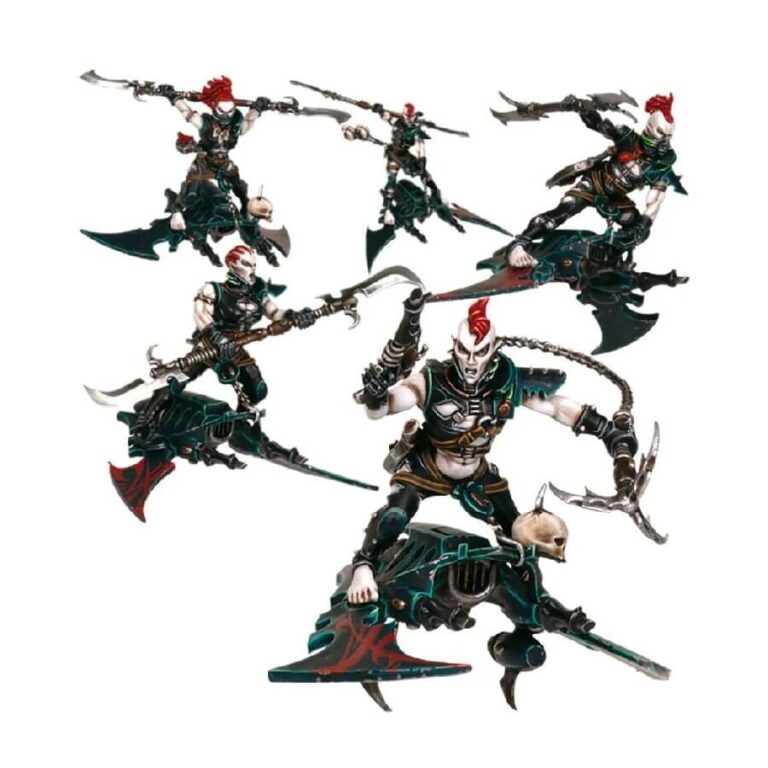
Hellions, the ferocious airborne killers of the Drukhari, strike fear into the hearts of their prey with their swift and deadly assaults. Mounted on skyboards, single-pilot anti-gravity boards, these feral warriors unleash their savage fury, fueled by potent combat drugs. With murderously sharp hellglaives in hand, they descend upon their enemies, slashing limbs and unleashing screams of terror in a relentless display of violence.
What’s in the Hellions box
- x83 plastic components that make 5 Drukhari Hellions. The set also includes: three variations of skyboard, 10 different heads, five different bodies (three male and two female). Also included are weapon options including Hellglaives and an agoniser.
- x5 Citadel 32mm flying bases
How to paint the Hellions set
- Step 1: Apply Base Coat
Start by applying a base coat of Abaddon Black paint to the entire Hellion model, ensuring smooth and even coverage. - Step 2: Paint Armor and Clothing
Use a fine brush to paint the armor and clothing in Khorne Red for the armor and Dryad Bark for the clothing. - Step 3: Highlight Exposed Skin
Paint the exposed skin areas with Kislev Flesh or Pallid Wych Flesh to add contrast to the model. - Step 4: Shade with Darker Tone
Use a darker shade like Agrax Earthshade to create shadows and depth on the armor and clothing. Apply it carefully to the recessed areas, such as the crevices and folds. - Step 5: Add Highlights
Add highlights to the raised areas of the model using a lighter shade like Evil Sunz Scarlet for the armor and Karak Stone for the clothing. This will make the details pop and add dimension to the model. - Step 6: Paint Weaponry
Paint the weaponry, such as the hellglaives, with Brass Scorpion or Runelord Brass. Apply a wash of Nuln Oil to add depth and definition to the metallic areas. - Step 7: Detail Additional Elements
Paint any additional details, such as straps, pouches, or symbols, using complementary colors. For example, you can use Screamer Pink for small details or accents. - Step 8: Apply Overall Wash
Apply a wash, such as Nuln Oil or Agrax Earthshade, to the entire model to enhance the shadows and bring out the details. Remove any excess wash to maintain clarity. - Step 9: Add Weathering Effects
Consider adding weathering effects, such as drybrushing with Karak Stone or Ryza Rust, to give the model a worn and battle-hardened look. - Step 10: Apply Protective Varnish
Finish by applying a protective varnish to seal and protect your paintwork. Choose a matte, satin, or glossy varnish according to your preference, keeping in mind the desired finish for your model.

