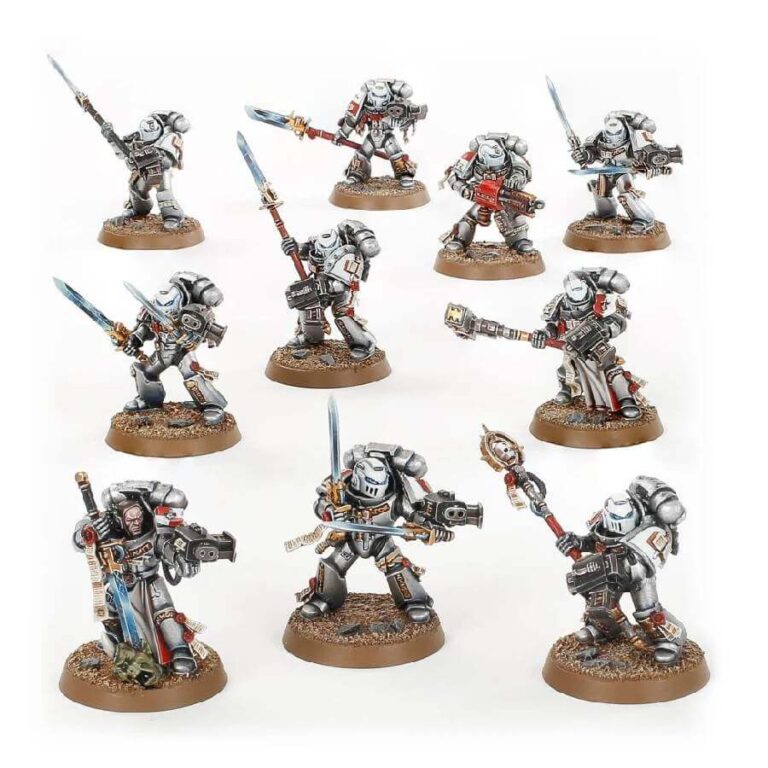
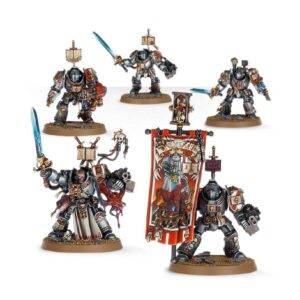
Grey Knights Purifier Squads embody the Chapter’s devotion to their mission, being experienced daemonhunters with unwavering spirit. These squads are often deployed as the spearhead of an attack, teleporting into the enemy territory and unleashing a purifying fire that eradicates the corrupted, while paving the way for their allies.
The Purifier Squad kit includes all the components needed to build ten Purifiers, among which one can be assembled as the Knight of the Flame unit leader. The squad is armed with Nemesis force swords and storm bolters, and each model can be equipped with a range of arcane weapons. The kit provides six Nemesis force halberds, six pairs of Nemesis force falchions, two Nemesis daemon hammers, and two Nemesis warding staves. In addition, the squad has special ranged weapons such as psycannons, psilencers, and incinerators.
These models are adorned with intricate inscriptions, purity seals, and other details that are characteristic of the Grey Knights. The Knight of the Flame features a unique helmetless head, adding to the model’s distinctiveness. The kit offers a wide range of customization options, allowing you to build a unique Purifier Squad that suits your playstyle.
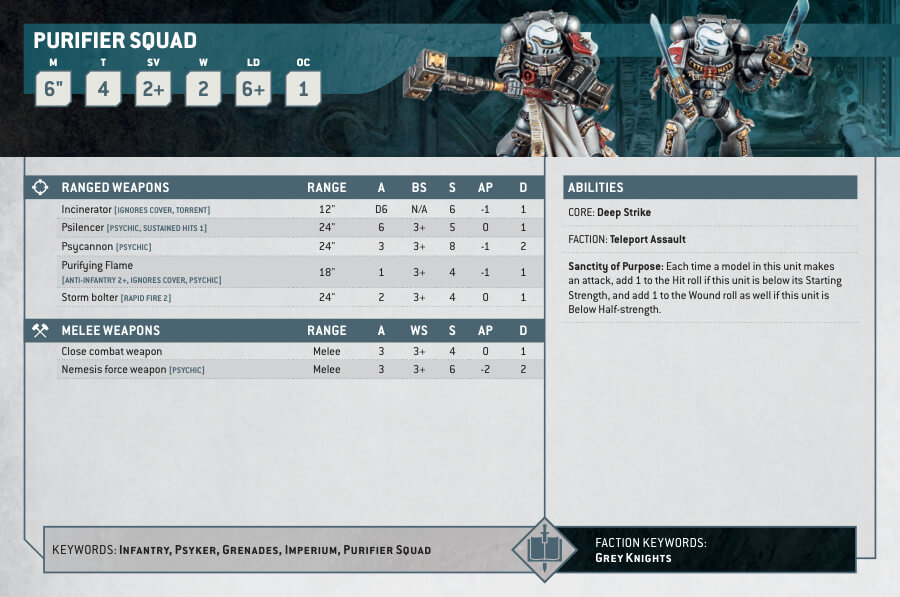
Grey Knights Purifier Squad Datasheets
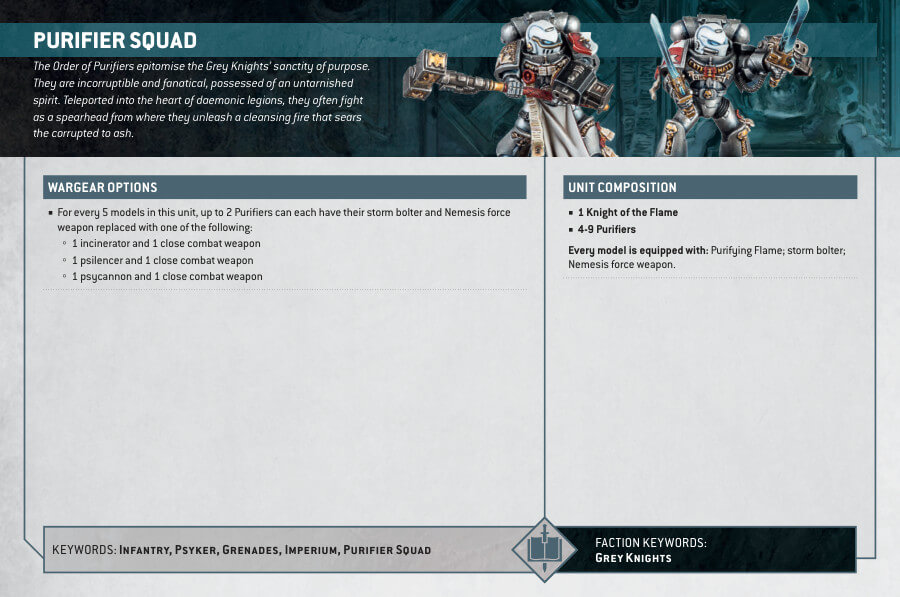
What’s in the Grey Knights Purifier Squad box
- x236 plastic components that can assemble a Grey Knights Purifier Squad. Alternatively, you can also assemble a Grey Knights Interceptor Squad, a Grey Knights Purgation Squad or a Grey Knights Strike Squad.
- x10 Citadel 32mm Round Bases
How to paint the Grey Knights Purifier Squad
- Step 1: Prime
Begin by applying Chaos Black or White Scar primer to your Grey Knights Purifier Squad. Either of these primers is ideal as they provide a good base for the following colors to adhere to. - Step 2: Base Colors
Start by applying the foundational colors to your Purifier Squad. Paint their armor with Leadbelcher, a metallic silver paint. For the sword blades, use Caledor Sky, a bright blue color to create a vibrant effect. - Step 3: Shading
To add depth and shadows to the armor, apply Drakenhof Nightshade, a blue shade, to the silver areas. This shade will create a cool, ethereal look. - Step 4: Layering
Lightly layer the silver armor with Stormhost Silver, a brighter silver paint, on raised surfaces and edges. This will create highlights and add dimension to the metallic look. - Step 5: Facial Features
If the Purifiers have exposed heads, paint their facial features with a flesh-tone paint like Rakarth Flesh. You can add depth by applying Reikland Fleshshade as a shade and then highlighting with a lighter flesh tone such as Flayed One Flesh. - Step 6: Sword Details
Enhance the sword blades by adding streaks of Baharroth Blue and White Scar along the length of the blades. This will give the swords an electrifying effect. - Step 7: Armor Details
For any red details on their armor, use Mephiston Red. Be precise when painting the trim and any red insignias. For the gold details, like ornamental elements and insignias, use Retributor Armor.
If you want, you can also paint their helmets with White Scar for a striking contrast against the dark armor. For their eye lenses, use a bright blue, like Baharroth Blue, to create a glowing effect. - Step 8: Basing
Consider adding a suitable base to complete your models. You can use textured paints or materials like sand to create a realistic terrain effect. Paint the base to match your army’s theme or the envisioned battlefield terrain. - Step 9: Varnish
To protect your work and add a protective layer, apply a matte varnish, such as Stormshield or Munitorum Varnish. Varnishing not only adds a protective layer but also enhances the longevity of your hard work, safeguarding it from the rigors of the battlefield.

