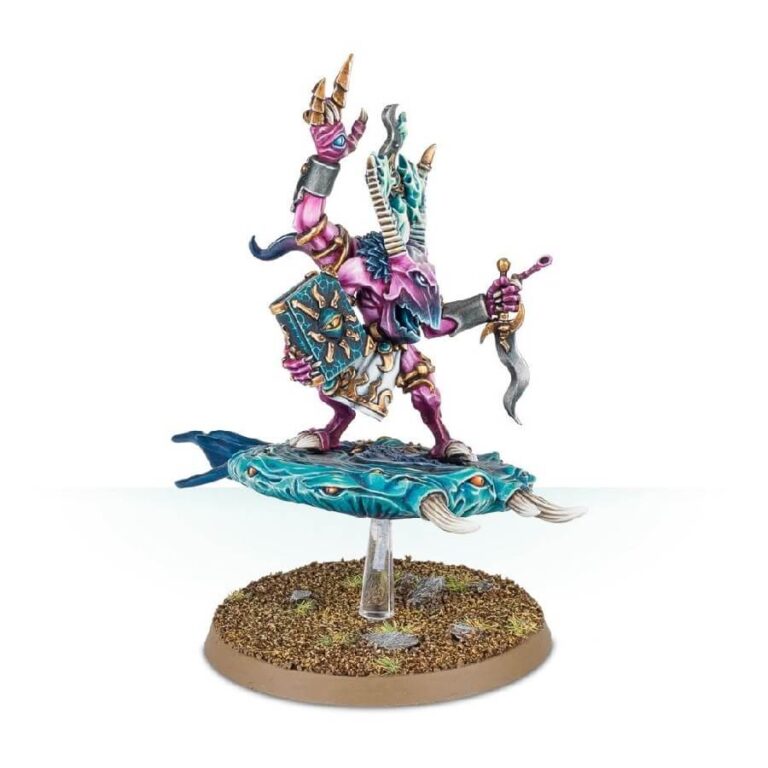
Prepare for the relentless and dynamic presence of a Herald riding atop a Disc of Tzeentch, for no corner of the battlefield remains secure from their mystical onslaught. Swiftly traversing the skies, this formidable Herald conjures mesmerizing azure flames, launching them with deadly precision towards their hapless adversaries, all the while effortlessly eluding retaliation. Seizing the opportune moment, the Herald fearlessly swoops in, wielding their staff of change to unleash unimaginable horrors upon the enemy, while the menacing horns and razor-sharp teeth of the Disc mete out their own merciless retribution. Brace yourself for an awe-inspiring display of magical prowess and divine punishment as the Herald on their Disc of Tzeentch commands the very fabric of reality.
What’s in the Fluxmaster, Herald of Tzeentch box
- x12 resin components that make this Herald of Tzeentch
- x1 50mm square base
- x1 large flying base (60mm)
- x2 small flying stems
How to paint the Fluxmaster, Herald of Tzeentch set
- Step 1: Prime the Miniature
Apply a thin and even coat of primer to the Fluxmaster, Herald of Tzeentch, using a suitable color such as black or grey for the miniatures and the Disc. This provides a smooth surface for the paint to adhere to. - Step 2: Basecoat the Skin and Disc
Begin by basecoating the skin of the Fluxmaster with a pink color of your choice, such as Pink Horror or Emperor’s Children. Apply multiple thin coats to achieve solid coverage, allowing each coat to dry before applying the next. Simultaneously, basecoat the Disc of Tzeentch with a vibrant color like The Fang or Mephiston Red, depending on your desired scheme. Apply multiple thin coats until you achieve good coverage, allowing each coat to dry before applying the next. - Step 3: Highlight the Skin and Disc
Using a lighter shade, like Screaming Skull or Pallid Wych Flesh, carefully apply highlights to the raised areas of the Fluxmaster’s skin. Focus on areas such as the face, hands, and any exposed flesh. This will add depth and bring out the details. Similarly, use a lighter shade of the basecoat color to highlight the Disc, emphasizing its contours and edges. - Step 4: Shade the Skin and Disc
To create shadows and enhance the depth of the skin, use a darker color like Druchii Violet or Carroburg Crimson. Apply the shade selectively to the recesses and areas where shadows would naturally occur, such as creases and under the chin. For the Disc, use a darker shade like Agrax Earthshade or Nuln Oil to define the recessed areas and create a sense of dimension. - Step 5: Blend the Colors
Using a clean, damp brush, gently blend the highlight and shade colors together on the skin and Disc to create a smooth transition between the different shades. This technique helps to soften the edges and create a more natural-looking gradient. - Step 6: Paint the Details
Using smaller brushes, paint the intricate details of the Fluxmaster, such as the staff, robes, and embellishments. For example, you can use colors like Averland Sunset for the staff, Warpstone Glow for the magical effects, and Abaddon Black for the robes. Similarly, paint any metallic areas on the miniature and Disc using metallic paints like Retributor Armor or Iron Warriors. - Step 7: Fine Details and Finishing Touches
Take your time to paint the finer details on the Fluxmaster, such as the intricate designs on the staff or any symbols on the miniature. Use a steady hand and a smaller brush for precision. Add any additional details like gemstones or glowing effects with carefully applied colors like Spiritstone Red or Phalanx Yellow. Also, consider weathering the Disc by adding washes or dry brushing techniques to create a more realistic and worn appearance. - Step 8: Varnish for Protection (optional)
If desired, you can apply a layer of varnish to protect the painted miniature and Disc. Use a suitable varnish like matt or gloss, following the manufacturer’s instructions.

