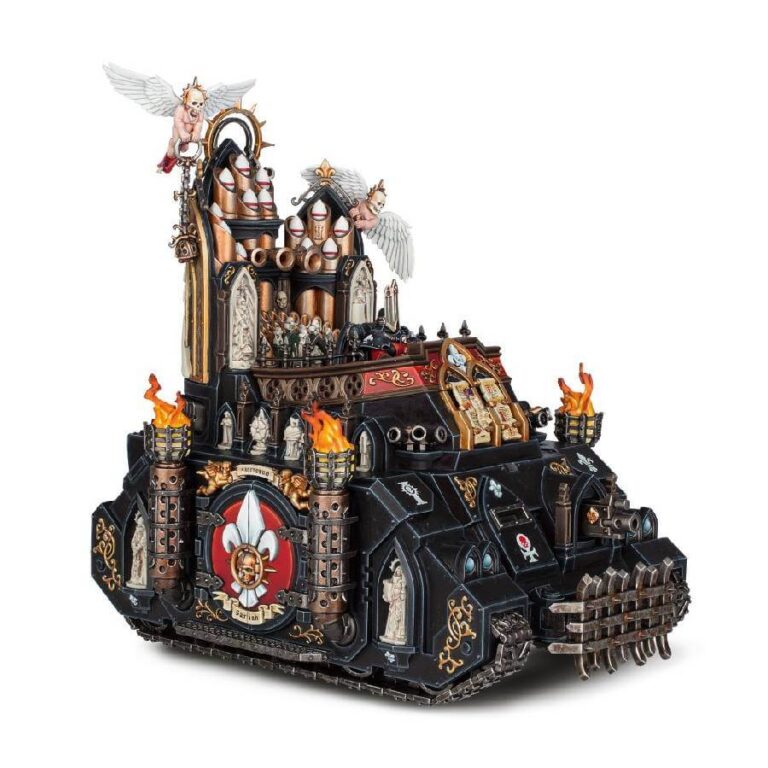
The Exorcist stands as a remarkable symbol of the Adepta Sororitas’ devotion to the Emperor and their unyielding determination to purge heresy. This awe-inspiring war machine is not just a vehicle but a rolling shrine, a testament to the grandeur of the Master of Mankind, adorned with intricate craftsmanship. As it advances into battle, the Exorcist projects inspirational hymns that resonate across the battlefield, instilling faith and pride in the hearts of all loyal Imperial servants.
When squadrons of Exorcists form armored spearheads, their collective symphonic chants turn the blood-soaked battleground into a sacred cathedral. Battle-weary warriors find renewed vigor, and those facing overwhelming odds discover newfound courage to stand their ground. And then, as if guided by divine intervention, the Exorcist launches its rocket salvos into the heart of the enemy, altering the very course of battle.
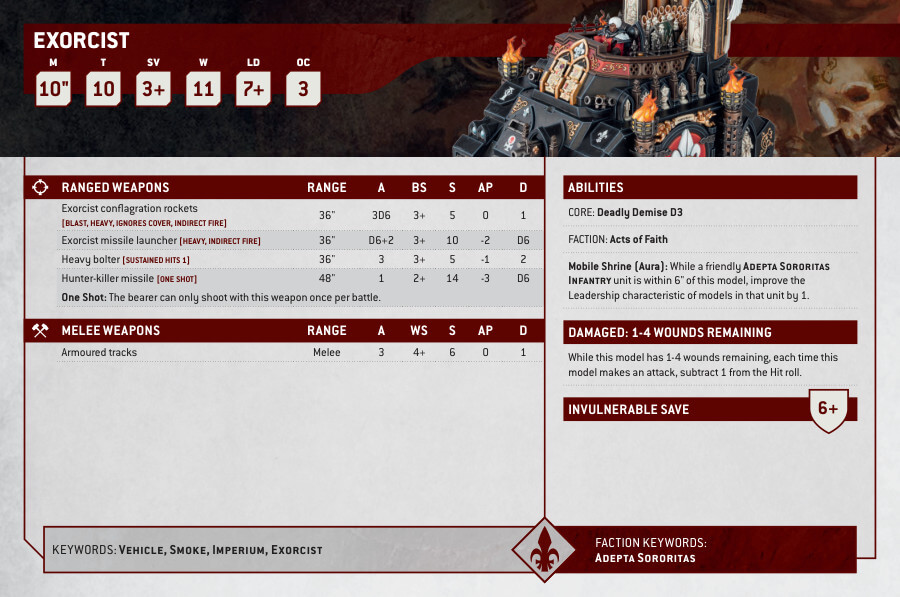
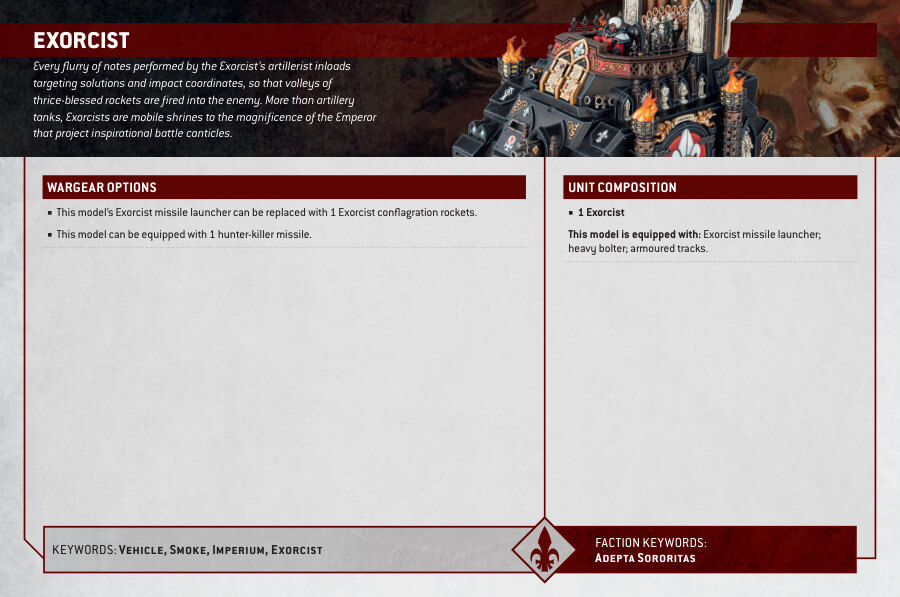
The Exorcist is armed with a hull-mounted heavy bolter and offers a choice between the formidable Exorcist missile launcher or the devastating Exorcist conflagration rockets as its primary weaponry. Additionally, this vehicle is equipped with smoke launchers for added defense and can be further enhanced with a hunter-killer missile, making it a formidable force on the battlefield. The Exorcist stands as a testament to faith, firepower, and the unshakable resolve of the Adepta Sororitas in their tireless mission to eradicate heresy in the Emperor’s name.
Exorcist Datasheets
What’s in the Exorcist box
- x99 plastic components that make the tank and includes all of the Exorcist’s weapons and wargear. options.
- x1 Adepta Sororitas Transfer Sheet.
How to paint the Exorcist Set
- Step 1: Priming – A Solid Foundation
Begin by priming your Exorcist model with Chaos Black spray. To achieve the best results, hold the spray can approximately 6-8 inches (15-20 cm) away from the model. Apply the primer in thin, even coats to ensure a smooth and consistent base for painting. - Step 2: White Details – Pure Brilliance
Paint the white details of the Exorcist with Corax White. Use a fine brush and apply the paint evenly, covering all the white areas. Afterward, apply a layer of White Scar to achieve a brilliant, clean white finish. Multiple thin coats may be needed for a clean, brilliant white finish. - Step 3: Gold and Red Details – Ornate Accents
For the gold details, like emblems or decorative elements, use Retributor Armour paint. Apply it carefully to highlight these areas. When painting the red details such as stripes or insignia, use Mephiston Red. Ensure precision and neatness in your brushwork to create ornate accents. - Step 4: Darker Gold and Silver Details – Contrasting Elements
Focus on the darker gold details like trumpets or pipes by using Balthasar Gold or Screaming Bell paint. To paint the silver details, such as tracks and exhaust pipes, use Leadbelcher or Ironbreaker. Apply these paints with a steady hand to create a striking contrast against the other colors, adding depth to your model. - Step 5: Flames – Fiery Brilliance
To create a realistic flame effect, begin with Yriel Yellow as the base color for the innermost part of the flames. Hold your brush at an angle and apply the yellow paint with short, flicking strokes to mimic the appearance of flames. Next, transition to Troll Slayer Orange, gradually layering it outward from the yellow. Maintain the flicking motion to achieve a fiery gradient.
Continue by using Evil Sunz Scarlet to intensify the red portions of the flames. Apply this paint in a flicking manner as well, concentrating on the outer edges of the flames. Finally, add Wild Rider Red to enhance the fiery brilliance. Use this color sparingly at the very tips of the flames for maximum impact. Remember to blend the colors smoothly for a realistic flame effect. - Step 6: Varnishing – Protect and Finish
To protect your beautifully painted Exorcist and give it a finished look, apply a varnish. When using Munitorum Varnish Spray, follow the manufacturer’s instructions carefully. Apply the varnish in light, even coats, allowing each coat to dry before applying the next. This will safeguard your paintwork and provide a professional finish to your Exorcist model. Ensure the model is entirely dry before handling or displaying it.
We also left you a video tutorial here.

