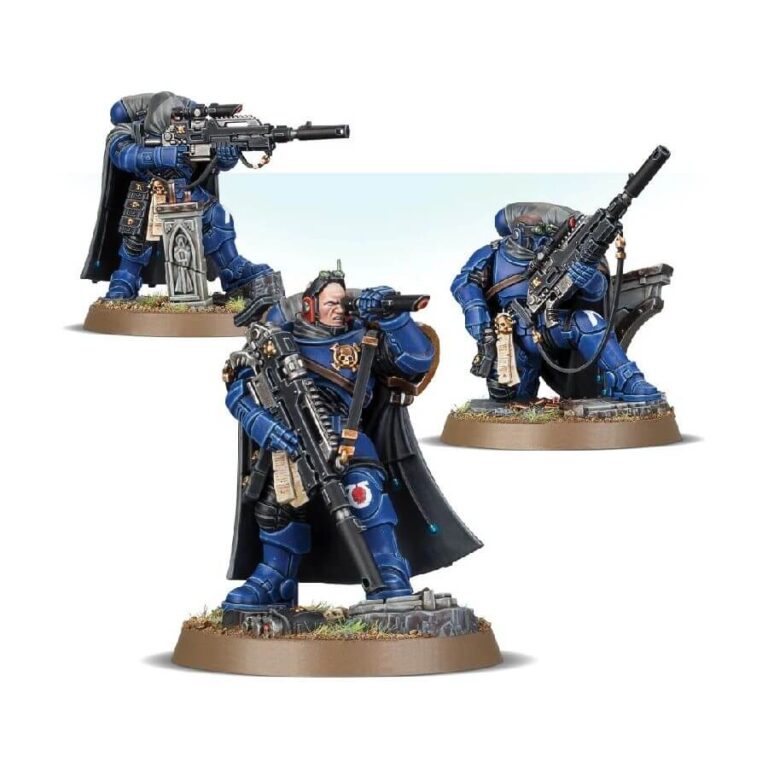
Eliminators are a crucial part of any Space Marine force, known for their deadly precision and stealthy tactics on the battlefield. These skilled marksmen lurk in the shadows, waiting for the perfect moment to strike and take out their targets with well-placed shots.
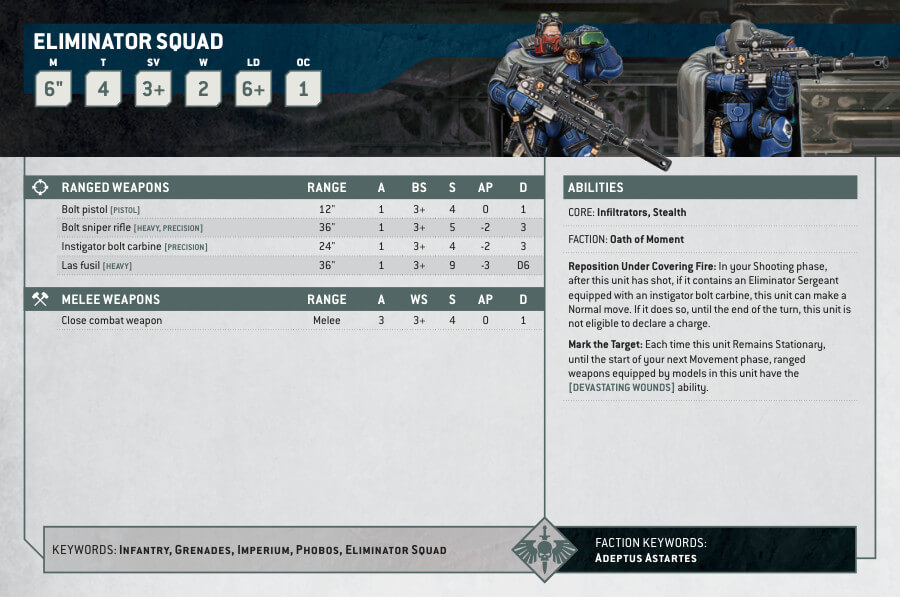
The Eliminators squad comes equipped with a choice of either a las fusil, a high-powered weapon perfect for taking down heavily armored targets, or a bolt sniper rifle, which offers a selection of ammunition to suit any situation. The Sergeant also has the option to carry an instigator bolt carbine.
But that’s not all – this versatile kit comes with a range of optional parts, allowing you to customize each model to your liking. Whether you prefer your Eliminators with or without helmets, you’ll have the flexibility to make each model unique.
Whether you’re a seasoned player or just starting out, the Eliminators squad is a must-have addition to any Space Marine collection. With their deadly accuracy and ability to strike from the shadows, they’re sure to be a valuable asset on the battlefield.
Eliminators Datasheets
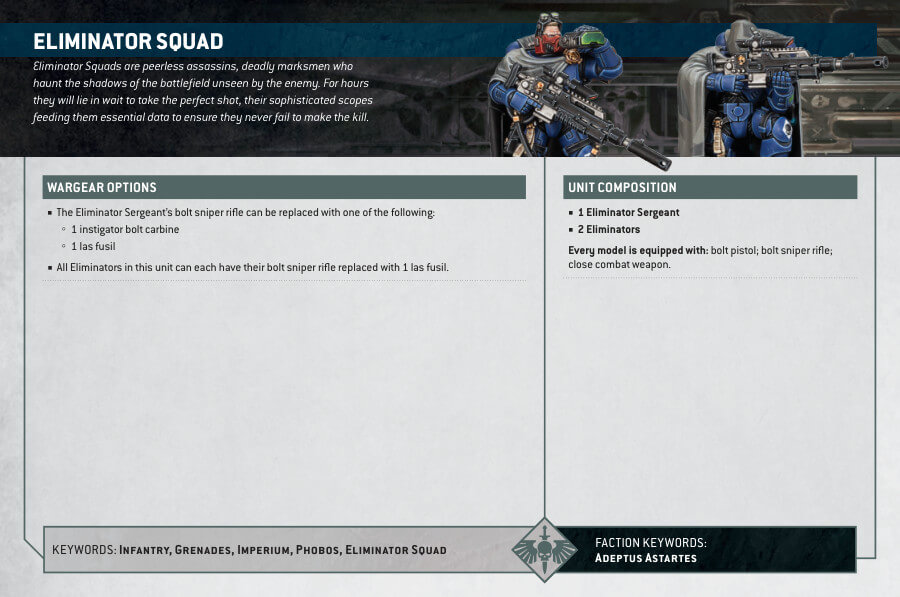
What’s in the Eliminators box
- x60 plastic components, providing everything needed to build 3 Eliminators.
- x3 Citadel 40mm Round bases: Each model is supplied with a Citadel 40mm Round base, making them ready for use in Warhammer 40k games.
- x1 transfer sheet for customizing the models with Primaris Space Marines Infantry designs.
How to paint the Eliminators set
- Step 1: Base Coat
Start by painting the Eliminators’ armor in a solid blue color. You can use Ultramarine Blue or a similar blue shade to achieve the base coat. - Step 2: Gold and White Details
Next, add the gold and white details to the armor. Use a metallic gold paint like Retributor Armour for the decorative elements, such as chapter symbols and squad markings. For the white details, use White Scar and focus on the edges and raised areas to create highlights. - Step 3: Black and Grey Weapons
Paint the weapons, weapon details, and belts in black and grey colors. For a realistic metallic appearance, you can use Leadbelcher paint for the gun barrels and other metallic parts. - Step 4: Exposed Head
For the Eliminator with an exposed head, paint it in a flesh tone such as Cadian Fleshtone or another suitable color to represent human skin. - Step 5: Helmet Lenses
For the remaining Eliminators with helmets, paint their lenses in with Mephiston Red. This will create a striking contrast against the blue armor and make them look fierce. - Step 6: Adding Depth (Optional)
To add depth and realism to the miniatures, consider using shading techniques. Apply a shade like Nuln Oil to the recesses of the armor and weapons. This will make the details pop and give the models a more dynamic appearance. - Step 7: Protect Your Masterpieces
Now that your Eliminators are fully painted and looking fantastic, it’s time to protect your hard work. Apply a layer of varnish to seal and safeguard the paint job. Varnishing helps prevent chipping, fading, and general wear and tear during gameplay.

