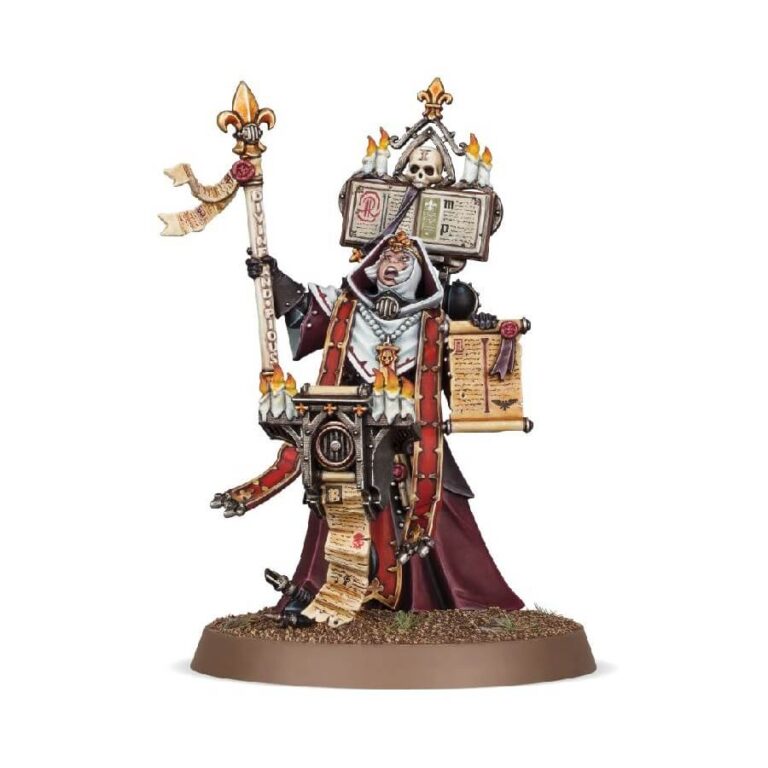
The Sister Dialogus fearlessly silences the enemy’s war cries by resounding with exalting praise to the God-Emperor. As a steadfast pillar of faith within the Adepta Sororitas battle line, she fearlessly stands atop fire-swept promontories, her arm raised high, clutching her staff of office, while enemy shots whiz by. Her powerful voice, amplified by a laud hailer, cuts through the chaotic din of battle, reaching the ears of nearby Sororitas through vox-beads and sensoria arrays, enriching their spirits with her vast reservoir of sacred knowledge. Each resounding verse she utters is accompanied by deadly shots from her bolt pistol, a punctuation mark to her unwavering devotion.
This kit allows you to assemble a single Dialogus miniature, equipped with an array of microphones and vox-speakers, enabling her to amplify her sacred oratory across the battlefield. A hovering lectern stands before her, adorned with relic parchment that gracefully hangs down, while verses adorn the candle-topped rostrum, further enhancing the ambiance of her presence.
Dialogus Datasheets
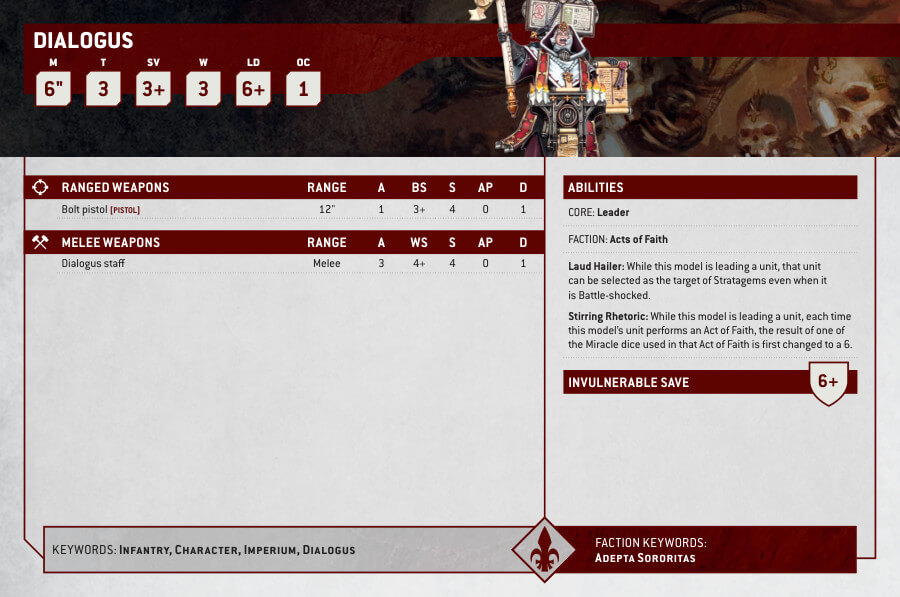
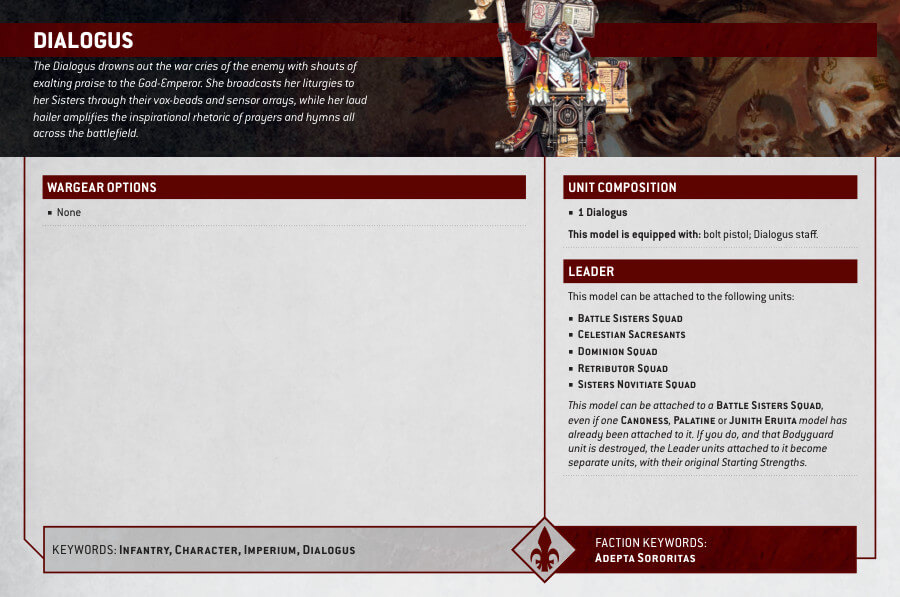
What’s in the Dialogus box
- x10 plastic components
- x1 Citadel 40mm Round Base
How to paint the Dialogus set
- Step 1: Prepare Your Workspace
Ensure you have a clean and well-lit workspace before you begin painting your Dialogus. Gather all the necessary materials, including paints, brushes, water pot, palette, and the model itself. Organizing your space will make painting more enjoyable. - Step 2: Prime the Model
Apply a thin and even coat of primer to the Dialogus miniature. Priming helps the paint adhere better and provides a smooth surface for painting. You can use Citadel’s Colour Chaos Black Spray as a primer. - Step 3: Basecoat the Model
Choose the base colors for each part of the model and apply them evenly. For example, use Retributor Armour for the metallic areas, and Averland Sunset for the robes. Apply the paint carefully, ensuring good coverage without any pooling or excessive thickness. - Step 4: Layering
To add depth and dimension, apply lighter shades of the base colors to the raised areas and edges. For instance, use Liberator Gold for highlighting the Retributor Armour, and Yriel Yellow for highlighting the Averland Sunset robes. Use a smaller brush for precise application. - Step 5: Wash
Apply a wash, such as Agrax Earthshade, to the recessed areas of the model. This will enhance shadows and bring out the details. Make sure the wash flows into the recesses but doesn’t pool. Use a larger brush and remove excess wash with a clean brush or tissue. - Step 6: Drybrushing
Take a larger, flat brush and dip it into a lighter color than the basecoat, such as Stormhost Silver for the metallic areas. Wipe off most of the paint on a tissue, then lightly brush the raised surfaces of the model. The drybrushing will highlight the textures and details. - Step 7: Detailing
Use a small brush to paint smaller details on the model, such as the face, insignia, or any additional elements. For example, use Abaddon Black for the eyes and White Scar for the candles on the rostrum. Take your time and be patient while painting these delicate areas. - Step 8: Basing
To complete the model, add a base to enhance its overall appearance. Apply Citadel Texture paints, such as Armageddon Dust or Astrogranite, to create a textured ground. You can also add additional elements like tufts or rocks for extra visual interest. - Step 9: Varnish
Protect your painted Dialogus by applying a varnish. This will help prevent chipping or damage to the paint job. Follow the instructions on the varnish bottle for proper application.

