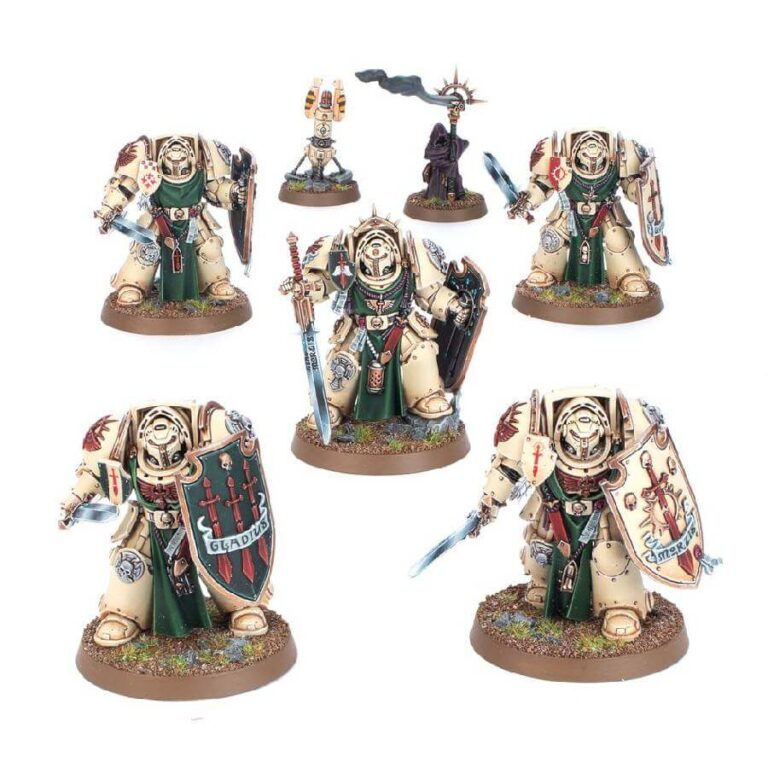
The Deathwing Terminator Squad, a formidable addition to the Dark Angels‘ arsenal, exemplifies the sudden and electrifying combat style synonymous with the Deathwing. Renowned throughout the galaxy, these warriors clad in Tactical Dreadnought armor embody the strategic acumen and patience of the Unforgiven.
At the forefront of this elite force are the Deathwing Knights. Distinguished by their unique kit, these paragons of war don a striking ensemble of cowls and tabards, armed with shields and weapons capable of decimating armored adversaries. The kit’s versatility is a standout feature, offering the option to equip all five Knights with either swords or maces. The variety of headgear, including hooded and helmed options, allows for a high degree of customization, ensuring each squad can be uniquely assembled.
This kit’s allure extends beyond its combat capabilities. It includes a teleport homer, a crucial tool for their signature surprise deployments, and a Watcher in the Dark, a mysterious figure that adds an enigmatic aura to the unit. The Deathwing Terminator Squad is not just a new unit; it’s a symbol of the Dark Angels’ relentless pursuit of their foes, including the Fallen.
Discover more about the Dark Angels and their fearsome Deathwing Knights on our Space Marines Faction Lore section, and explore a wide range of Warhammer 40,000 miniatures to enhance your collection.
Deathwing Knights Old vs New comparison
This latest iteration brings a fresh, dynamic aesthetic that aligns seamlessly with the high-quality standards of recent Games Workshop releases, such as the updated Asmodai miniature.
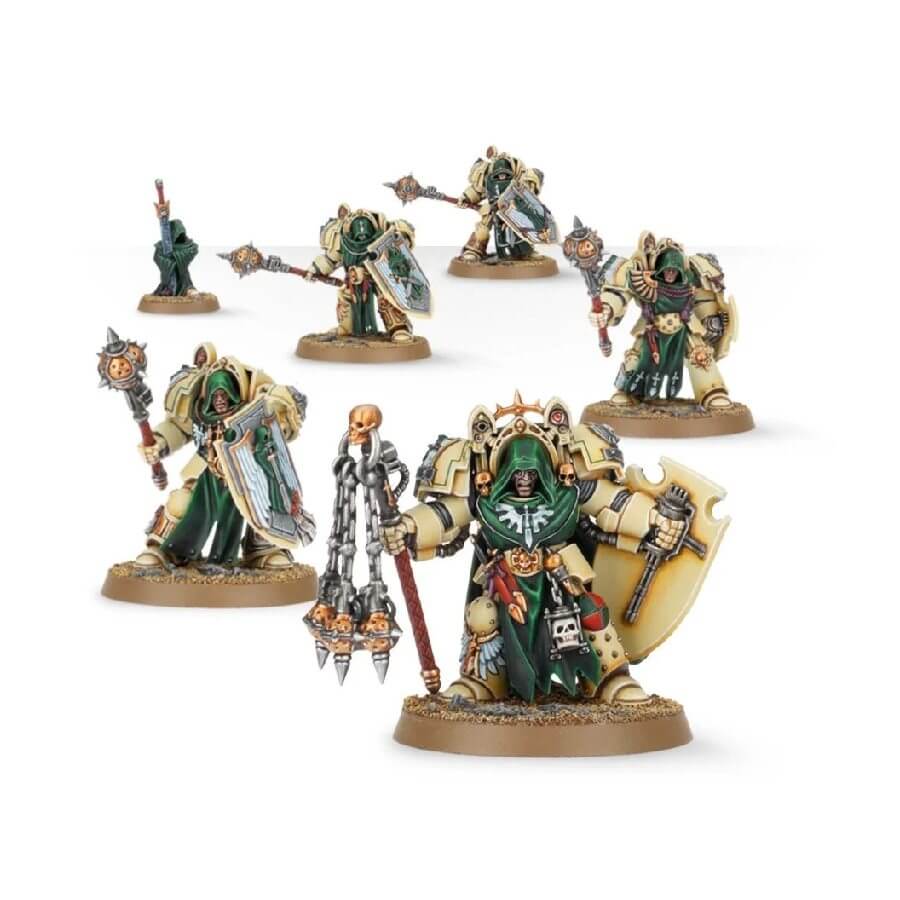
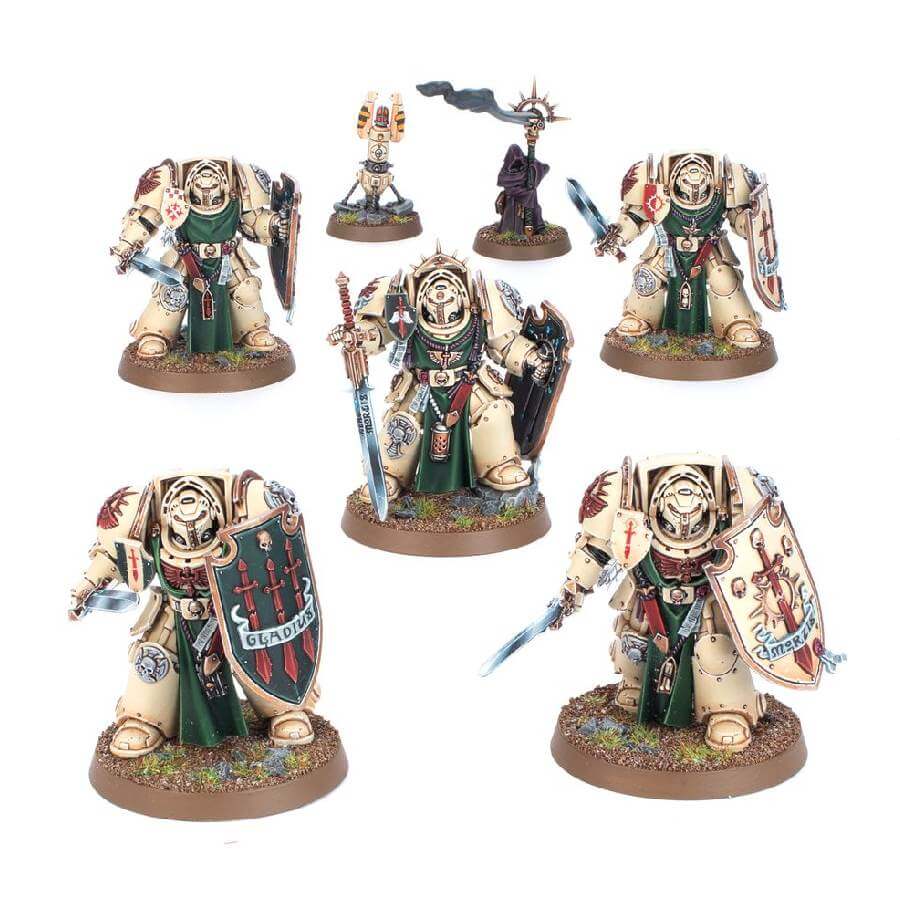
The new Deathwing Knights not only surpass their predecessors in terms of intricate detailing and design but also embody the cutting-edge craftsmanship that GW is renowned for.
The enhanced features and sharper lines breathe new life into these iconic figures, making them a must-have for any Dark Angels enthusiast!
Deathwing Knights Datasheets
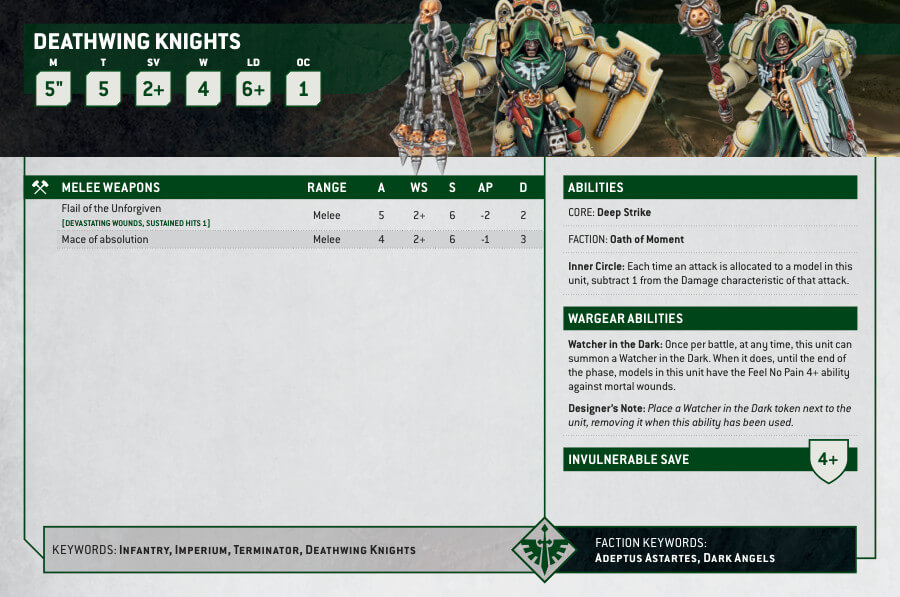
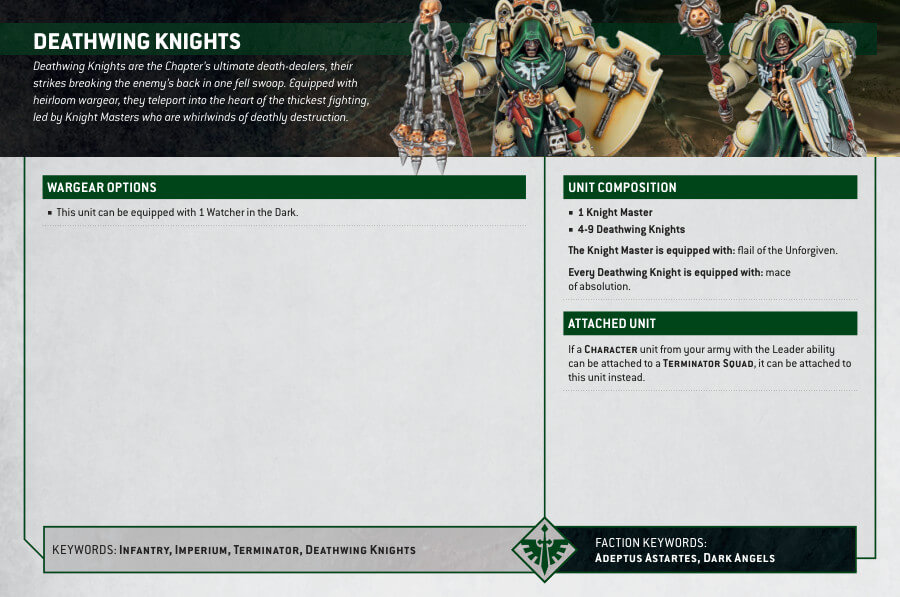
What’s in the Deathwing Knights box
- x119 plastic components that make 5 Deathwing Knights, 1 Teleport homer and 1 Watcher in the Dark.
- x5 Citadel 40mm Round Bases.
- x2 Citadel 25mm Round Bases.
- x1 Dark Angels Transfer Sheet.
How to paint the Deathwing Knights Squad
- Step 1: Base Coat
Step one is to apply the base coat to the Deathwing Knights Squad’s armor. Paint it in a sandy color like Zandri Dust or another shade you want. Apply thin coats to preserve the model’s details. - Step 2: Shading the Armor
To add depth and dimension to the sandy armor, apply a shade like Agrax Earthshade or Seraphim Sepia. Use a fine detail brush to carefully apply the shade in the recessed areas, such as panel lines and crevices. This will create a natural shadow effect, making the sandy armor look more realistic. - Step 3: Layering the Armor
After the shade has dried, use a lighter sandy color like Ushabti Bone to reapply highlights on the raised areas of the armor. Focus on edges and surfaces that catch the light. This layering technique will make the sandy armor appear more three-dimensional and textured. - Step 4: Painting the Clothing in Green
For the cloth elements on the Deathwing Knights Squad, paint them in green using a color like Caliban Green or another shade of your choice. Be precise and neat with your brushwork to make the green clothing stand out against the sandy armor. - Step 5: Shading the Clothing
To add depth to the green clothing, apply a shade like Biel-Tan Green. Use a fine detail brush to apply the shade in the recessed areas of the clothing. This will create shadows and make the green clothing look more realistic. - Step 6: Layering the Clothing
After the shade has dried, use a lighter green color like Warpstone Glow to reapply highlights on the raised areas of the clothing. Focus on edges and folds to create a more vibrant and dynamic look to the green clothing. - Step 7: Metallic Red and Gold Details
Using a metallic red paint like Runefang Steel, carefully add the red details on the model. This could be the chapter symbols, emblems, or other decorative elements that you want to highlight in red.
Next, using a gold paint like Retributor Armor, add the gold details on the model. This could be any decorative trim, chapter symbols, or other embellishments. - Step 8: Varnish (Optional)
For protection and a finished look, consider applying a layer of varnish. You can use Ardcoat here. This varnish will provide a glossy finish, enhancing the colors and details on the model while also providing protection.

