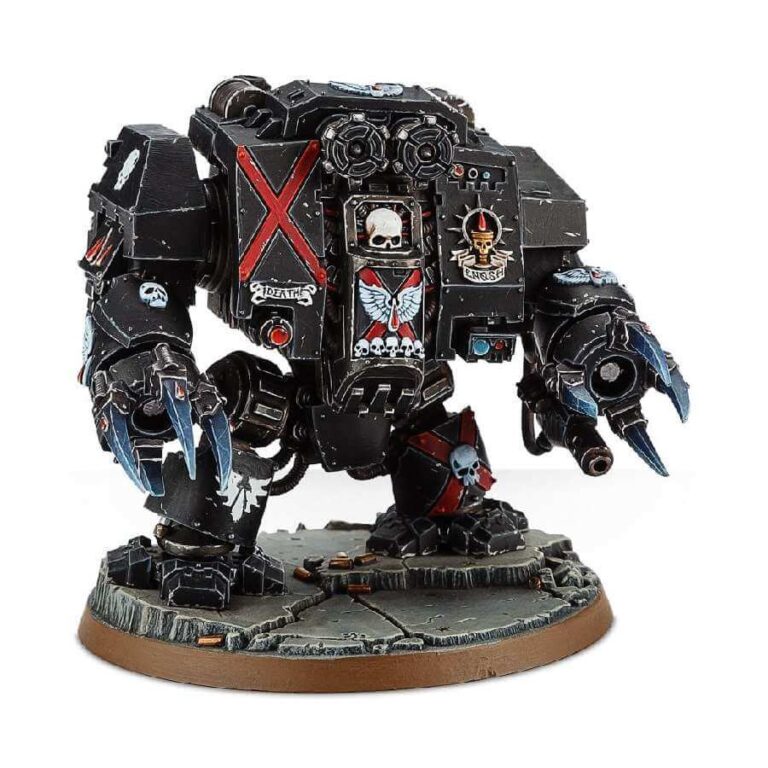
The Blood Angels Dreadnought is a powerful and fearsome weapon on the battlefield, even though it offers little protection against the Black Rage, which can turn its pilot into an unyielding engine of absolute destruction. The Death Company Dreadnought is the unfortunate fate of those pilots who fall to the Black Rage, as they become engulfed in an unending parade of madness, horror, and war until their final battle.
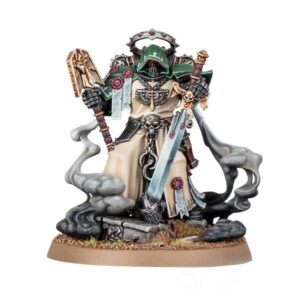
The multi-part plastic kit includes 68 components, including three sarcophagi, which can be used to create a Furioso Dreadnought, a Librarian Dreadnought or a Death Company Dreadnought. It also features all the weapon options available to these mighty war machines, such as power fists, blood talons, a frag cannon, magna-grapples, and a force weapon for the Librarian Dreadnought.
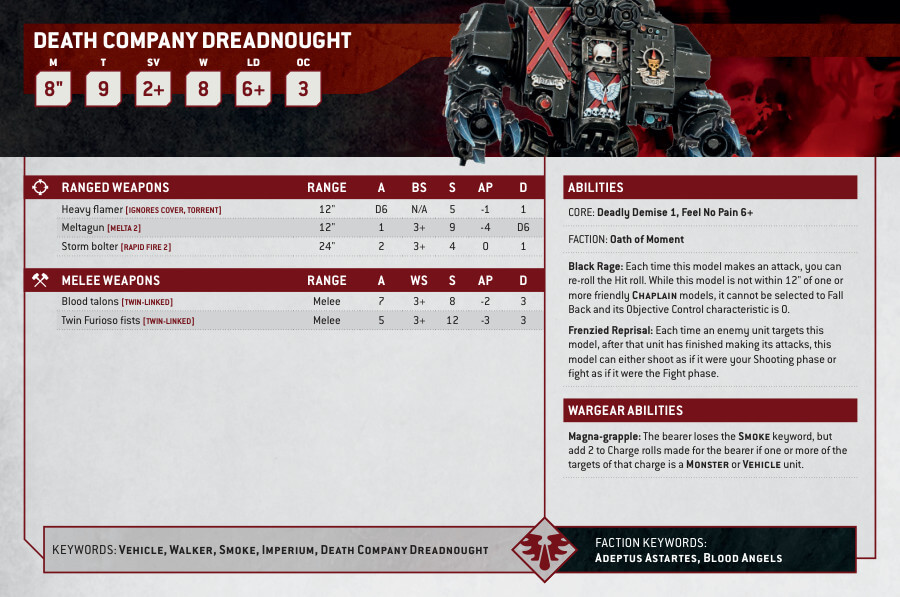
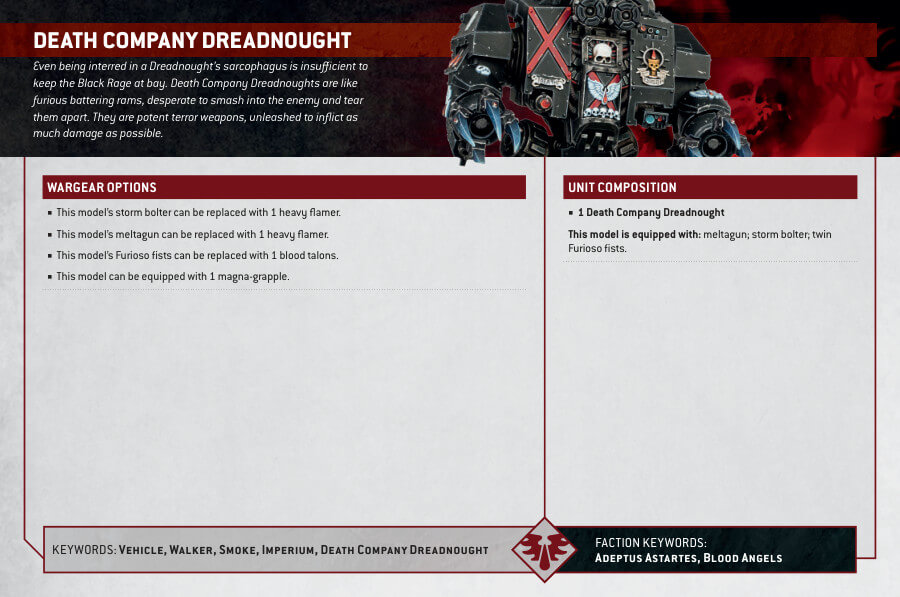
Death Company Dreadnought Datasheets
What’s in the Death Company Dreadnought box
- x68 plastic components you can use to create one of the following Dreadnoughts with their weapons:
- Furioso Dreadnought
- Librarian Dreadnought
- Death Company Dreadnought
- x1 Citadel 60mm Round Textured base
How to paint the Death Company Dreadnought
- Step 1: Base Coat
Step one is to apply the base coat to the Death Company Dreadnought’s body. Paint it black using a solid black color like Abaddon Black. Apply thin coats to preserve the model’s details. - Step 2: Shading and Layering the Body
To add depth to the black body, apply a shade like Nuln Oil. Use a fine detail brush to carefully apply the shade in the recessed areas. Then, use a lighter black color like Eshin Grey for layering. Apply this color to the raised areas, focusing on edges and surfaces that catch the light. This layering technique will make the black body appear more three-dimensional and dynamic. - Step 3: Claws
For the claws, paint them blue using a vibrant blue color like Calgar Blue or another shade of your choice. Be precise and neat with your brushwork to make the blue claws stand out against the black body. - Step 4: Metallic Details
Using metallic paints like Leadbelcher or Iron Warriors, carefully add the metallic details on the Death Company Dreadnought’s body. This could be mechanical parts, pistons, or other metallic elements. Take your time to make the metallic details look clean and realistic. - Step 5: Gold Details
For gold details, use a gold paint like Retributor Armor. Paint any decorative trim, chapter symbols, or other embellishments with this color. Ensure the gold details add a regal touch to the model. - Step 6: White Details
Using a white paint like White Scar, carefully add any white details on the model. This could be any insignia, edges, or markings. Be precise with this step to achieve clean and crisp white details. - Step 7: Weathering/Chipping (Optional)
For weathering effects like chipping, you can use a sponge or a fine brush to apply a darker color like Rhinox Hide or Mechanicus Standard Grey to the edges and areas that would experience wear and tear. This will give the Death Company Dreadnought a battle-worn appearance. Be subtle with this technique to avoid overdoing the weathering. - Step 8: Varnish (Optional)
For protection and a finished look, consider applying Citadel Munitorum Varnish. This varnish comes in a matte finish, which can enhance the realistic appearance of the weathering and chipping effects you added. The Munitorum Varnish will also protect your paint job and ensure your Death Company Dreadnought stays pristine on the battlefield.

