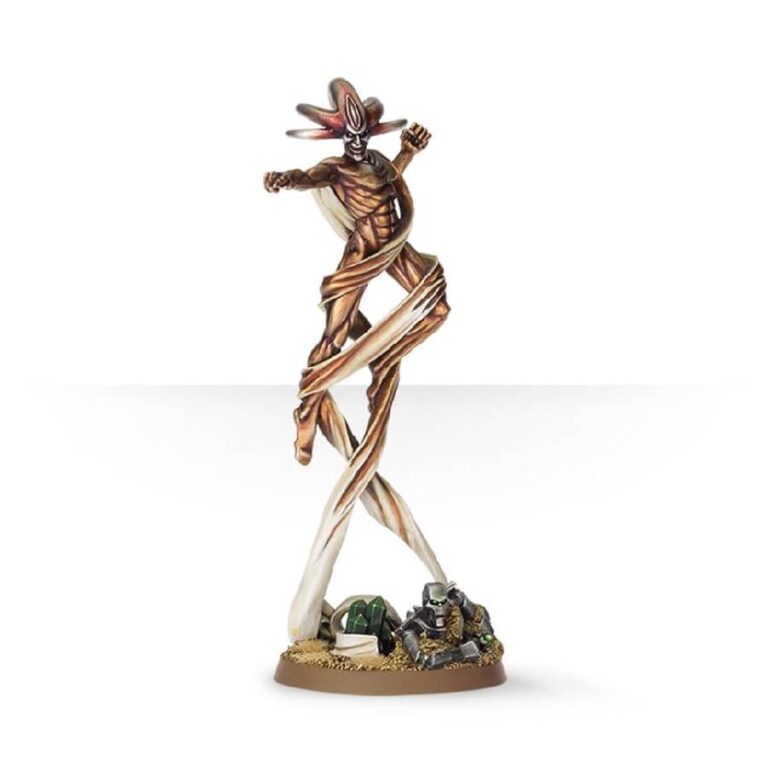
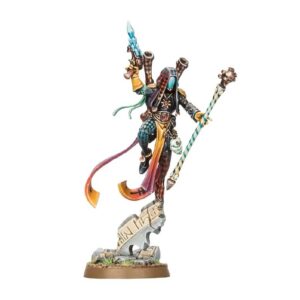
Step into the enigmatic realm of C’tan Shards, entities brimming with nearly boundless power. With the ability to conjure energy blasts, bend minds to their will, manipulate temporal currents, and exile adversaries to alternate realities, C’tan Shards are an embodiment of astonishing potential. Their capabilities know but two constraints: their profound imagination and glimmers of memories of their distant origin, severed long ago. While a C’tan Shard can’t fully recollect its once-omnipotent existence, it carries the echoes of that infinitely more powerful being’s personality and hubris. This amalgamation results in eccentric and capricious Shards, who tactically dispatch their foes in unforeseen yet astutely pragmatic manners. From projecting transdimensional thunderbolts to reshaping gravity by assuming singularity form, or even hurling opponents back through time to disintegration, these Shards wield an array of bewildering and formidable techniques. In the tapestry of warfare, the C’tan Shards emerge as dynamic and unpredictable Necrons force, forever echoing the might of their primordial past.
What’s in the C’tan Shard of The Deceiver box
- x9 resin components that make one C’tan Shard of The Deceiver miniature.
- x1 Citadel 40mm Round Base.
How to paint the C’tan Shard of The Deceiver set
- Step 1: Priming the Model
Start by priming the C’tan Shard of The Deceiver with Retributor Armour spray. This primes the model and provides a base layer for the paint to adhere to. - Step 2: Base Coating the Body
Apply Brass Scorpion to the body of the C’tan Shard. This lustrous brass color becomes the foundational tone for its form, exuding an aura of ancient power. - Step 3: Layering and Highlighting
To add depth and dimension, apply lighter shades like Auric Armour Gold or Stormhost Silver to specific raised areas, such as edges or contours. This layering technique accentuates the model’s intricate details. - Step 4: Adding Metallic Details
Use Runefang Steel to paint any metallic details on the model, such as ornate patterns, symbols, or adornments. This step contributes contrast and realism to the miniature. - Step 5: Cloth and Fabric
For cloth elements, utilize a color like Pallid Wych Flesh to create a contrast against the metallic body. This off-white tone adds texture and visual interest. - Step 6: Small Details and Accents
When painting smaller elements, like the Necron emerging from the base, use suitable colors. For instance, Leadbelcher/Runelord Brass can be applied to metallic parts, while shades like Agrax Earthshade add depth. - Step 7: Base Painting and Details
Paint the base using suitable colors that match your desired environment. Incorporate textures such as Stirland Mud or Astrogranite to enhance the realism of the base. - Step 8: Final Details and Personalization
Add any finishing touches that enrich the model’s character. This is the stage to incorporate unique symbols, extra details, or creative elements that personalize the C’tan Shard. - Step 9: Varnishing
Once the paint is dry, apply a matte varnish to protect your work. This preserves the model’s appearance during gameplay and display.

