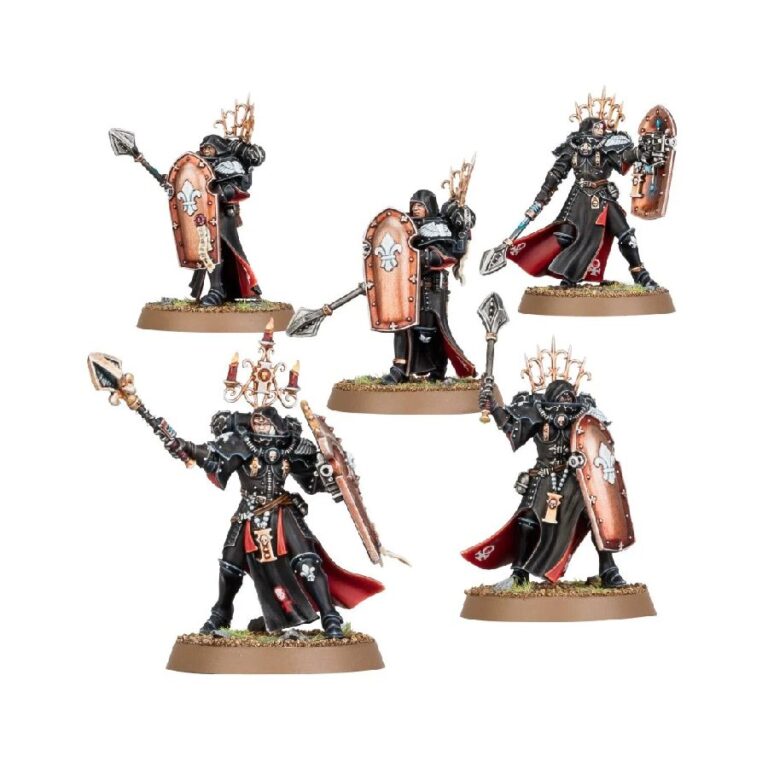
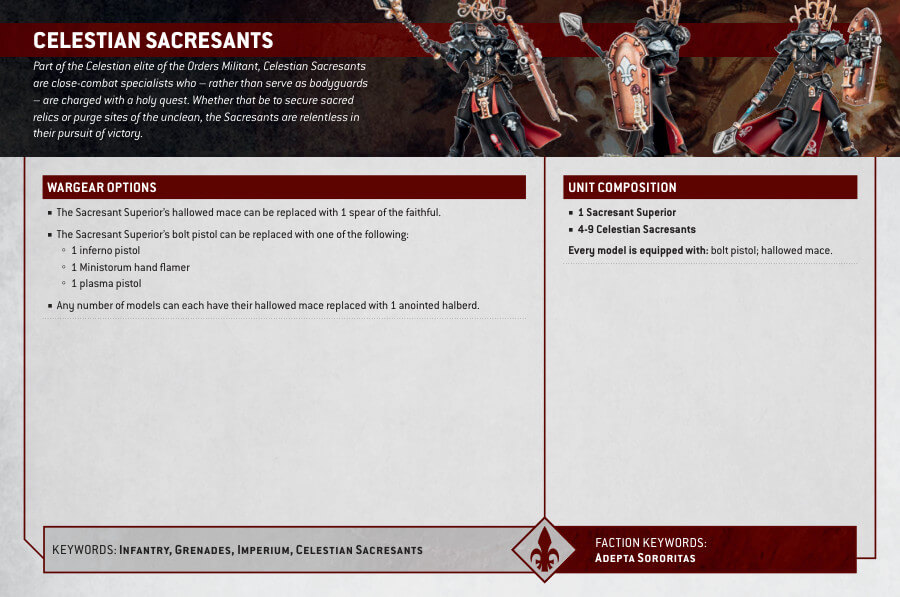
Celestian Sacresants, the esteemed members of the Adepta Sororitas, have embarked on a noble path away from their duties as bodyguards for the Canoness, venturing throughout the Imperium in service of their order. Each Sacresant is entrusted with specific missions, be it eradicating heresy and sedition or pursuing sacred relics and holy sites, yet all are ever-ready to heed the call of their master, taking up their shields, maces, and blades to engage in the fervor of war.
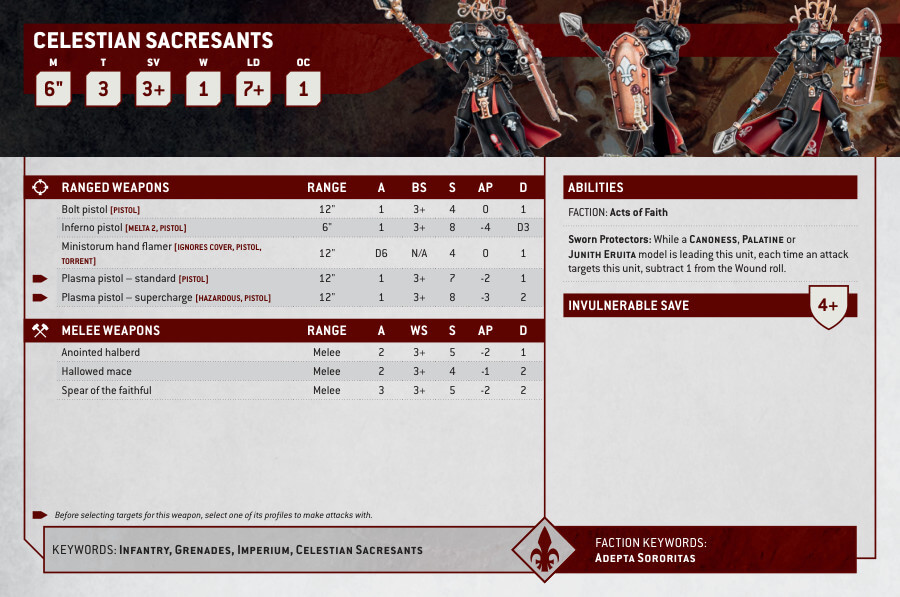
Adorned in the iconic power armor of the Adepta Sororitas and equipped with their unique Sacresant shields, these specialists excel in close-quarters combat, displaying exceptional resilience against overwhelming firepower. Their arsenal offers a choice between the precision of armor-piercing anointed halberds or the devastating impact of heavy hallowed maces, ensuring the Celestian Sacresants are fully prepared to engage and triumph over the enemy’s most formidable elite forces.
Celestian Sacresants Datasheets
What’s in the Celestian Sacresants box
- x69 plastic components, with which you can assemble five Celestian Sacresants, one of which may be assembled as a Celestian Superior.This kit includes options for hooded or helmeted heads, and may be equipped with either anointed halberds or hallowed maces.
- x5 Citadel 32mm Round Bases
How to paint the Celestian Sacresants Set
- Step 1: Prepare the miniatures
Before you begin painting, make sure your Celestian Sacresant miniatures are cleaned and assembled. Remove any mold lines or imperfections using a hobby knife or file, and carefully glue the components together as instructed. - Step 2: Prime the miniatures
Apply a thin, even coat of primer to the miniatures. This will help the paint adhere better and provide a smooth surface for painting. Use a white or light gray primer for brighter colors, or a black primer for a darker, more dramatic look. - Step 3: Basecoat the armor
Using a brush, apply the base color to the power armor of the Celestian Sacresants. For example, you can use Retributor Armour for a golden armor appearance. Apply thin layers of paint, allowing each layer to dry before adding the next. - Step 4: Paint the details
Using smaller brushes, paint the various details of the miniatures. Focus on areas such as the face, hair, weapons, and accessories. For the Sacresants shields, you can use Celestra Grey as the base color and add Ulthuan Grey for highlights. - Step 5: Add highlights and shading
To create depth and definition, apply highlights and shading to your miniatures. Use a lighter shade of the base color to highlight raised areas, such as edges and folds in the armor. For shading, you can mix a darker shade of the base color with a small amount of black or brown paint and carefully apply it to recessed areas. - Step 6: Finishing touches
Complete the painting process by adding final touches. This can include painting insignias, adding battle damage, or applying a wash to enhance the details. Nuln Oil is commonly used as a wash to add depth and shadows to the miniatures. - Step 7: Varnish and protect
Once the paint has dried completely, apply a protective varnish. This will help preserve the paint job and protect the miniatures during gameplay. Choose a matte or gloss varnish based on your preference.

