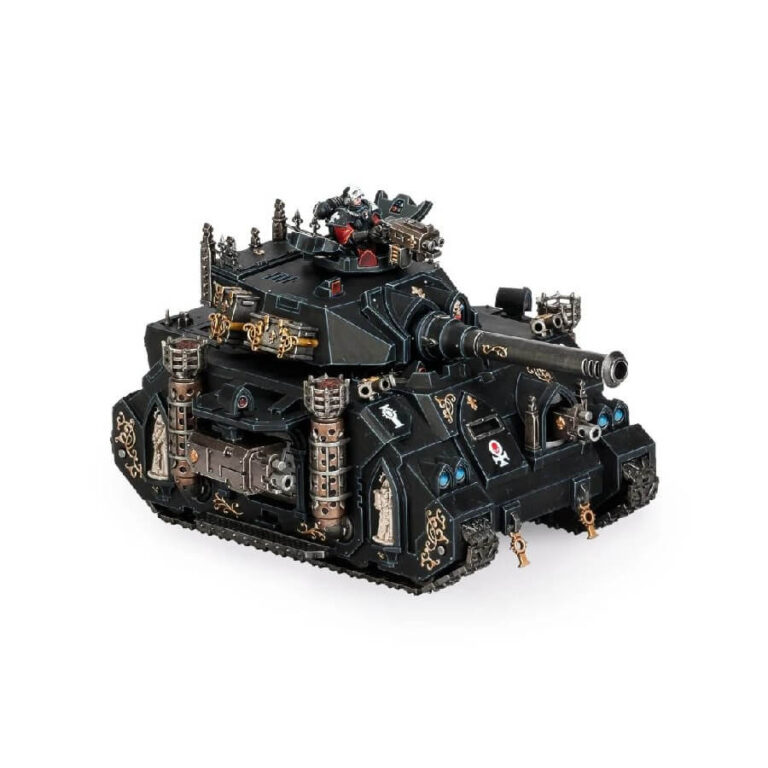
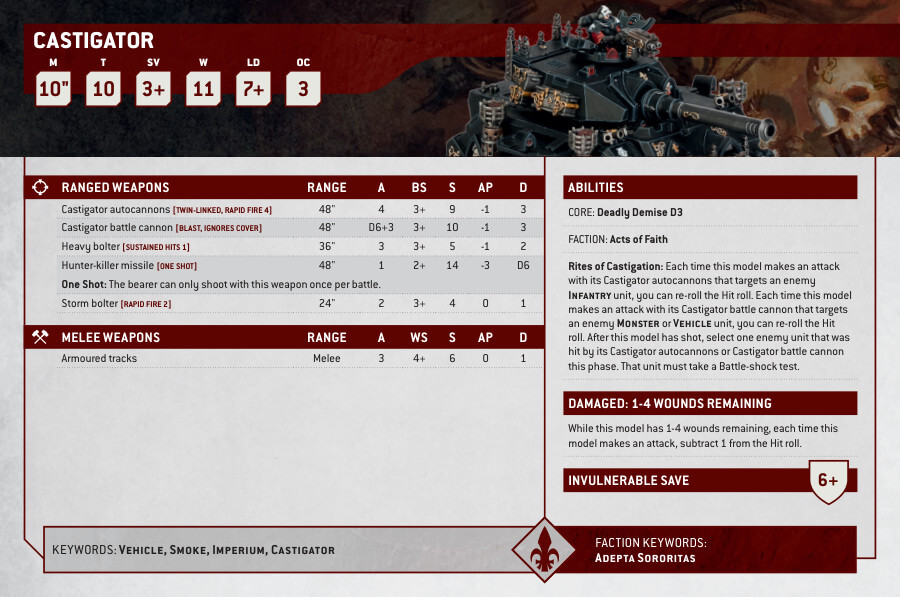
The Castigator is a formidable battle tank proudly utilized by the Adepta Sororitas, offering unparalleled fire support for their Battle Sisters on the battlefield. With its diverse arsenal of weaponry, it serves as a relentless force, capable of breaking through enemy lines and swiftly decimating hordes of adversary infantry.
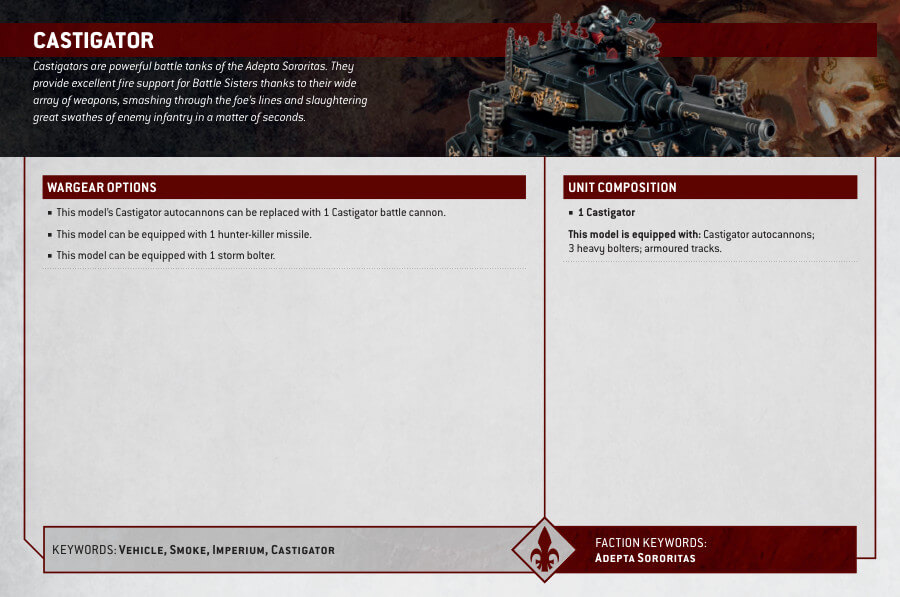
Builders have the choice to equip the Castigator with either a Castigator battle cannon or Castigator autocannons as its primary armament. This flexibility allows for tailoring the tank’s capabilities to suit specific battlefield requirements. Additionally, there are various wargear and gunner options to further customize the Castigator, ensuring it can fulfill a wide range of tactical roles.
Castigator Datasheets
What’s in the Castigator box
- x108 plastic components that make one Castigator tank.
How to paint the Castigator Set
- Step 1: Priming – A Solid Foundation
Begin by priming your Castigator model with Chaos Black spray. This provides a sturdy base for the subsequent layers of paint and ensures a smooth finish. after that, you can edge highlight with Eshin Grey. - Step 2: Details and Pipes – Precision Painting
Paint the intricate details and pipes of the Castigator with Balthasar Gold. To enhance depth and definition, apply a shade of Agrax Earthshade over these areas, allowing the shade to settle into the recesses for added realism. - Step 3: Tracks – Metallic Treads
For the tank’s tracks, use Leadbelcher paint. This metallic hue will give the tracks a convincing appearance. - Step 4: Red and White Details – Striking Accents
Paint the red details of the Castigator with Mephiston Red, ensuring they stand out boldly. Simultaneously, apply White Scar to the white details to create a striking visual contrast. - Step 5: Optics – Cool Blue Glare
Focus on the blue optics of the Castigator using Thousand Sons Blue. This will give the tank’s optics a cool, high-tech appearance. You can add highlights to these parts using White Scar again. - Step 6: Gold and Metallic Details – Glistening Highlights
Use Retributor Armour to paint the gold details of the model, adding a touch of regal brilliance. For other metallic components, use Leadbelcher, enhancing their realism and depth. - Step 7: Varnishing – Preserve and Enhance
To protect your meticulously painted Castigator and provide a finished look, apply a layer of Munitorum Varnish Spray. Ensure the model is entirely dry before varnishing.

