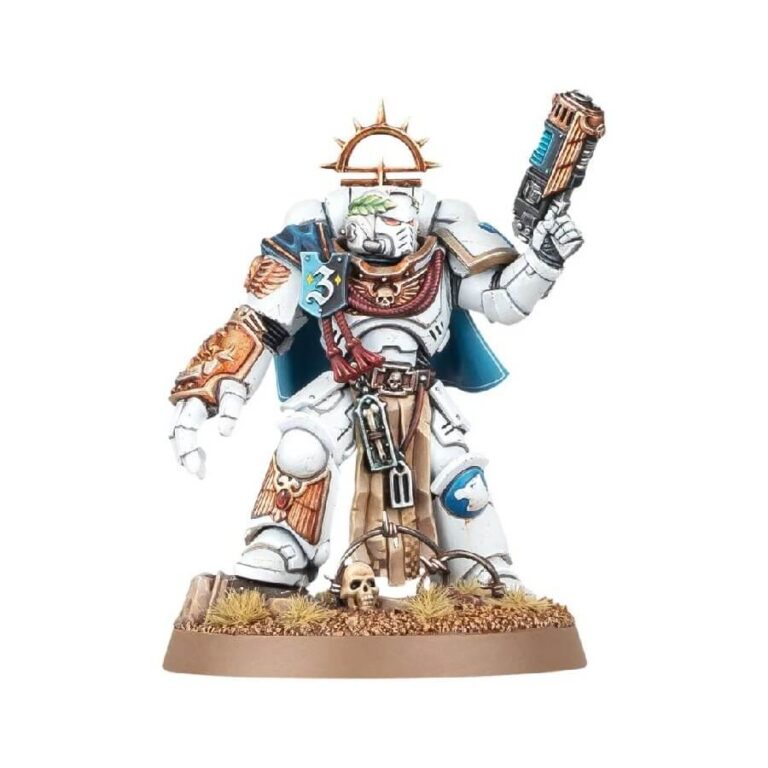
A trusted advisor to Guilliman and Captain of the White Consuls Chapter, leads the Indomitus Crusade with a rare and masterfully crafted power fist gifted to him by the Avenging Son himself for honourable service. With unmatched loyalty to Guilliman’s ambitions, Messinius was granted the rank of Lord Lieutenant within the Space Marines Crusade Fleet and is determined to see the Imperial Regent’s vision through. The Black Library Celebration 2023 introduced Messinius to the tabletop, featuring his power armor adorned with symbols of the White Consuls, Crusade Fleet Tertius, and the Lord Commander, and a unique power fist adorned with sculpted auramite, accompanied by a plasma pistol. Messinius can be built with a wreath-topped helmet or a bare head, revealing his scarred features.
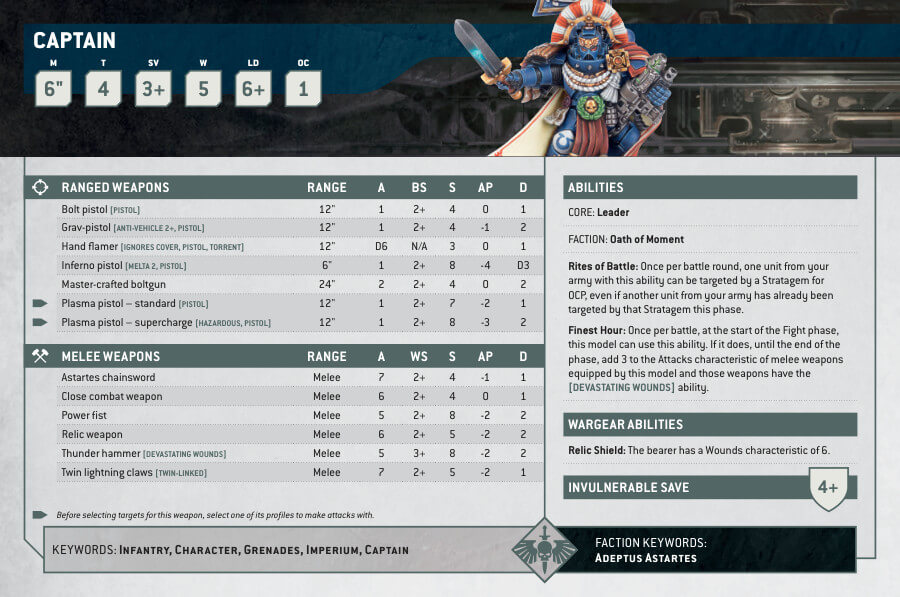
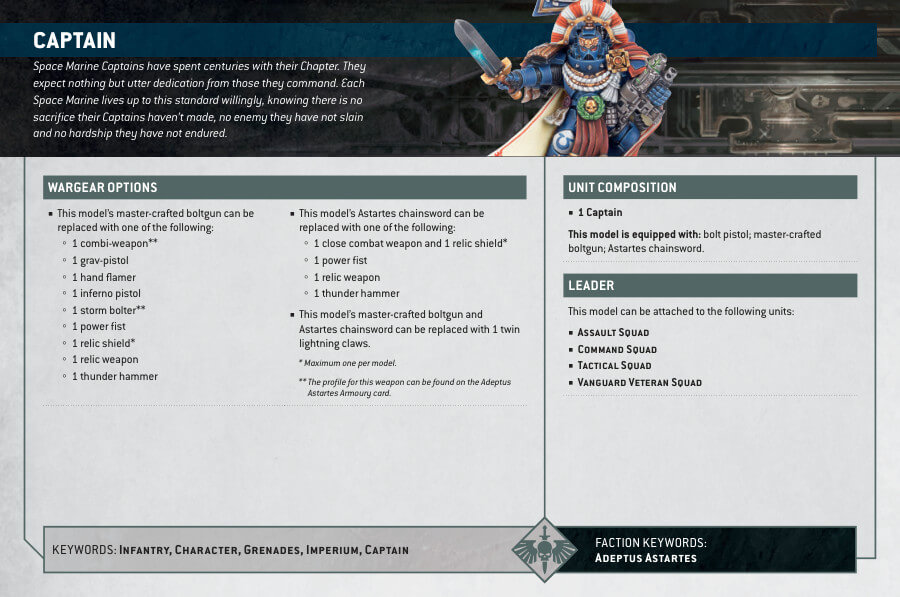
Captain Messinius Datasheets
What’s in the Captain Messinius box
- x14 plastic components that make one Captain Messinius.
- x1 Citadel 40mm Round Base
How to paint the Captain Messinius
- Step 1: Base Coat
Start by priming the Captain Messinius model with a light spray primer. This will provide a solid foundation for the paint to adhere to. Ensure you have a smooth and even coat of primer before proceeding. - Step 2: Armor
Paint the Captain’s armor with white paint. Use a bright white color like White Scar to achieve a clean and pristine look. Apply thin coats to preserve the model’s details and gradually build up the color. - Step 3: Cape
Next, paint the cape of Captain Messinius with blue. A vibrant blue like Caledor Sky can work well for this. Ensure that the blue stands out against the white armor for a striking appearance. - Step 4: Details on Armor
Using a gold paint, carefully add the details on the armor that should be in gold. This could be the insignia, trim, or other embellishments. For example, you can use a paint like Balthasar Gold. Be patient and take your time with this step to achieve clean and crisp gold details. - Step 5: Helmet or Exposed Head
If Captain Messinius has a helmet, paint it white to match the armor. If he is assembled without one, paint his exposed head with a flesh-tone paint, such as Cadian Fleshtone or Kislev Flesh, to make it look realistic. - Step 6: Lenses and Wreath
For the helmet with lenses, paint the lenses red for a menacing appearance. You can use a color like Evil Sunz Scarlet. Also, paint the wreath around the helmet’s lenses green. Moot Green can work well for this purpose. - Step 7: Other Details
Use different colors to paint other details on the model. For ropes and other brown elements, consider using a paint like Gorthor Brown. For any blue details, a color like Alaitoc Blue can be suitable. Bronze details can be painted with a bronze color like Hashut Copper. Finally, skulls and bone-like elements can be painted with a bone color, such as Zandri Dust. - Step 8: Weathering Effects (Optional)
If you wish to add weathering effects to the model, consider using techniques like dry brushing or sponging with a darker paint to create a worn and weathered appearance. This can add depth and character to the model, giving it a battle-hardened look. - Step 9: Final Touches
Check the model for any areas that might need touch-ups. Ensure that all the colors and details are neat and consistent. If you want to add additional weathering effects or highlights, this is the time to do so. - Step 10: Varnish (Optional)
For protection and a finished look, consider applying Citadel’s Ardcoat varnish. It provides a glossy finish, enhancing colors and details on the model. Follow instructions on the bottle and apply in a well-ventilated area.

