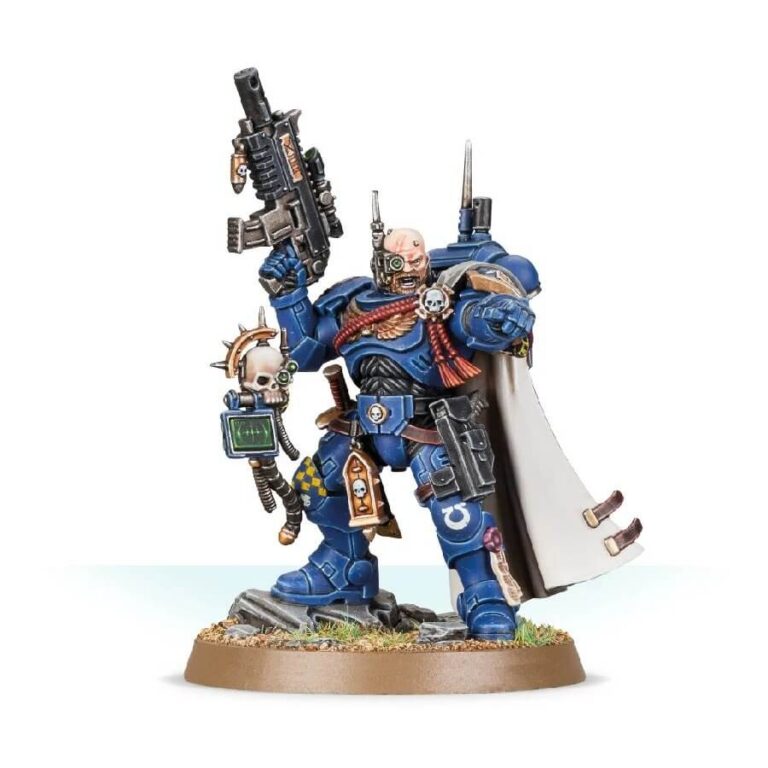
Each company in a Chapter of the Adeptus Astartes falls under the command of a Captain. It is often said that a Space Marine is worth at least ten other soldiers; under the leadership of a Captain, this swells even further, for they coordinate their warriors with deadly precision and inspire their followers to fight with a dedication and spirit that cannot be instilled by training or discipline alone.
A Primaris Captain in Phobos Armour is an HQ choice for any Adeptus Astartes Faction – including Blood Angels, Dark Angels and even the Space Wolves (for whom he fulfils the role of Wolf Lord). He is a highly skilled warrior in every aspect of battle and wields a deadly master-crafted instigator bolt carbine – a marksman’s weapon designed to snipe enemy commanders. In addition to wearing a camo cloak to enhance the effects of cover, the Primaris Captain in Phobos Armour can use an advanced omni-scrambler to thwart enemy reinforcements as they move onto the battlefield.
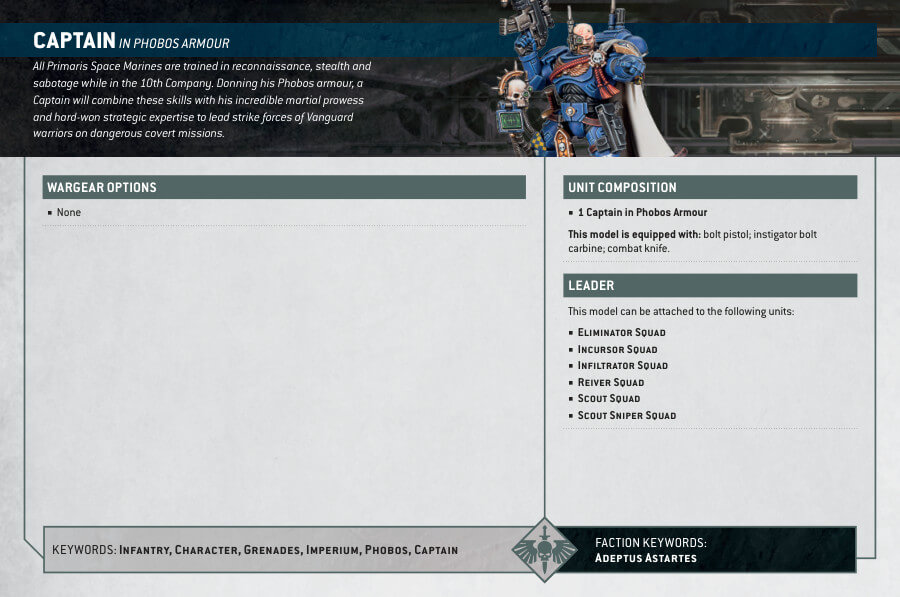
Captain in Phobos Armour Datasheets
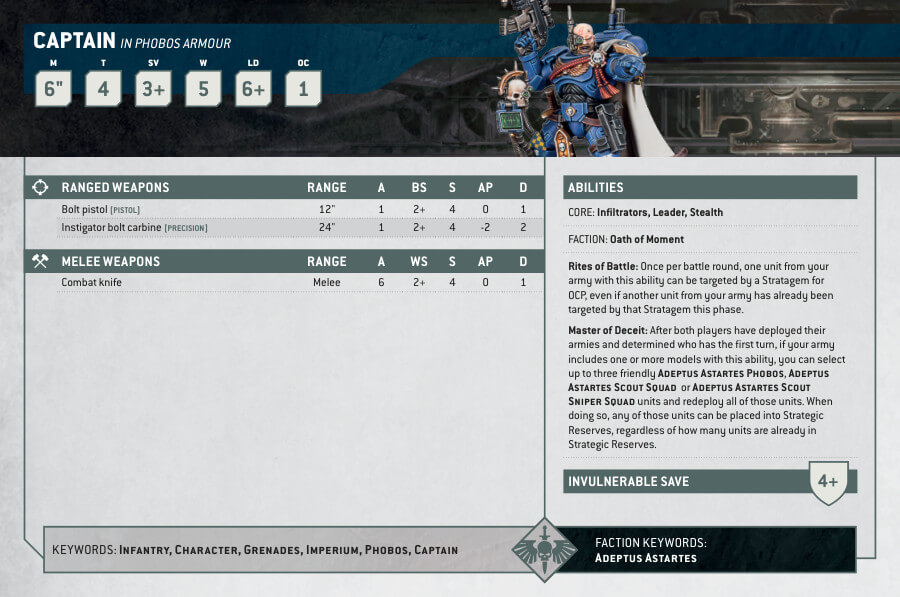
What’s in the Captain in Phobos Armour box
- x9 plastic components that make one Captain in Phobos Armour.
- x1 Citadel 40mm Round Base
- x1 Ultramarines Character Transfer Sheet
How to paint the Captain in Phobos Armour
- Step 1: Base Coat
Begin by priming the Captain in Phobos Armour model with a spray primer. This will provide a solid foundation for the paint to adhere to. Ensure you have a smooth and even coat of primer before moving on. - Step 2: Armor
Paint the Captain’s armor with your chosen blue color. For instance, you can use a vibrant blue like Kantor Blue or another shade that appeals to you. Apply thin coats to preserve the model’s details and build up the color gradually. - Step 3: Shading the Armor
To add depth and definition to the blue armor, apply a shade like Drakenhof Nightshade. Use a fine detail brush to carefully apply the shade in the recessed areas, such as the panel lines and crevices. This will create a natural shadow effect, making the armor look more realistic. - Step 4: Layering the Armor
After the shade has dried, use a lighter blue color like Alaitoc Blue to reapply highlights on the raised areas of the armor. Focus on edges and surfaces that catch the light. This layering technique will make the armor appear more three-dimensional and vibrant. You can apply this lighter blue color to areas such as the edges of the armor plates, the top surfaces, and other prominent areas to create contrast and depth. Be patient and build up the highlights gradually for a smooth and realistic effect. - Step 5: Rifle
Paint the rifle with a black color, such as Abaddon Black. Be precise with this step to avoid getting black paint on other areas of the model. - Step 6: Gold Details
Using Retributor Armour, carefully add the details on the armor that should be in gold. This could be the Aquila, chapter symbols, or other embellishments. Be patient and take your time with this step to achieve clean and crisp gold details. - Step 7: Brown Ropes
For any rope-like details on the model, use a brown paint like Mournfang Brown. This could be pouches, straps, or any other rope-like elements. Apply the paint carefully and neatly. - Step 8: Black Details
Paint any black details on the model, such as belts, holsters, or other accessories, using a black color like Abaddon Black. Be precise and avoid getting black paint on surrounding areas. - Step 9: Red Details
Add red details on the model, such as lenses, insignias, or other markings, using a red paint of your choice. For example, you can use Mephiston Red. Be neat and careful when painting these small details. - Step 10: Skin
For the exposed head of the Captain, paint the skin with Rakarth Flesh or a similar flesh-tone paint. This will give the model a more lifelike appearance. - Step 11: Shading and Highlighting
To further enhance the model, you can add shading and highlighting to certain areas. For example, you can shade the brown ropes with Agrax Earthshade to add depth, and then highlight them with a lighter brown like XV-88. Similarly, you can shade the red details with Carroburg Crimson and then add highlights with a lighter red like Evil Sunz Scarlet. - Step 12: Final Touches
Check the model for any areas that might need touch-ups. Ensure that all the colors, shading, and layering are neat and consistent. If you want to add additional details or highlights, this is the time to do so. - Step 13: Varnish (Optional)
If you wish to protect your paint job and give the model a finished look, consider applying a layer of varnish. A matte varnish will provide a more realistic finish, while a gloss varnish can enhance certain details.

