
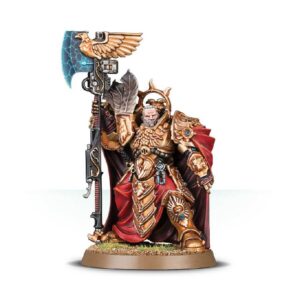
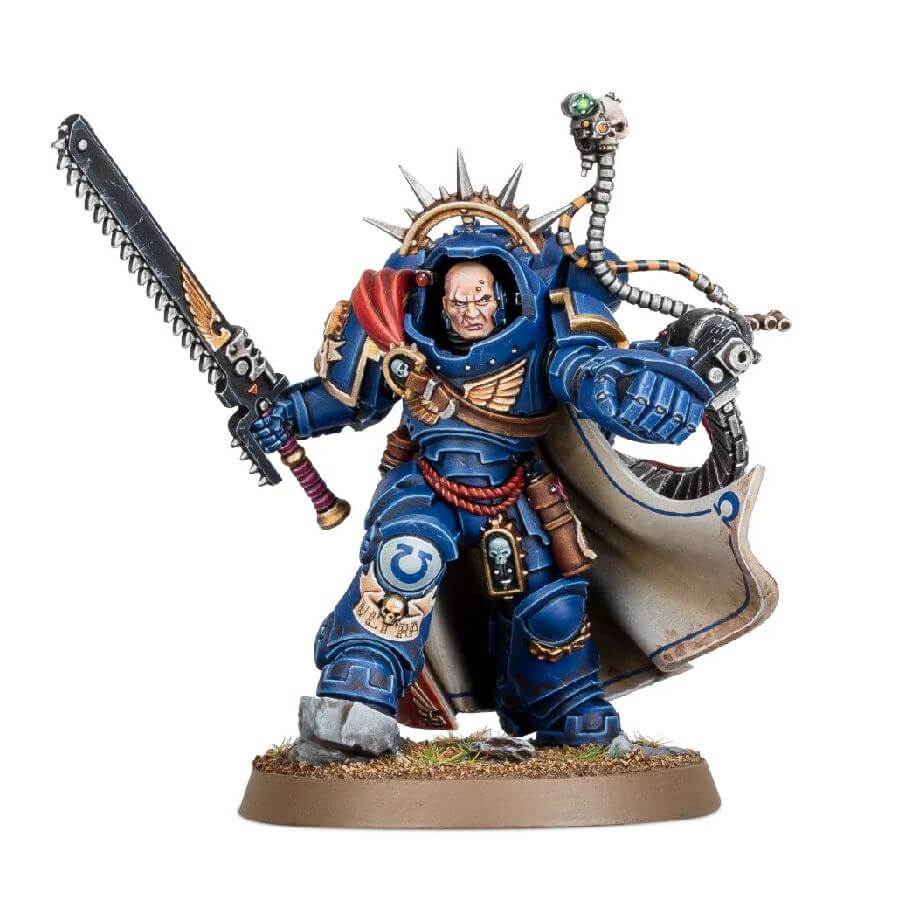
Space Marine Captains are formidable leaders, fearlessly commanding their troops with expert tactics and wielding a range of powerful weapons and equipment. These skilled warriors don heavy Gravis armor, which allows them to confidently enter the most intense and hazardous battlefields. Their choice to don this armor demonstrates their unwavering commitment to vanquishing their enemies, regardless of the challenges they may face.
In addition to their combat prowess, Captains inspire their troops to achieve ever-greater accomplishments in the field. They can unleash devastating damage both up close and at range, making them a critical asset to any Space Marine army.
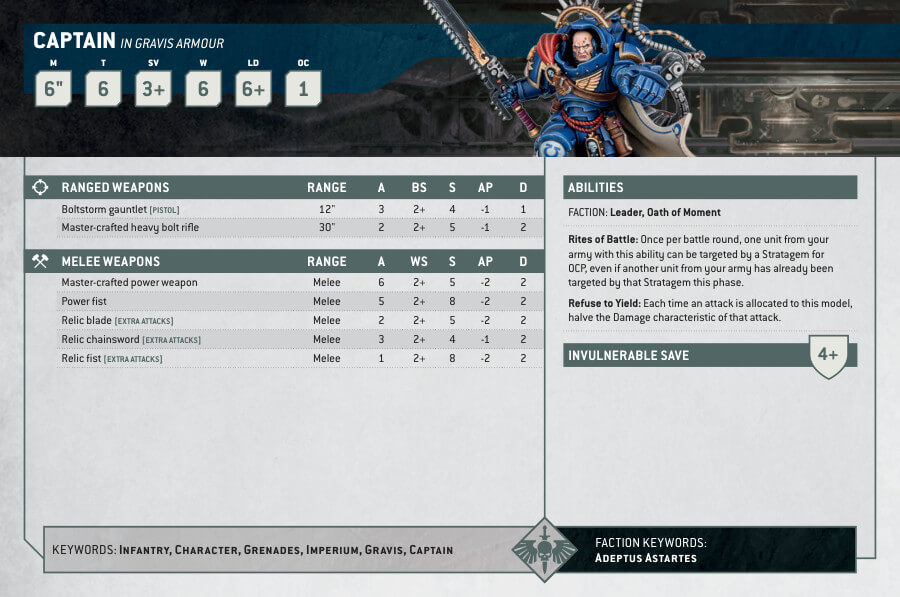
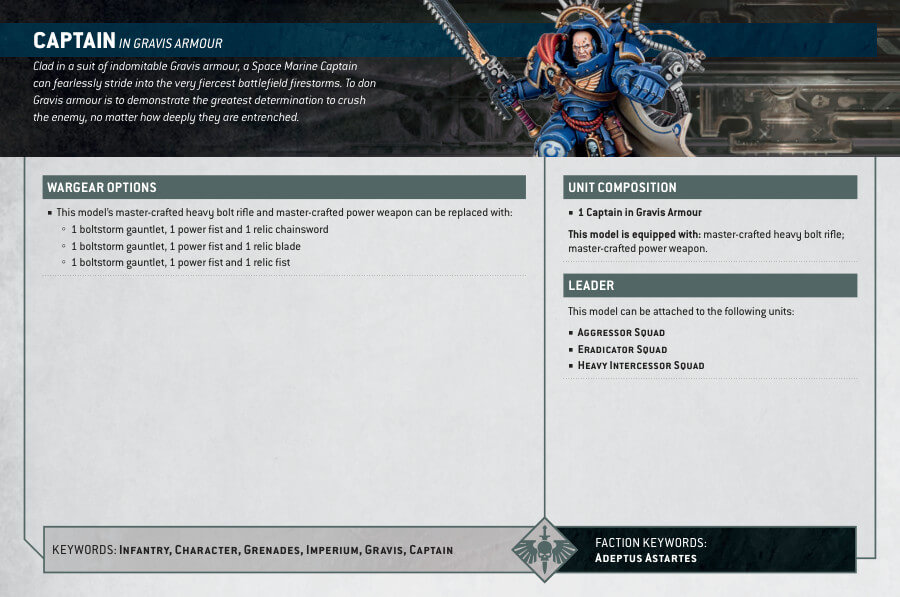
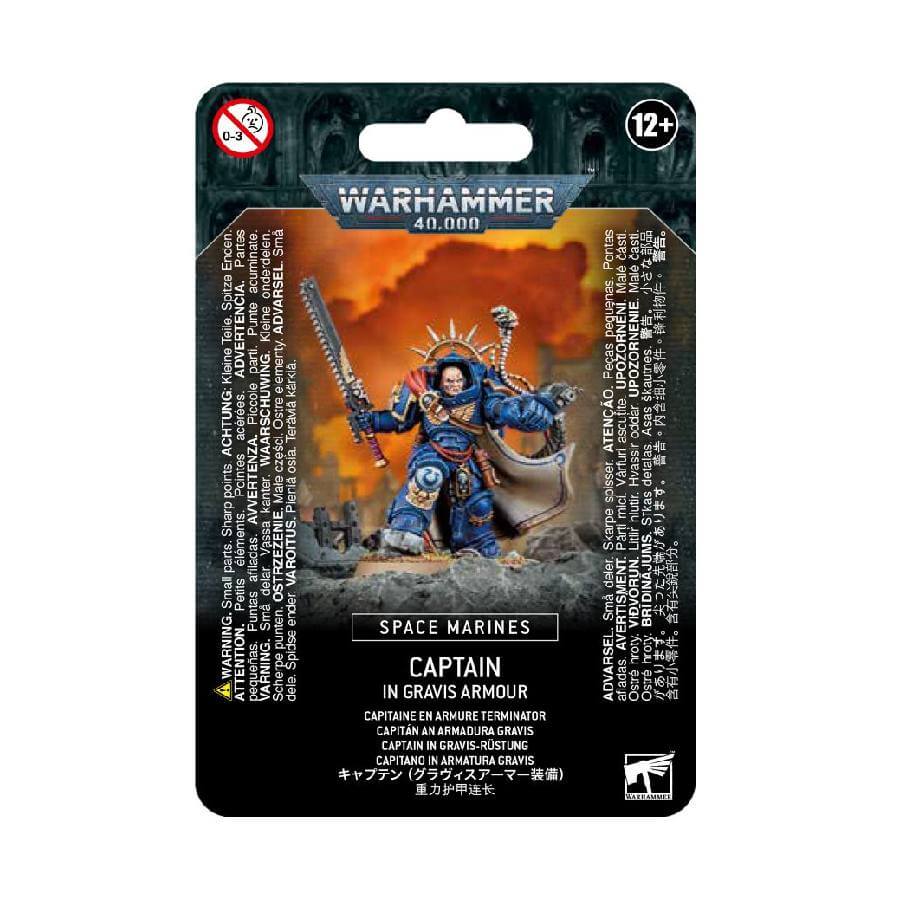
Captain in Gravis Armour Datasheets
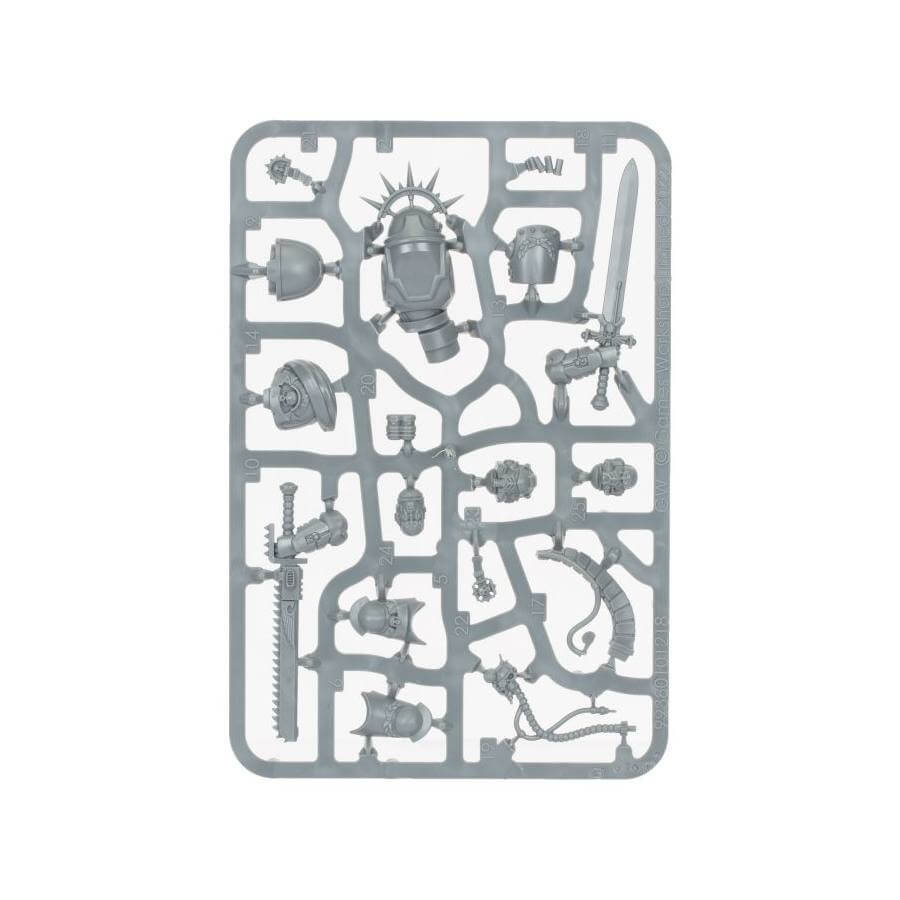
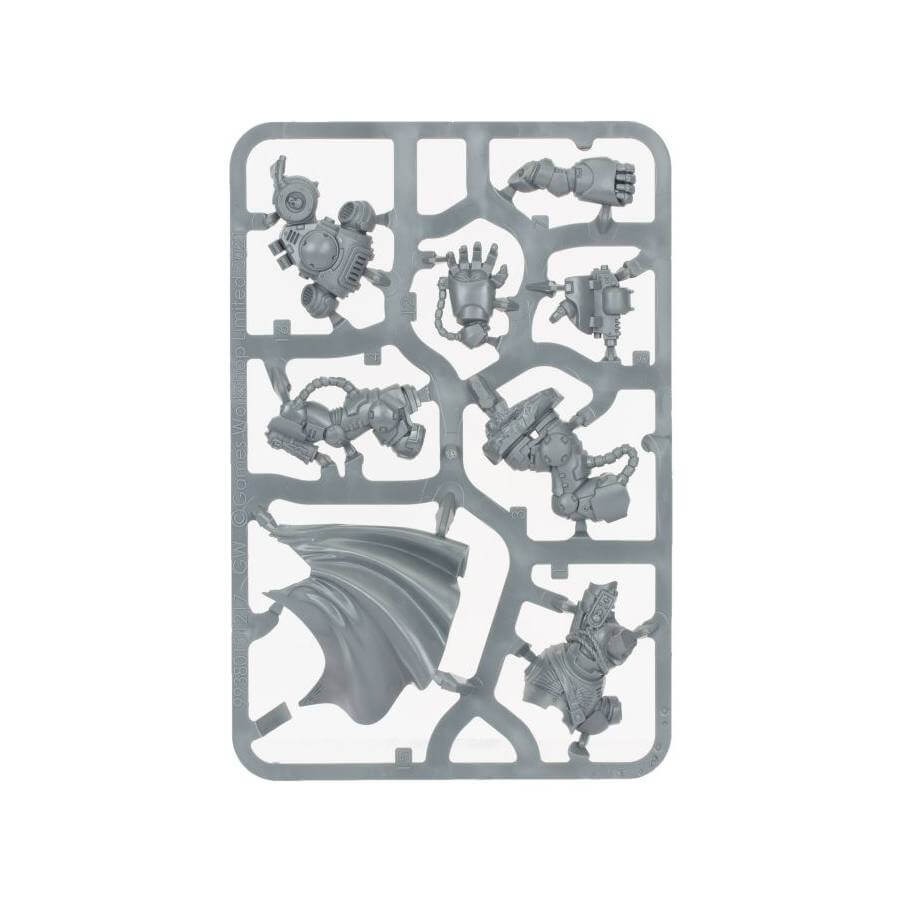
What’s in the Captain in Gravis Armour box
- x25 plastic components that make 1 Space Marine Captain in Gravis Armour.
- x1 (of each) chainsword, power sword, powerfist, as well as a boltstorm gauntlet.
- x1 40mm Citadel Round Base.
How to paint the Captain in Gravis Armour
- Step 1: Base Coat
Start by priming the Captain in Gravis Armour model with Chaos Black spray primer. This provides a good foundation for the paint to adhere to. Make sure you have a smooth and even coat of primer before proceeding. - Step 2: Armor
Paint the Captain’s armor with your chosen blue color. Consider using a vibrant blue like Calgar Blue or another shade that you prefer. Apply thin coats to preserve the model’s details and gradually build up the color. - Step 3: Shading the Armor
To add depth and definition to the blue armor, apply a shade like Drakenhof Nightshade. Use a fine detail brush to carefully apply the shade in the recessed areas, such as the panel lines and crevices. This will create a natural shadow effect, making the armor look more realistic. - Step 4: Layering the Armor
After the shade has dried, use the base blue color again (Calgar Blue or your chosen shade) to reapply highlights on the raised areas of the armor. Focus on edges and surfaces that catch the light. This layering technique will make the armor appear more three-dimensional and vibrant. - Step 5: Cape
Next, paint the cape of the Captain with a bold red color, such as Mephiston Red. Ensure that the red stands out against the blue armor for a striking appearance. - Step 6: Shading the Cape
For the red cape, use Carroburg Crimson shade. Apply it gently over the entire cape, allowing it to settle into the folds and recesses. This will add depth and richness to the red color. - Step 7: Layering the Cape
After the shade has dried, use your base red color to add highlights to the raised areas of the cape. Apply this layer sparingly, concentrating on the upper surfaces and folds. This layering technique will make the cape look more dynamic and eye-catching. - Step 8: Metallic Components
Use metallic paints, like Leadbelcher or Iron Warriors, to paint any metallic components on the Captain’s armor and equipment. This includes areas like the joints, weapons, and other accessories. - Step 9: Shading the Metallic Components
For the metallic parts of the model, use a shade like Nuln Oil. Apply the shade to the metallic areas, allowing it to flow into the recesses. This will create shadows and enhance the metallic appearance. - Step 10: Layering the Metallic Components
Once the shade has dried, use your metallic paint (Leadbelcher, Iron Warriors, etc.) to reapply highlights on the raised areas of the metallic components. This will make the metal look more reflective and shiny. - Step 11: Gold Details
Using a gold paint, like Retributor Armor, carefully add the Ultramarine details on the Captain’s armor. This could be the Ultramarines chapter symbol, winged insignia, or other markings. Take your time with this step to make the gold details look crisp and impressive. - Step 12: Shading the Gold Details
For the gold details, apply a shade like Seraphim Sepia. Apply it carefully to the gold areas, focusing on the recesses and intricate details. This will create shadows and make the gold stand out. - Step 13: Layering the Gold Details
After the shade has dried, use your gold paint (Retributor Armor or similar) to reapply highlights on the raised areas of the gold details. This will give the gold a more lustrous and regal appearance. - Step 14: Chainsword
Paint the chainsword with a black color, such as Abaddon Black. Be precise with this step to avoid getting black paint on other areas of the model. - Step 15: Skulls
For the skulls on the model, use a white paint like White Scar. Focus on the details and make the skulls stand out against their respective backgrounds. - Step 16: Bronze Details
Lastly, paint any bronze details on the model, such as buckles or trim, using a suitable bronze paint like Warplock Bronze. - Step 17: Final Touches
Check the model for any areas that might need touch-ups. Ensure that all the colors, shading, and layering are neat and consistent. If you want to add additional details or highlights, this is the time to do so. - Step 18: Varnish (Optional)
To protect your beautiful paint job and give the model a finished look, consider applying a layer of Citadel Munitorum Varnish. This varnish will help protect your miniature from chipping, scratches, and other wear and tear during gameplay, while also enhancing the colors and details on the model.
