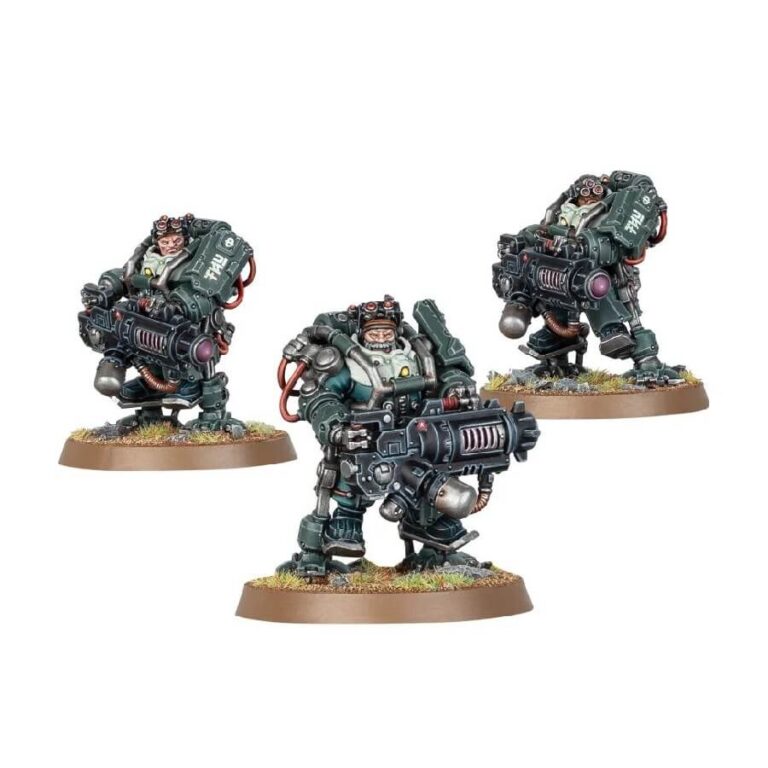
Evolved from the void-rigs that once serviced Leagues‘ spacecraft, the Thunderkyn wear armored exo-suits, replacing repair tools with heavy weaponry. These formidable armaments are employed to dismantle enemy armor and provide suppressive fire in support of their Oathband
This multipart plastic kit allows the assembly of three Brôkhyr Thunderkyn. These combat engineers don robust exo-frames that accommodate their heavy armaments and are equipped with advanced omni-visors for comprehensive battlefield awareness. The Thunderkyn can be armed with a selection of potent weaponry, including a bolt cannon, graviton blast cannon, or SP conversion beamer.
Additionally, the kit offers a range of seven distinct head designs, including an Ironkin variant, and four interchangeable omni-visor designs to offer variety in customization, resulting in a unique squad of Thunderkyn that embodies both craftsmanship and combat prowess.
What’s in the Brôkhyr Thunderkyn box
- x74 plastic components that make 3 Brôkhyr Thunderkyn miniatures.
- x3 Citadel 40mm Round Bases.
- x1 Leagues of Votann Transfer Sheet with 555 numerals, runes, and markings for prominent Leagues.
How to paint the Brôkhyr Thunderkyn set
- Step 1: Apply Primer Coat
Begin by applying a thin, even layer of primer to your miniature. Primer serves as a foundation for your paint, allowing it to adhere better and creating a smooth surface. For a neutral base, opt for the Grey Seer primer, which will help prepare the miniature for the upcoming layers of color. - Step 2: Paint the Armor with Incubi Darkness
With your brush loaded with Incubi Darkness paint, focus on the armor sections of your miniature. Apply the paint evenly to ensure consistent coverage. This deep green color will form the base of the armor’s appearance. Don’t worry if the initial application seems a bit rough; later steps will refine the look. - Step 3: Shade with Coelia Greenshade
Now, introduce depth to the armor using Coelia Greenshade shade paint. Apply the shade paint meticulously over the areas coated with Incubi Darkness. This technique will allow the shade to settle naturally into the recesses of the armor, crafting realistic shadows and enhancing the overall depth. Apply the shade sparingly, allowing it to flow into the armor’s crevices for an authentic appearance. - Step 4: Add Detailing
Transition into refining your miniature by utilizing a smaller brush for detailing. Focus on incorporating highlights and shadows to emphasize the intricacies of the armor. To highlight the edges of the warrior’s armor, select a lighter shade like Kabalite Green. With controlled brushwork, carefully apply this highlight color to the edges, adding a touch of brilliance and dimension. - Step 5: Work on Faces and Skin
As you move on to the exposed skin areas, such as the warrior’s face, select a suitable flesh tone like Cadian Fleshtone. Use your brush to paint these areas, capturing the lifelike complexion of the character. Applying the flesh tone skillfully will breathe life into the miniature, making the details stand out. - Step 6: Enhance Small Details
Employ fine brushes to add intricate small details to your miniature. For example, if you’re faced with the challenge of painting intricate patterns on the warrior’s shield, rely on your steady hand to paint precise lines using Evil Sunz Scarlet. This step showcases your attention to detail and elevates the overall quality of your miniature. - Step 7: Paint the Bases
Shift your focus to the bases of your miniatures. Craft a natural look by starting with a base coat of Dryad Bark, creating the appearance of earth or terrain. Follow this by gently dry brushing Screaming Skull over the top, adding a subtle highlight that imitates natural wear and tear. - Step 8: Apply Washes
Introduce depth and richness to your miniature’s appearance by applying washes. For the warrior’s armor, employ Nuln Oil wash to darken the crevices and achieve a stunning contrast that makes the details pop. The wash seeps into the recesses, emphasizing the three-dimensional quality of your miniature. - Step 9: Finalize with Touches
Carefully review your miniature for any areas that may benefit from extra attention. Consider making final touch-ups to refine highlights, correct any shading inconsistencies, and ensure a polished appearance. This step is your chance to fine-tune the miniature and make it truly exceptional. - Step 10: Apply Varnish
Preserve your hard work and effort by applying a protective varnish to your miniatures. This final touch adds a layer of defense against wear and tear, ensuring your miniature remains vibrant and detailed for years to come. With this protective coat in place, your miniature is ready to be displayed with pride.

