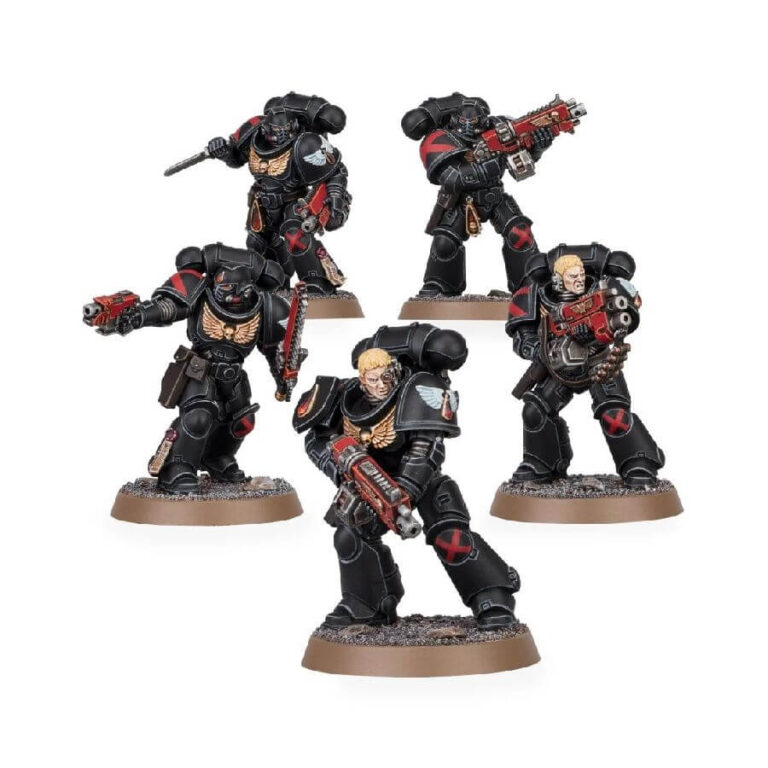
Blood Angel fans were disappointed when the first Primaris Space Marines brought to the Chapter by Roboute Guilliman succumbed to the Black Rage. However, these brothers were inducted with solemnity into the Death Company, and their terrifyingly aggressive combat skills on the battlefield, combined with the fury of the Black Rage, quickly made them revered. This multipart plastic kit includes five Death Company Intercessors armed with bolt rifles that can be assembled in three different variants. The kit also includes a Blood Angels Primaris Upgrade frame, which can be used to add the unique heraldry and iconography of the Blood Angels to your miniatures. The models can also be painted as Blood Angels Primaris Intercessors.
If you want to save money and build 10 Intercessors you can buy the Primaris Intercessors kit (10 models-$60) and paint them to fit the blood angels. We think this is a better bang for your buck.
Also available in this box set:
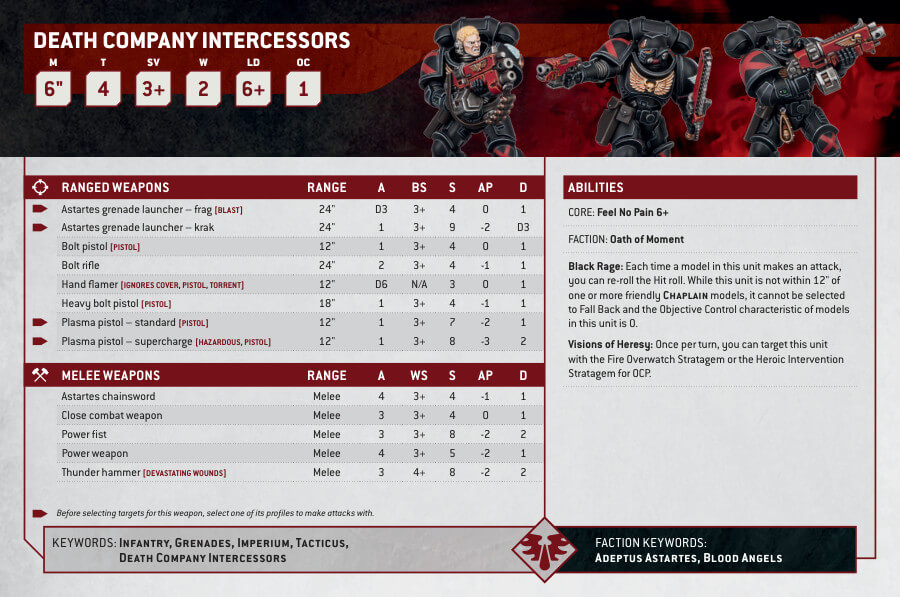
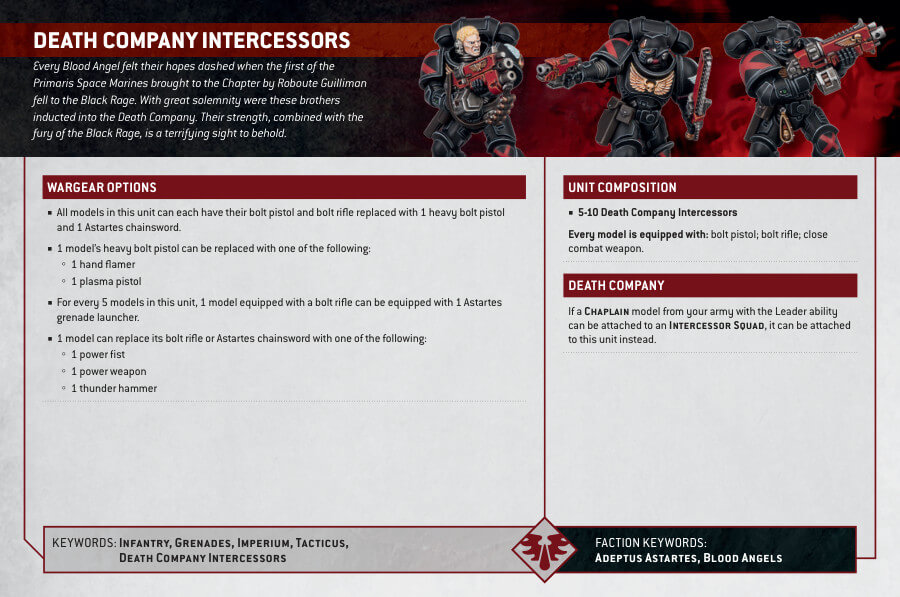
Blood Angels Death Company Intercessors Datasheets
What’s in the Blood Angels Death Company Intercessors box
- x159 plastic components that make 5 Blood Angels Death Company Intercessors with 5 bolt rifles that can be assembled in three variants.
- x1 Blood Angels Primaris Upgrade frame that allows you to personalize your miniatures with the unique heraldry and iconography of the Blood Angels
- x5 Citadel 32mm Round Bases
- x1 Blood Angels Primaris Infantry Transfer Sheet to enhance your models with decals.
How to paint the Blood Angels Death Company Intercessors
- Step 1: Base Coat
Begin by priming the Death Company Intercessors with a spray primer. This will provide a solid foundation for the paint to adhere to. Ensure you have a smooth and even coat of primer before proceeding. - Step 2: Armor
Paint the armor plates on the Death Company Intercessors with a layer of Abaddon Black. Apply thin coats to avoid obscuring the details. You may need to apply two or three thin coats to achieve good coverage. - Step 3: Bolters and Pistols
Next, paint the bolt rifles and bolt pistols with Mephiston Red. Use a small brush to carefully cover these areas, and don’t worry if you get some red on the black armor – we’ll tidy it up later. - Step 4: Retributor Armor
Apply Retributor Armor to the smaller details, such as the trim on the armor, shoulder pads, and other embellishments. This metallic paint will add a nice touch of shine to the model. - Step 5: Layering
To create depth and richness in the colors, apply edge highlights using Evil Sunz Scarlet on the red areas and Stormhost Silver on the metallic parts. This will make the armor and details pop. - Step 6: Shading
Shading adds shadows and definition to the model. Use Nuln Oil to shade the black armor, focusing on the recessed areas and the edges. Use Agrax Earthshade to shade the red areas and the metallic details. For the flesh tones, you can use Reikland Fleshshade. - Step 7: Helmets
For Death Company Intercessors without a helmet, paint the exposed heads with your chosen flesh tone. Cadian Fleshtone or Kislev Flesh can work well for this purpose. - Step 8: Helmet Lenses
For the Intercessors with helmets, paint the helmets with Abaddon Black. Then, carefully paint the lenses with Wazdakka Red to create the glowing red effect. - Step 9: White Details
If there are any details on the model that require a white color, such as the Blood Angels iconography on the shoulder pads, use White Scar to paint them. Take your time and be patient with this step. - Step 10: Final Touches
Check the model for any areas that might need touch-ups. Make sure the colors are neat and consistent. If you wish to add more detail, you can do so at this stage. - Step 11: Varnish (Optional)
If you want to protect your paint job, consider applying a layer of varnish. A matte varnish will give your models a more realistic finish, while a gloss varnish can make certain parts, like lenses, appear more vibrant.

