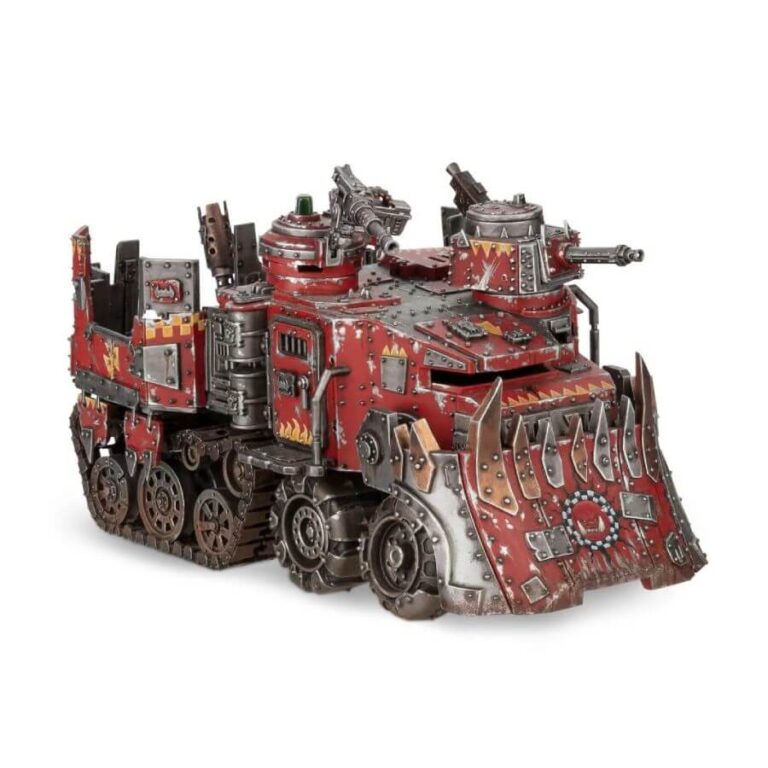
Indulge in the ultimate customizable transport tank with the Battlewagon, where each creation is a unique marvel crafted by Meks with a passion for cobbling on armor plates, adding ramming spikes, assorted dakka, and random gubbinz. This rugged mobile fortress is the epitome of Ork style, ensuring your Boyz reach the battlefield with unstoppable force and relentless resilience, while offering an array of weapons options to shoot, smash, and crush your foes. Prepare for battle in true Warboss fashion!
What’s in the Battlewagon box
- x135 plastic components that make one Battlewagon. The kit includes options for a big shoota, kannon, killkannon, lobba, zzap gun, deff rolla, grabbin’ klaw, and wreckin’ ball and can alternatively be assembled as a Gunwagon or a Bonebreaka.
How to paint the Battlewagon set
- Step 1: Basecoat the Hull
Begin by applying a basecoat of your chosen color to the Battlewagon’s hull using a large brush. For example, you can use Waaagh! Flesh for a classic Ork look or Mephiston Red for a more aggressive appearance. - Step 2: Shading the Hull
Apply a shading wash, like Agrax Earthshade, to the hull to add depth and shadows. Use a medium-sized brush and ensure the wash settles into the recesses for a weathered effect. - Step 3: Highlighting the Hull
Once the shading wash is dry, highlight the raised edges and details of the hull using a lighter color, such as Warboss Green or Evil Sunz Scarlet. Use a fine detail brush for precise application. - Step 4: Adding Details
Use a smaller brush to paint details like glyphs, clan symbols, or additional colors for weapons and accessories. For example, use Leadbelcher for metal parts and Abaddon Black for cannons and gun barrels. - Step 5: Painting the Crew
Paint the Ork crew members with their unique skin colors, such as a vibrant green using Warboss Green or a paler tone with Loren Forest. - Step 6: Weapons and Dakka
Paint the weapons using various metallic colors like Leadbelcher, Balthasar Gold, or Retributor Armor. For additional dakka, use different colors for the ammunition, such as Skrag Brown for rockets or Averland Sunset for bullet casings. - Step 7: Rust and Weathering
To give your Battlewagon a weathered look, apply rust and weathering effects using texture paints like Typhus Corrosion or Stirland Mud on the exposed metal parts. - Step 8: Varnish
Finish your masterpiece by applying a matte varnish to protect the paintwork and give your Battlewagon a unified finish.

