The formidable leaders of the Drukhari Kabals, embody both regality and monstrosity. With their power to dominate entire worlds and obliterate civilizations, they have indulged in the agony of countless victims. Drawing strength from the torment of countless beings, the Archons have become desensitized to ordinary pain. It now takes unimaginable atrocities to invigorate their withered souls. Thus, they embark on an unending cycle of raids into realspace, leaving behind a trail of devastation and suffering in their wake. These ruthless forays not only serve as a means to satiate their hunger but also as a means to remind themselves of their own vitality and insatiable desires.
Also available in this box:
What’s in the Archon box
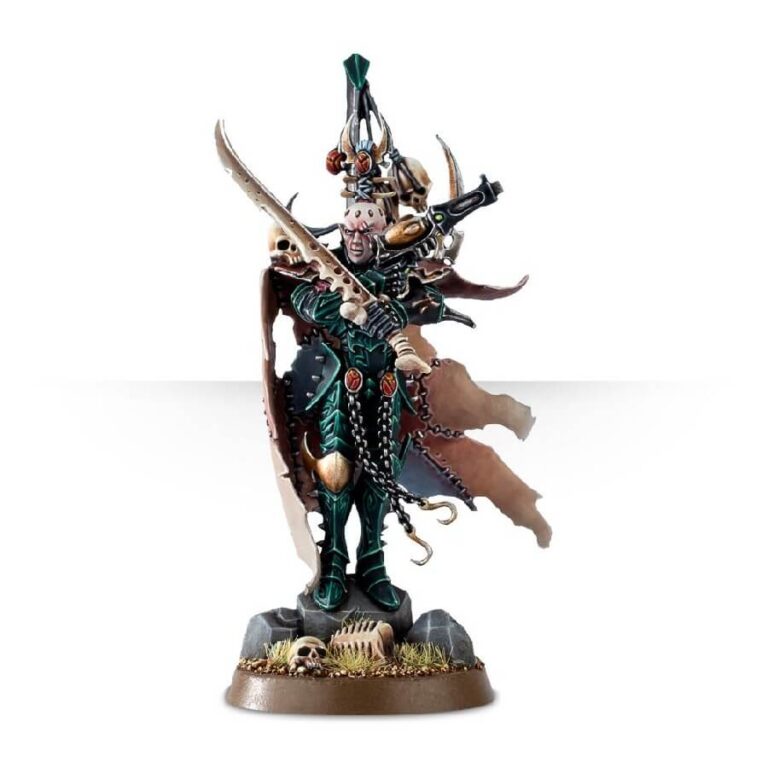
- x11 plastic components that make 1 Archon clad in Kabalite armour, inscribed with runes. The Archon carries a husk blade and splinter pistol, while the cloak of skin and the trophy rack mounted upon his pack proudly display the bounty of horror he has reaped in battle.
- x1 Citadel 25mm Round Base
How to paint the Archon set
- Step 1: Prime Your Model
Let’s start by prepping your model for painting. Grab your primer spray can and give it a good shake. Apply a thin, even coat of primer to the model. This step will help create a smooth surface for painting. Be patient and let the primer dry completely before moving on. - Step 2: Apply Base Colors
Choose the main colors for different parts of the model and apply them using a big brush to each section. Stay within the lines and take your time to get it just right. For the armor plates, you can use Abaddon Black and leave the recesses unpainted. Use Eldar Flesh for the face, Leadbelcher for the weapon, Mephiston Red for the cape, and Caliban Green for any other details you want to paint. - Step 3: Highlighting
Pick a lighter shade of the base color and switch back to the smaller brush. Apply this lighter color to the raised areas and edges of the model. This will add depth and create a three-dimensional effect.
For the armor plates, you can highlight the raised edges with Dawnstone if you started with a black basecoat. If you used a grey basecoat, go for Administratum Grey. - Step 4: Washes
Time to bring out the shadows and enhance the details. Washes are thin, dark-colored paints that settle into the recesses of the model. Grab a wash like Nuln Oil and apply it to the face, cape, and weapon. This will add depth and make those details stand out. - Step 5: Detailing
Grab a fine-tipped brush and take your time. Use colors like Evil Sunz Scarlet to paint small red gemstones on the weapon or Warpstone Glow to create intricate patterns on the cape. Be patient and steady-handed, and watch your model come to life. - Step 6: Basing
Let’s give your model a solid foundation. Apply Armageddon Dust texture paint to the base and let it dry. Once it’s dry, you can add even more realism by gluing on small rocks to create a rocky terrain. Get creative and make it your own! - Step 7: Varnish
To protect your masterpiece, it’s time to apply a layer of varnish. Grab your chosen varnish finish, whether it’s matte or gloss. Follow the instructions on the varnish can to ensure proper application.

