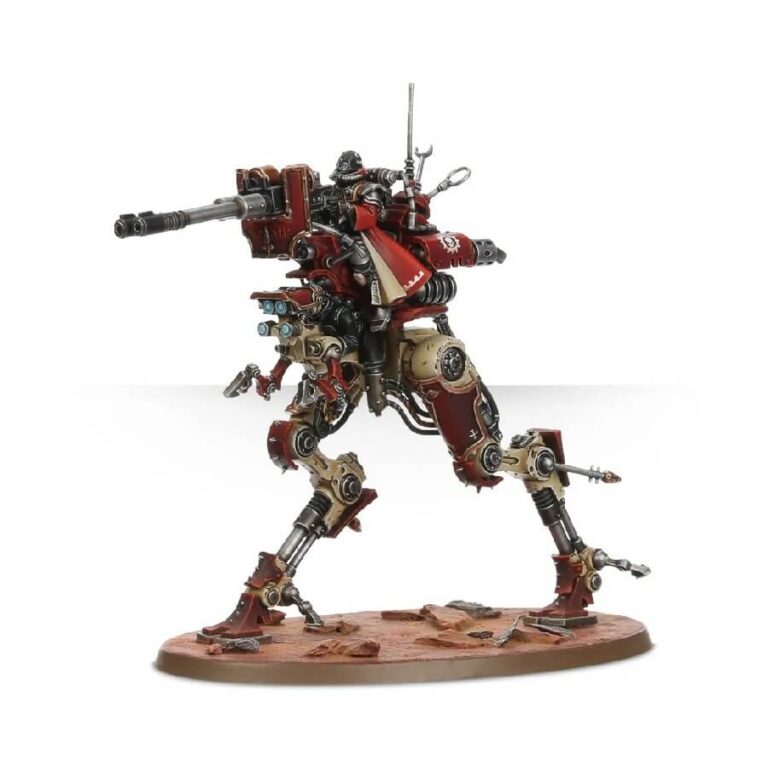
The Adeptus Mechanicus Ironstrider Ballistarius is a formidable artillery platform, boasting a unique and intimidating two-legged walking tank design. With its gyroscopic balance and advanced downlinks, it possesses unparalleled knowledge of its enemies, resulting in deadly accuracy on the battlefield.
The Ironstrider Ballistarius offers versatility through its choice of armament. It can be equipped with either a twin-linked cognis autocannon for rapid-fire devastation or a twin-linked cognis lascannon for precise, long-range strikes. The split-toed legs provide flexibility in posing, with adjustable suspensors that allow for dynamic angles. Every surface of the machine bristles with sensors, data collection modules, and antennae, ensuring comprehensive situational awareness.
To add further customization, the gunner of the Ironstrider Ballistarius has four head options, including three hooded variants and one with a rebreather. This attention to detail allows hobbyists to personalize their model and bring it to life with their preferred aesthetic.
Witnessing the Ironstrider Ballistarius on the battlefield is an awe-inspiring experience, as its lethal firepower and advanced technology strike fear into the hearts of its adversaries. The legends of its unerring accuracy and devastating impact will forever be etched in the minds of those fortunate enough to survive encounters with this mighty war machine.
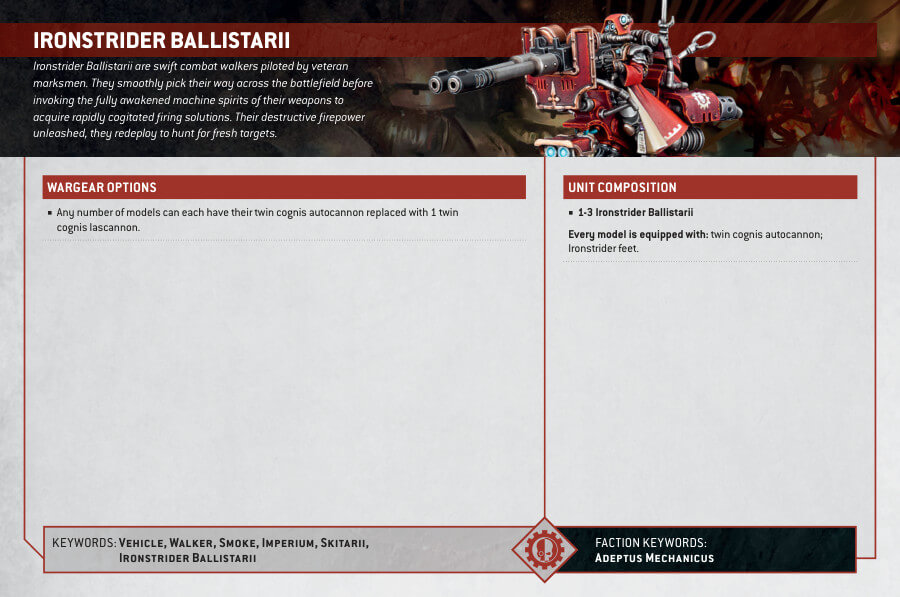
Ironstrider Ballistarius Datasheets
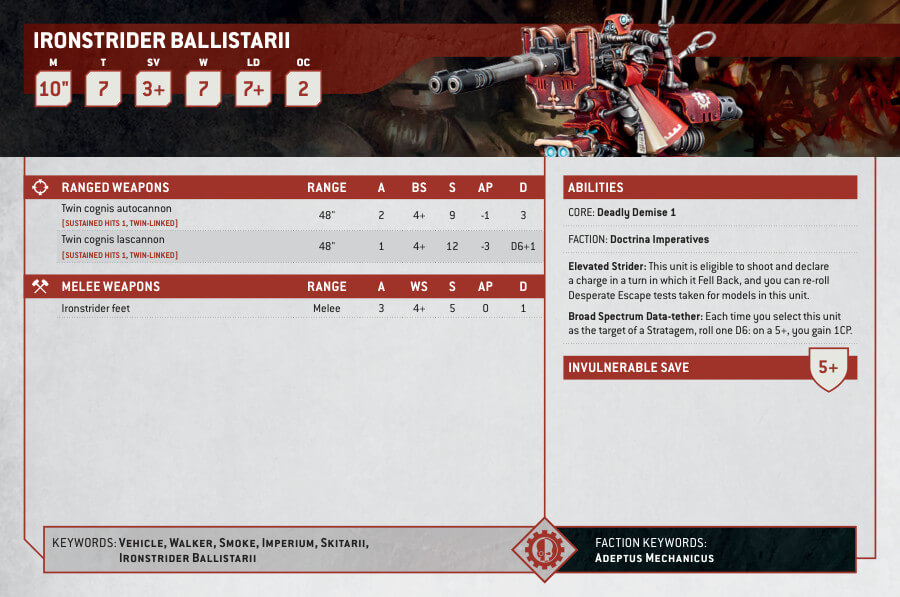
What’s in the Adeptus Mechanicus Ironstrider Ballistarius box
- x80 component plastic kit: This comprehensive kit provides all the necessary components to assemble either an Ironstrider Ballistarius or a Sydonian Dragoon. It offers a wide range of customization options and allows players to choose their preferred configuration for the model.
- x1 Small transfer sheet: The kit includes a small transfer sheet, which features various symbols and markings that can be applied to the model for added detail and personalization. These transfers allow players to enhance the visual appeal of their Ironstrider Ballistarius or Sydonian Dragoon.
- x1 105x70mm oval base: a stable and fitting platform for the assembled model. The base is designed to match the size and proportions of the Ironstrider Ballistarius or Sydonian Dragoon, ensuring a balanced and visually appealing presentation.
How to paint the Adeptus Mechanicus Ironstrider Ballistarius
- Step 1: Prime the Model
Before you start painting, apply a suitable primer to the miniature. This will create a smooth surface for the paint to adhere to and ensure better color coverage. For example, you can use a grey or black primer. - Step 2: Base Coat
Start by applying a base coat to the different areas of the model. Use a brush or airbrush to carefully cover the armor plates, mechanical parts, and weapons. For the red armor, you can use a vibrant color like Mephiston Red. For the metal parts, a metallic shade such as Leadbelcher works well. - Step 3: Detailing the Armor
Next, focus on the smaller details of the armor. Use a smaller brush to pick out the edges, rivets, and other intricate parts with a lighter shade, like Evil Sunz Scarlet, to create highlights. This will add depth and definition to the model. - Step 4: Metallic Accents
Paint the metallic accents on the Ironstrider Ballistarius, such as pipes, cables, and joints. Use a brush to apply a layer of Runelord Brass or a similar color to these areas. Be careful to avoid touching the surrounding areas while painting the fine details. - Step 5: Weathering and Effects
To give the model a weathered and battle-worn appearance, consider adding some weathering effects. You can use a drybrush technique with a lighter shade of brown, like XV-88, to create scratches and wear on the edges of the armor. Additionally, you can use a wash, such as Agrax Earthshade, to add depth and shading to recessed areas. - Step 6: Weapons and Details
Paint the weapons of the Ironstrider Ballistarius, such as the twin-linked cognis autocannon or the twin-linked cognis lascannon, using appropriate colors. For example, you can use a dark metallic shade for the weapon barrels, such as Ironbreaker. Paint any additional details, such as screens, buttons, or lenses, with contrasting colors to make them stand out. - Step 7: Basing
Finish off the model by working on the base. Apply texture paint or modeling paste to create a realistic ground texture. Paint the base with suitable colors to match your desired theme, such as a combination of browns and grays for an industrial look. Add additional details like static grass or small rocks for extra realism. - Step 8: Varnish and Seal
Once you are satisfied with the paint job, apply a protective varnish or sealant to the model. This will protect the paint from chipping and give it a smooth, finished appearance. Matte, satin, or gloss varnishes are popular options depending on your preference.

