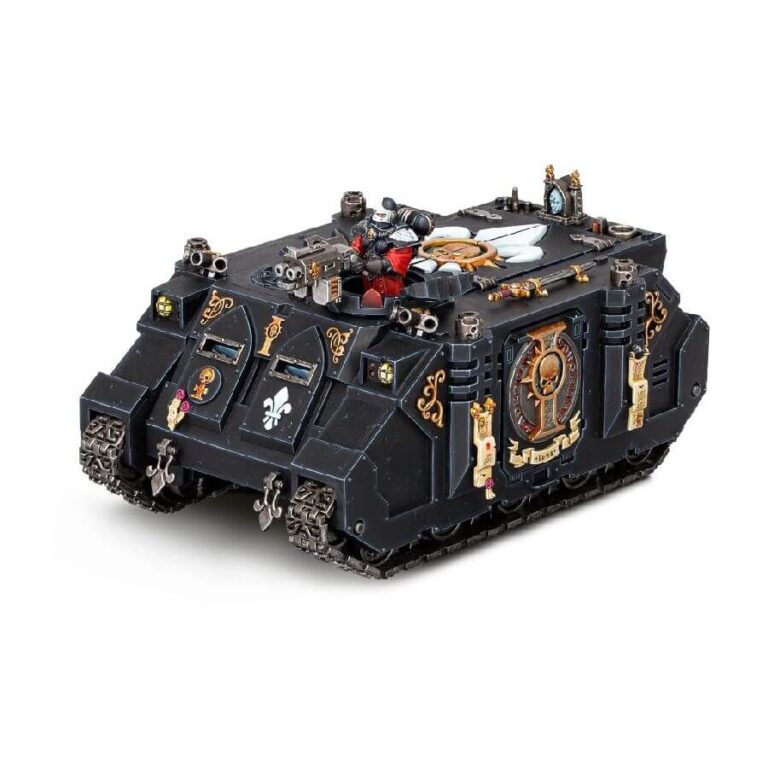
The Rhino, an armored personnel carrier, has stood as a steadfast presence within the Imperial military forces since the earliest days of the Great Crusade. Crafted from the reliable Standard Template Construct, Rhinos possess exceptional durability, sturdiness, and user-friendliness. The Rhinos utilized by the Militant Orders are adorned with awe-inspiring filigree and sacred icons, meticulously applied and maintained by skilled artisans. These embellishments pay homage to the machine spirit of each Rhino, revering its vital role as a conduit for the Emperor’s divine judgment.
This comprehensive kit offers a plethora of optional additions, including an intricately detailed glacis plate, elegantly arched viewing ports, and a formidable hunter-killer missile. Furthermore, it boasts a fully-detailed interior, complete with a communications array and a boltgun resting on an arming rack. Additionally, an optional Sororitas driver/gunner configuration further enhances the versatility of this remarkable vehicle.
With its timeless design and richly decorated aesthetics, the Rhino embodies both functionality and grandeur, serving as a testament to the indomitable spirit of the Adepta Sororitas and their unwavering dedication to the Emperor’s cause.
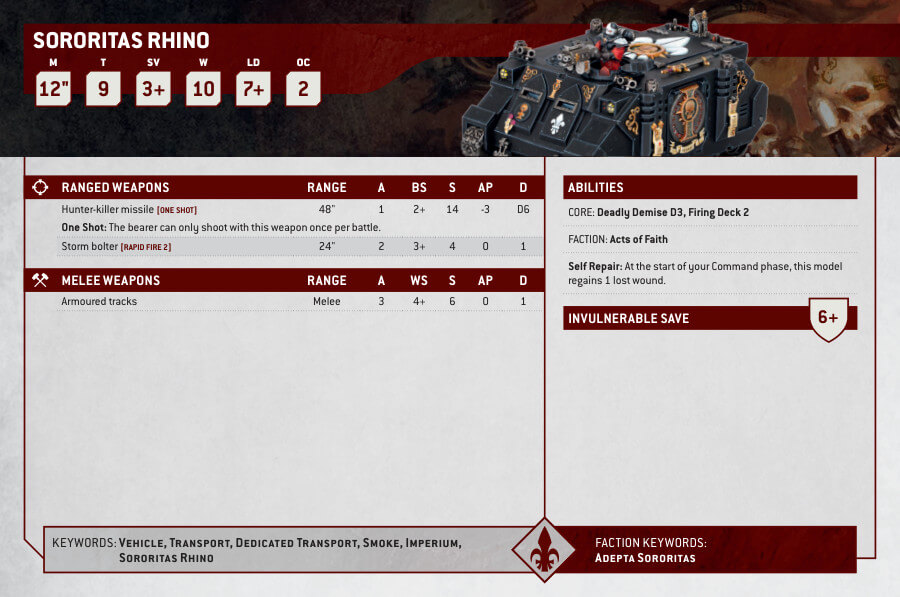
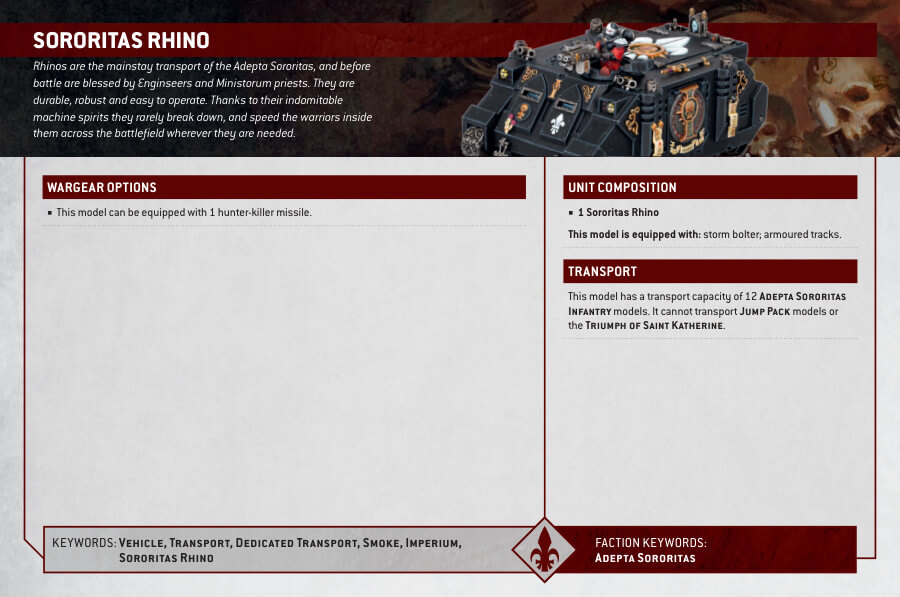
Adepta Sororitas Rhino Datasheets
What’s in the Adepta Sororitas Rhino box
- x103 plastic components.
- x1 Adepta Sororitas Transfer Sheet is also included.
How to paint the Adepta Sororitas Rhino Set
- Step 1: Gather your painting supplies, including Adepta Sororitas Rhino miniature, paintbrushes (small and medium-sized), acrylic paints (such as Citadel Color paints), palette or small dish for mixing paints, water container, and paper towels or cloth for cleaning brushes.
- Step 2: Prepare your work area by finding a well-lit and well-ventilated space. Lay down a protective surface, such as newspaper or a drop cloth, to avoid any paint spills or stains.
- Step 3: Prime the miniature by shaking the primer can well and applying a thin, even coat to the Adepta Sororitas Rhino. Choose a suitable primer color for your desired final look.
- Step 4: Apply the base colors to different areas of the miniature. For example, use Celestra Grey for the body, Leadbelcher for the metallic parts, and Mephiston Red for any red details. Ensure smooth and even coverage.
- Step 5: Create depth and highlights by layering lighter or darker shades onto specific areas. For instance, use Administratum Grey to highlight the edges of the body panels or Ironbreaker to add highlights to the metallic parts.
- Step 6: Apply a wash, such as Nuln Oil, to recessed areas and crevices of the miniature. This will enhance the shadows and details, giving the Rhino a more realistic appearance.
- Step 7: Use a fine brush to paint smaller details like the insignias and icons. Choose appropriate colors, such as Retributor Armor for gold accents or Evil Sunz Scarlet for the red details. Take your time and apply the paint with precision.
- Step 8: Finish the miniature by painting the base. Apply texture paint or glue sand onto the base and paint it accordingly. You can also add additional scenic elements like grass tufts or rocks to enhance the overall look.

