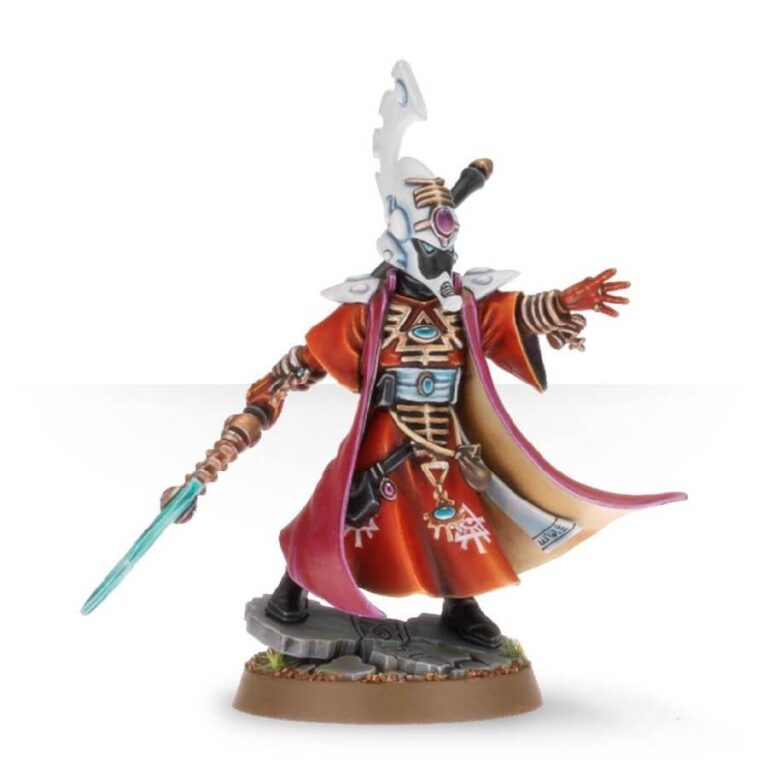
Farseers, the esteemed masters of prediction, possess a captivating mystique as the farsighted advisors of their craftworld. Their unwavering presence on the battlefield allows them to harness their divinatory powers, skillfully casting the intricate wraithbone runes of the Aeldari into the air. With an astute perception, they interpret the dynamic dance of the glowing icons orbiting around them, offering indispensable insights and guidance amidst the tumultuous chaos of war.
What’s in the Farseer box
- x10 plastic components that make 1 Aeldari Farseer armed with a Singing Spear.
- x1 Citadel 25mm Round Base
How to paint the Farseer set
- Step 1: Base Coat
Begin by applying a base coat of a vibrant, rich color like Mephiston Red to the robe and armor of the Farseer. This will serve as the foundation for the color scheme. - Step 2: Details
Use a fine brush to paint the intricate details of the model, such as the runes, gems, and staff. For example, you can use colors like Averland Sunset for the gems and Runefang Steel for the staff. - Step 3: Robe Highlights
Apply a lighter shade, such as Evil Sunz Scarlet, to the raised areas of the robe to create highlights and depth. This will make the robe appear more dynamic and visually interesting. - Step 4: Armor Highlights
Using a lighter shade, like Administratum Grey, carefully highlight the edges and prominent areas of the armor. This will add dimension to the model and make the armor stand out. - Step 5: Face and Skin
Paint the face and exposed skin areas with a flesh tone like Cadian Fleshtone or Eldar Flesh. Take your time to ensure smooth and even coverage. You can also paint them with a dark color, like Abaddon Black, if you want to make him look more menacing. - Step 6: Eyes and Runes
Use a fine brush to paint the eyes with a bright color like Moot Green. For the runes, you can use colors like White Scar or Pallid Wych Flesh. Take your time and use a steady hand to paint these intricate details. - Step 7: Base
Paint the base using appropriate colors for your desired environment. For example, you can use Stirland Mud for a realistic earthy look or Astrogranite Texture for a more rocky texture. Add additional details like grass tufts or rocks if desired. - Step 8: Wash
Apply a wash, such as Nuln Oil or Agrax Earthshade, to the entire model to add depth and shading. This will bring out the details and give the model a more realistic appearance. Be sure to remove any excess wash to maintain clarity. - Step 9: Final Touches
Add any additional details like freehand designs, weathering effects, or highlighting certain areas to further enhance the model’s appearance. You can use techniques like drybrushing or edge highlighting to make certain elements pop. - Step 10: Varnish
Finish by applying a protective varnish to seal and protect your paintwork. Choose a matte, satin, or glossy varnish according to your preference, keeping in mind the desired finish for your model.

