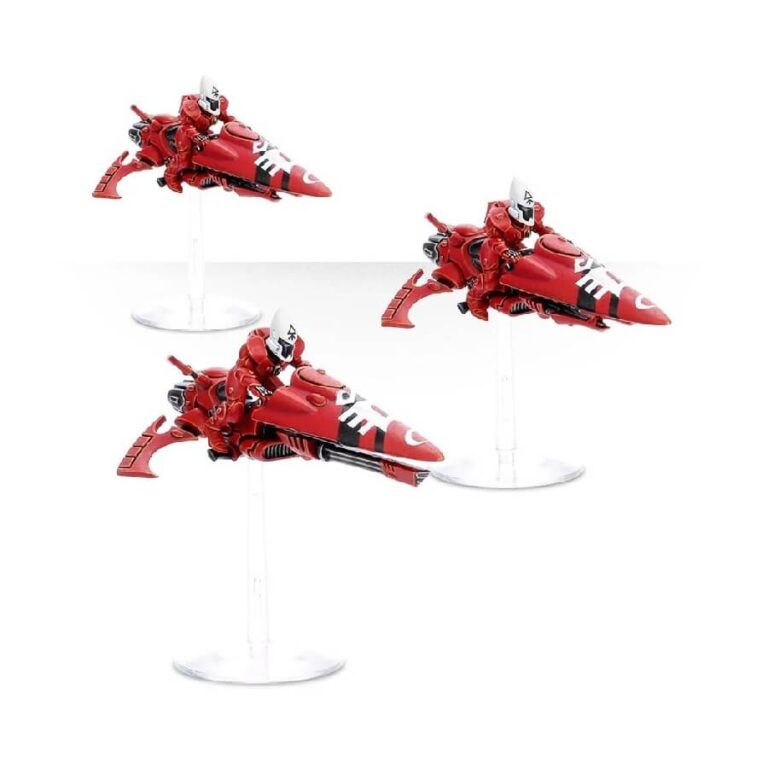
This versatile kit provides you with all the components needed to assemble three Aeldari Windriders. The jetbikes feature sleek designs with intricate sensor details, and the kit includes the option to add an elevated Heads-Up Display (HUD) for enhanced targeting capabilities. The shuriken catapults can be upgraded to either a shuriken cannon or scatter laser, providing a total of nine weapon options. Additionally, the kit includes three new guardian helmets, adding variety and customization to your models.
Also available in this box:
What’s in the Windriders box
- x72 plastic components that make 3 Aeldari Windriders.
- x3 Citadel 32mm flying bases
- x1 Aeldari transfer sheet
How to paint the Windriders set
- Step 1: Base Coat
Apply a solid base coat of black paint to the Windrider’s hull. Use a black paint like Abaddon Black or any other black paint you prefer. Ensure even coverage and let it dry completely. - Step 2: Craftworld Colors
Choose the color scheme for your Craftworld and paint the respective details. For example, if your Craftworld is Ulthwé, paint the helmet and shoulder pad trims with a black paint, like Corvus Black. If your Craftworld is Saim-Hann, paint these details with red, using a red paint like Mephiston Red or any other red paint you prefer. - Step 3: Detailing
Using a fine brush, carefully paint the gems and runes on the Windrider using vibrant colors. For example, use Spiritstone Red or a similar color for the gems, and use Runefang Steel for the runes. Apply these colors carefully to achieve clean lines and precise details. - Step 4: Detailing
Paint the rider’s armor and weapons using appropriate colors. For example, you can use colors like Rhinox Hide or XV-88 for brown leathers, or Balthasar Gold for metallic parts. Apply these colors carefully to ensure well-defined details. - Step 5: Highlighting
Create highlights on the black hull by adding a lighter shade. Mix a small amount of Dark Reaper with the black base coat to create a slightly lighter shade. Apply this mixture to the raised edges and contours of the hull, emphasizing the shape and adding dimension. - Step 6: Wash
For added depth and shading, consider applying a wash to the Windrider. Use a wash like Nuln Oil or a wash color that complements your chosen color scheme. Apply the wash selectively to recessed areas and panel lines, and wipe off any excess wash with a clean brush or cloth. - Step 7: Fine Details
Add any additional fine details you desire, such as symbols or freehand designs on the model, using contrasting colors. Consider using a bright yellow or white for striking visual impact. Apply these colors carefully and take your time to achieve clean and precise lines. - Step 8: Varnish
To protect your hard work and give the Windrider a finished look, apply a varnish. Choose a matte varnish to maintain the sleek appearance of the model. Follow the instructions on the varnish product for proper application.

