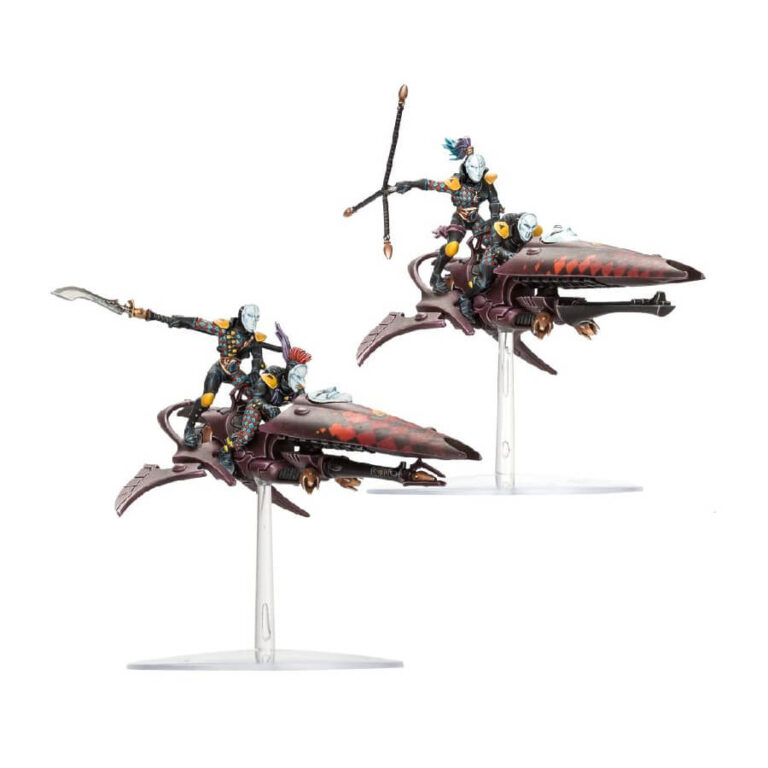
Skyweavers are the epitome of speed and firepower, swiftly maneuvering through the battlefield to annihilate their enemies with devastating shuriken fire and electromagnetic energy. This kit provides all the components needed to assemble 2 Aeldari Harlequin Skyweavers, featuring a pilot and pillion rider each. Armed with a shuriken cannon and mirage launcher, the shuriken cannon can be exchanged for a haywire cannon for added versatility. The pillion riders have the option of wielding star bolas or a zephyrglaive, while the kit offers a variety of unique masks for the pilots and pillion riders, including one fully masked head. For additional customization, there are four mask designs that can be positioned either flat on the bonnet or raised to reveal targeting equipment underneath.
What’s in the Skyweavers box
- x84 plastic components you can use to make 2 Harlequin Skyweavers.
- x2 Citadel 60mm flying bases
- x1 Harlequins transfer sheet.
How to paint the Skyweavers set
- Step 1: Prime the Model
Apply a thin and even coat of Chaos Black spray primer to the Skyweaver model. This provides a solid base for the paint to adhere to and enhances the vibrancy of the colors. - Step 2: Basecoat the Body
Start by applying a basecoat of Naggaroth Night to the body of the Skyweaver. Apply multiple thin coats for smooth and even coverage. - Step 3: Paint the Details
Focus on painting the various details on the Skyweaver using different paints. Use Evil Sunz Scarlet for accentuating certain areas like the front, Aeldari Emerald for the checker board pattern on the armor of the Harlequins and Lothern Blue for additional highlights or smaller details. - Step 4: Shade the Model
Apply shade selectively to the model using Druchii Violet to add depth and definition. Apply the shade to recessed areas, crevices, and other areas where shadows would naturally occur. - Step 5: Highlight the Model
To bring out the details and create contrast, highlight the model with lighter shades of the base colors. Use Xereus Purple for highlighting the raised areas and edges of the body and Alaitoc Blue for additional highlights on smaller details. - Step 6: Paint the Cockpit
Focus on painting the cockpit area using a combination of paints. Use Abaddon Black to emphasize the interior details, Mephiston Red for small accents, and Sotek Green to highlight specific buttons or controls within the cockpit. - Step 7: Final Touches
Add any additional details or highlights using Retributor Armor for small decorative elements or edging. Clean up any mistakes or smudges using a fine brush and the base color you used. - Step 8: Varnish the Model
Protect your finished Skyweaver by applying a coat of varnish. Apply the varnish evenly, following the manufacturer’s instructions, to protect the paint job and add durability to the model.

