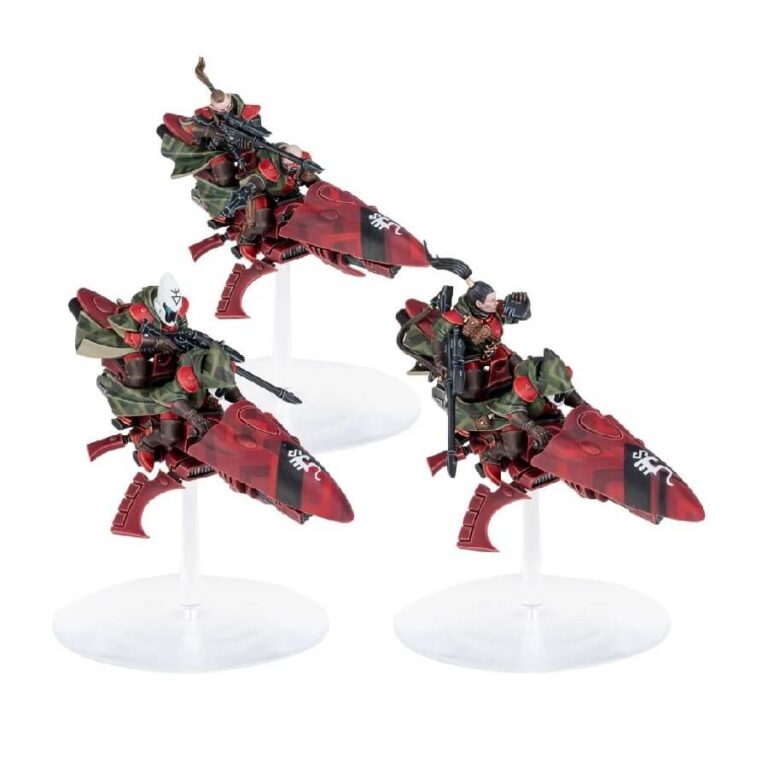
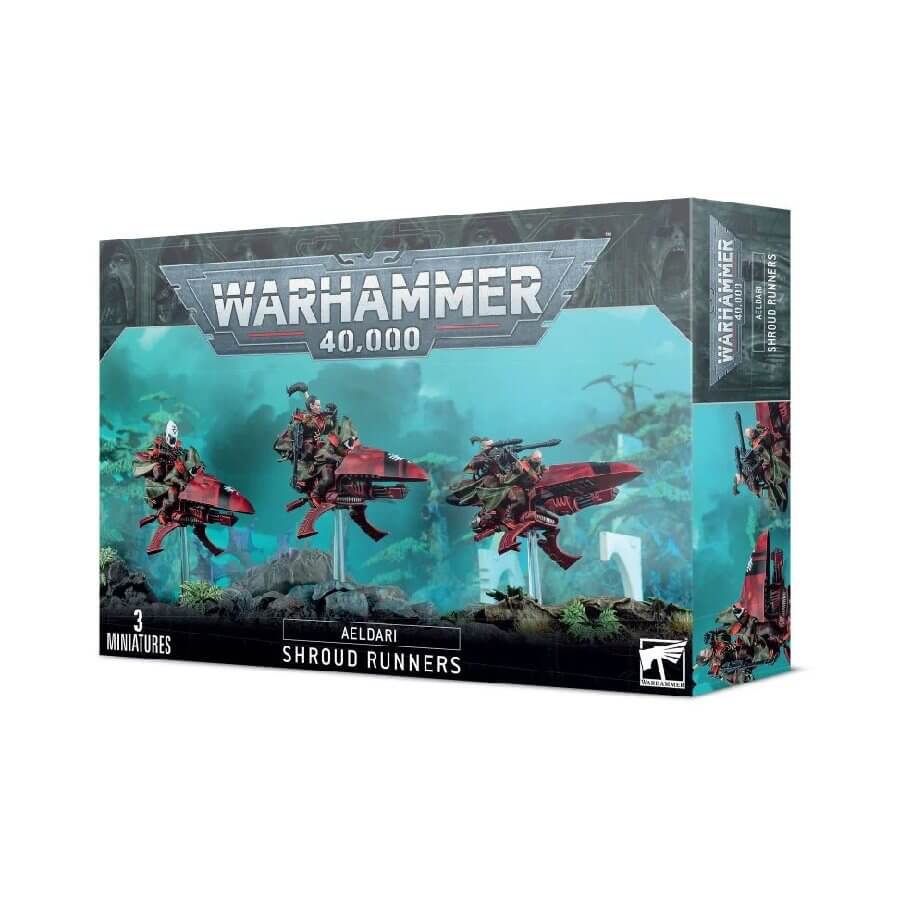
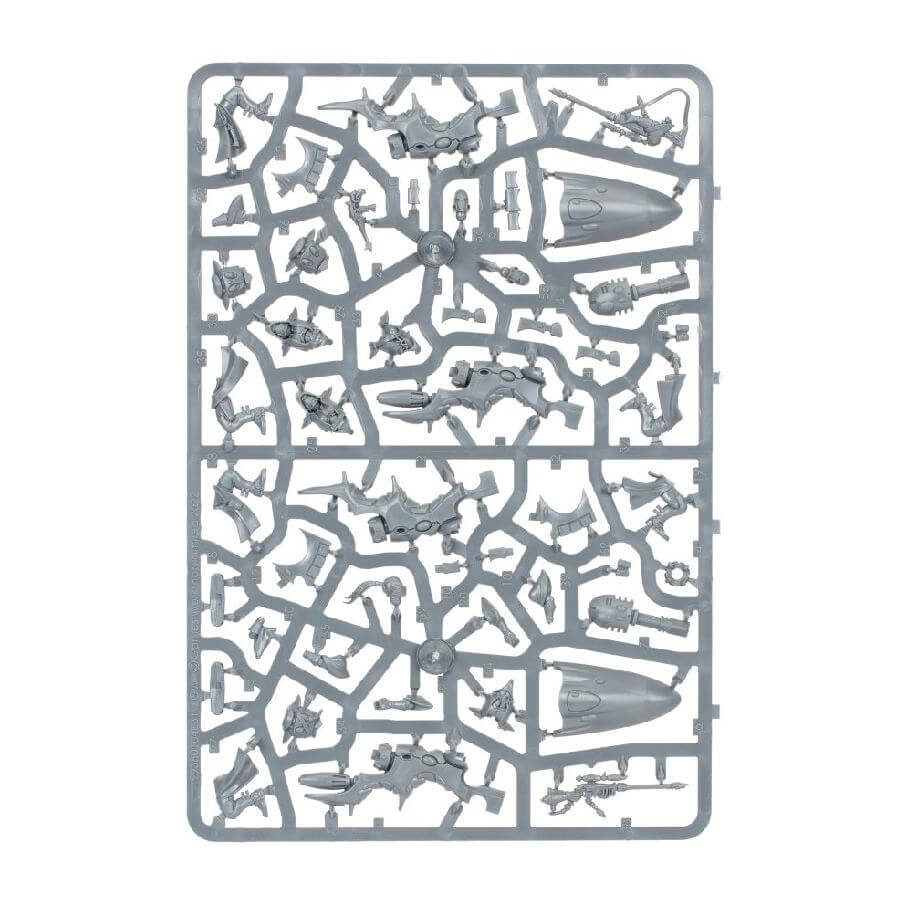
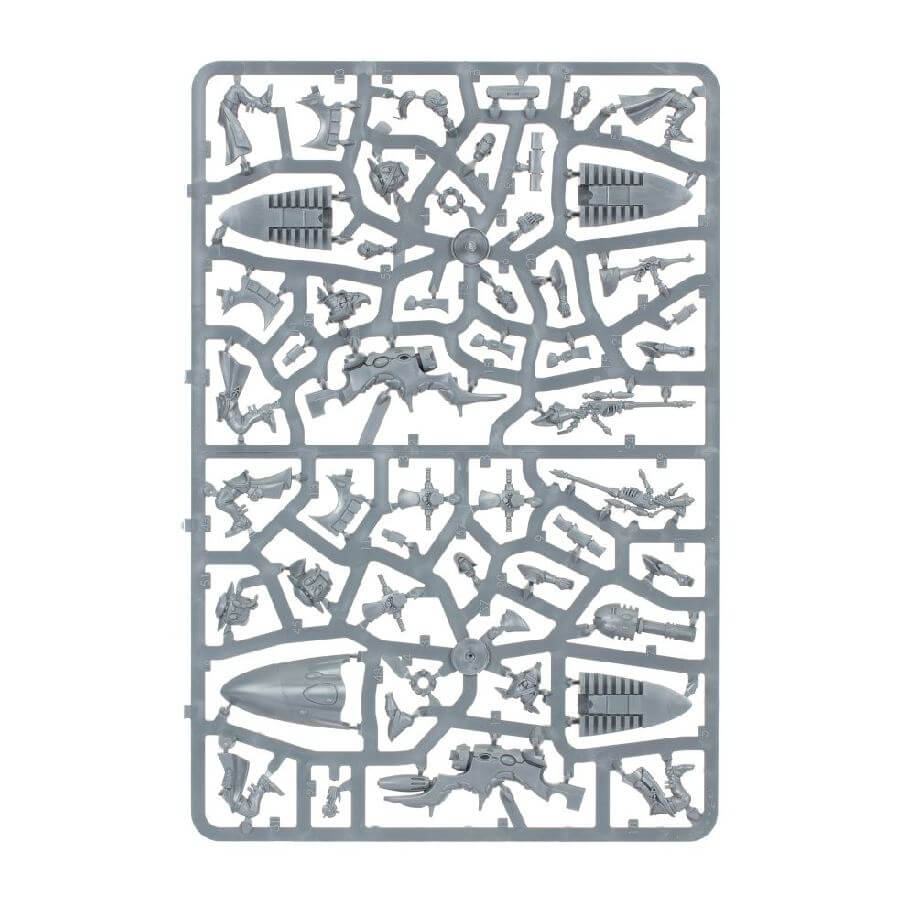
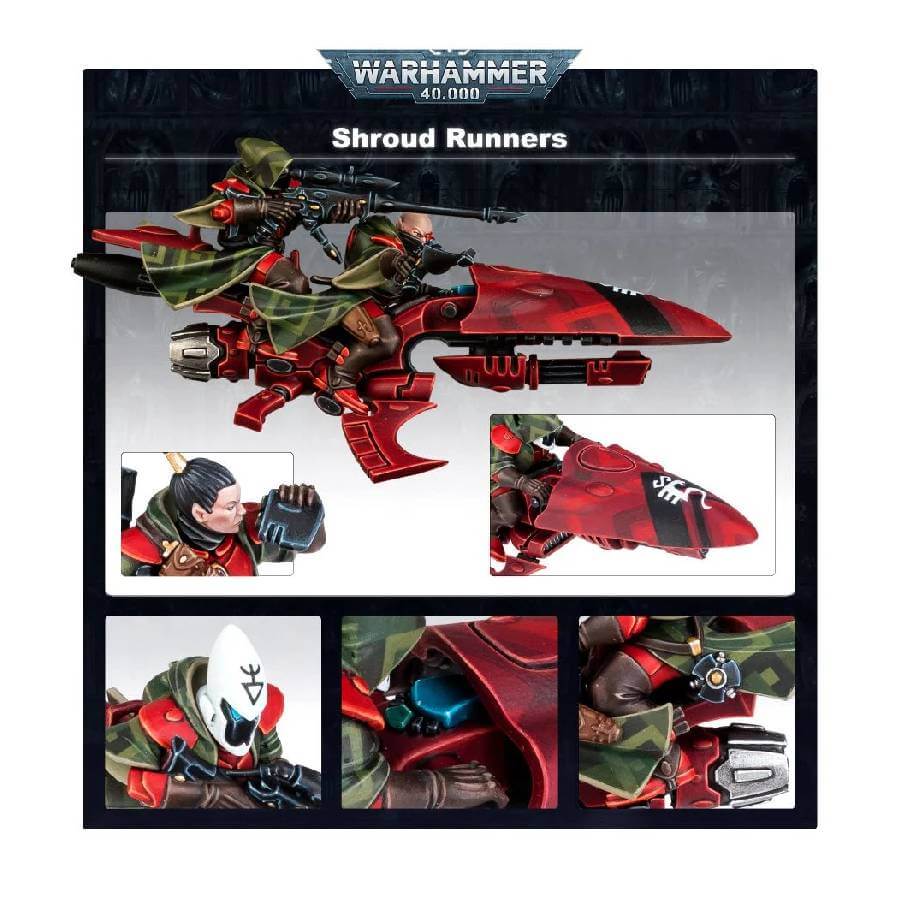
The Shroud Runners, swift and elusive scouts, bring unparalleled speed and precision to the battlefield. Mounted on jetbikes, these Aeldari Rangers expertly outmaneuver their foes while unleashing deadly sniper fire. This kit allows you to assemble three Shroud Runners, armed with Ranger long rifles and scatter lasers, offering versatile posing options for both riders and pilots. With a selection of helmeted and unhelmeted heads, you can customize your models to match your vision of these stealthy warriors.
What’s in the Shroud Runners box
- x100 plastic components that make 3 Shroud Runners.
- x3 Citadel 60mm Flying Bases
- x1 Aeldari Transfer Sheet which includes 369x decals
How to paint the Shroud Runners set
- Step 1: Prime the Models
Apply a white primer, such as White Scar spray, to ensure a smooth and even base for painting. - Step 2: Basecoat the Armor and Jet Bikes
Paint the armor of the riders with a dark green color, like Caliban Green. Apply thin layers to build up the color gradually. For the jet bikes, use a red color, such as Evil Sunz Scarlet, and paint the entire surface. - Step 3: Add Camouflage Patterns
Using a thin brush, paint black camo patterns on the armor of the riders and jet bikes. Create irregular shapes and lines to mimic the appearance of camouflaged patterns. Be patient and take your time for precise detailing. - Step 4: Paint the Red and White Elements
Add red elements to the armor and jet bikes using a bright red color, like Wild Rider Red. Focus on small details, such as stripes, markings, or insignias. For the white headgear of the riders, use a white paint, such as White Scar, to achieve a clean and crisp look. - Step 5: Highlight and Shade
Apply highlights to the green armor and red elements using a lighter shade of the base colors, mixed with a little white. This will add depth and dimension to the models. Use a darker shade of green, like Castellan Green, for shading the recesses of the armor. - Step 6: Paint Exposed Skin
For the riders without helmets, paint the exposed skin using a flesh tone, such as Kislev Flesh. Apply thin layers to achieve a natural look and use a wash, like Reikland Fleshshade, to enhance the shadows and add depth. - Step 7: Add Blue Details
Paint small blue details, such as gemstones or small markings, using a vibrant blue color like Alaitoc Blue. These details will provide visual interest and contrast to the models. - Step 8: Varnish for Protection
Once the paint is completely dry, apply a protective varnish to seal the models and protect the paint job. This will ensure their longevity and durability.