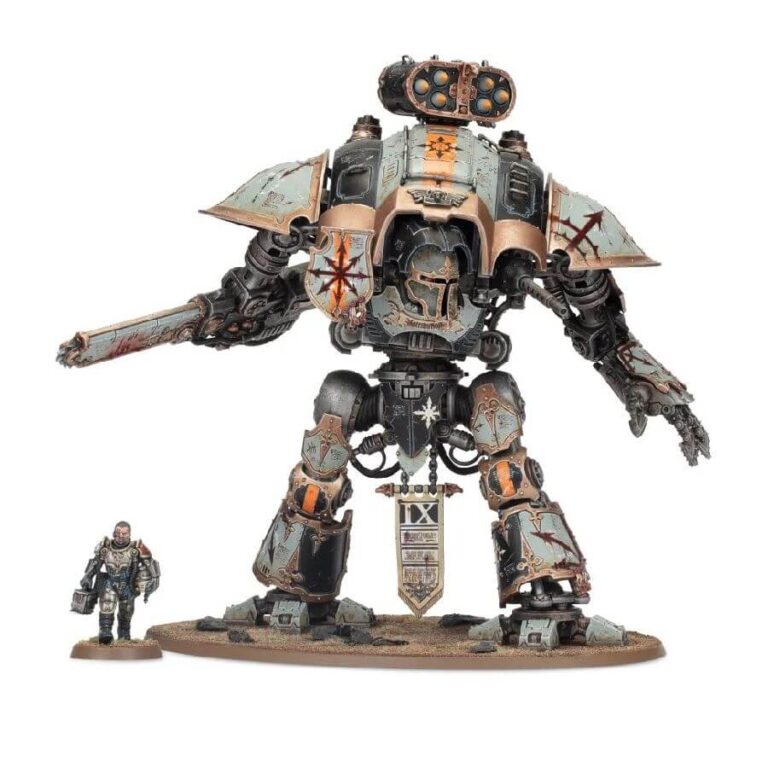
The Knights Despoiler personify the essence of Chaos Knights, with their Fallen Nobles rejecting honor and seething with hatred, while offering a wide range of powerful weapon options tailored to each pilot’s disposition. As a multi-part plastic kit, it enables you to construct a Knight Despoiler, a formidable and adaptable choice for your Chaos Knights armies, or a Dreadblade mercenary for other Chaos factions. This imposing walker excels in both long-range and close-quarters combat, with weapon choices including thermal cannons, missile pods, a reaper chainsword, and a warpstrike claw, accompanied by the ability to summon allied War Dogs into battle. Embarking on a painting project with the Knight Despoiler is truly rewarding, thanks to its extensive customization options and intricately detailed components that allow you to craft a truly distinctive war machine. Furthermore, this kit can also be assembled as a Questoris-class Imperial Knight, fully compatible with components from those sets, providing additional spare weapons, faceplates, and accessories for your other Knight kits.
What’s in the Knight Despoiler box
- x250 plastic components that make this impressive Knight Despoiler model and it’s pilot.
- x1 Citadel 170mm Oval Base
- x1 Citadel 25mm Round Base
- x1 transfer sheet featuring Knightly heraldry, ripe for corruption.
How to paint the Knight Despoiler set
- Step 1: Basecoat the model’s armor in a color of your choice, such as a deep metallic bronze or silver. For example, you can use a bronze paint like Balthasar Gold or a silver paint like Leadbelcher.
- Step 2: Paint the trim details on the armor, such as the edges and decorative elements, using a contrasting color. This could be a bright metallic like Gehenna’s Gold or Ironbreaker.
- Step 3: Apply a wash to the armor to add depth and shading. Use a wash like Agrax Earthshade for a darker, weathered look or Nuln Oil for a more defined contrast.
- Step 4: Paint the Knight Despoiler’s weapons in colors that suit your preference and the theme of your army. For example, you could paint a thermal cannon with a fiery effect using a combination of reds, oranges, and yellows.
- Step 5: Paint any additional details on the model, such as cables, pistons, or decorative elements, using appropriate colors. For instance, you can paint cables in a mechanical color like Mechanicus Standard Grey or a vibrant color like Mephiston Red for a more chaotic appearance.
- Step 6: Highlight the edges of the armor and other raised areas to add definition and make the model pop. Use a lighter shade of the base color, such as Sycorax Bronze for bronze armor or Ironbreaker for silver armor.
- Step 7: Apply weathering effects to the Knight Despoiler to give it a battle-worn appearance. This could include dry brushing with a lighter color to simulate wear and tear, or adding rust or corrosion effects using paints like Ryza Rust or Typhus Corrosion.
- Step 8: Paint the model’s base in a suitable color or texture to match your overall army theme. You can use materials like textured paint or flock for a natural terrain effect or incorporate thematic elements like skulls or debris.
- Step 9: Apply a protective varnish to seal and protect your paintwork. This will ensure that your Knight Despoiler stays vibrant and protected during gaming sessions and display.

