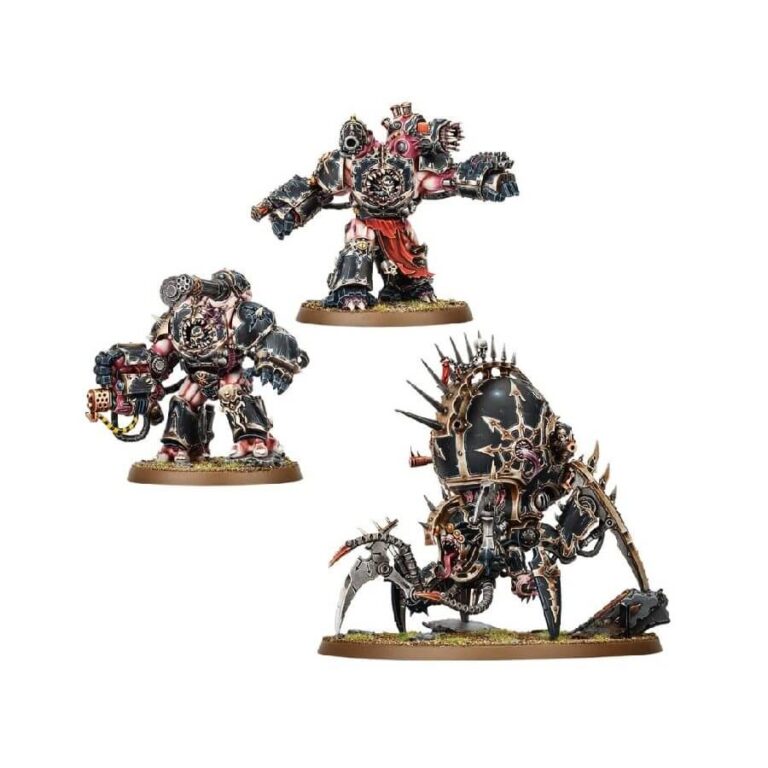
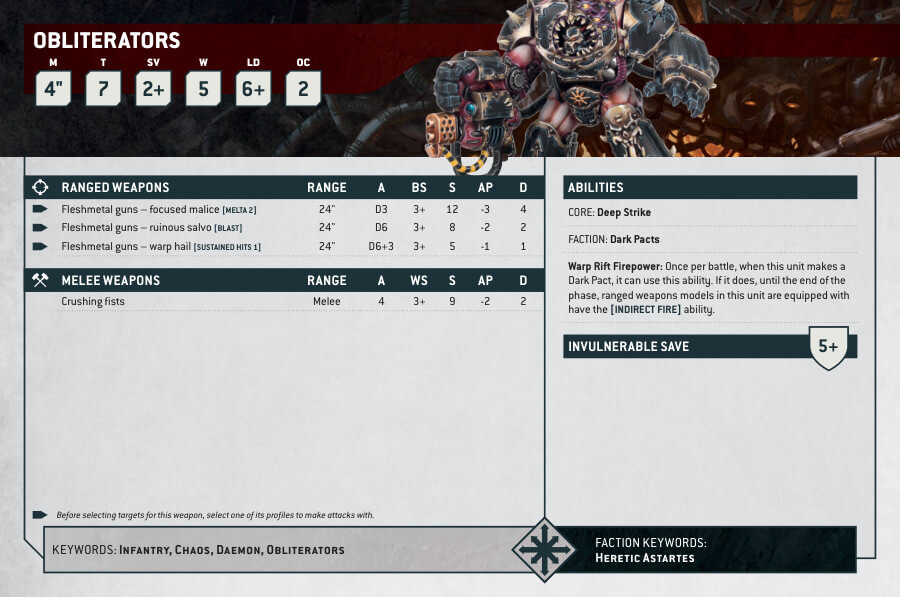
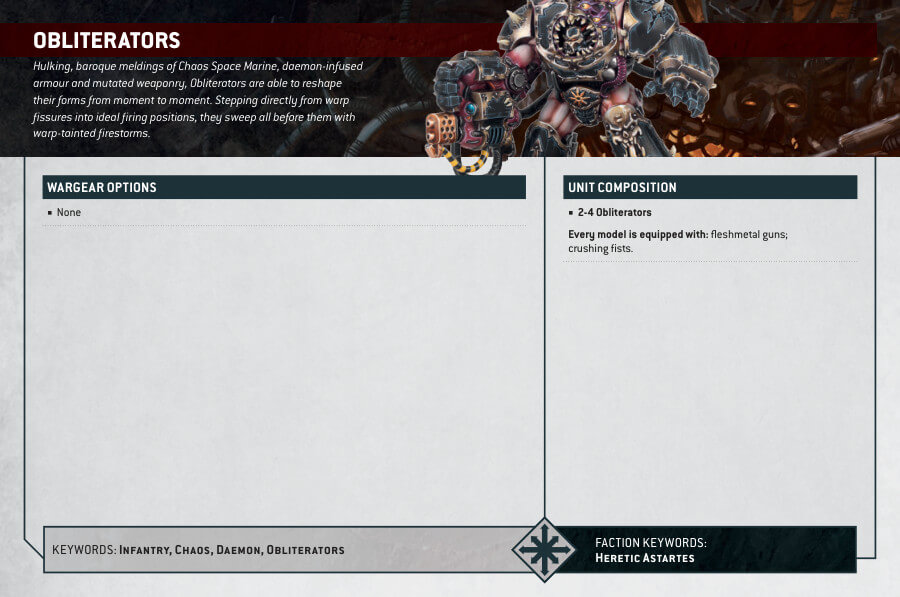
Prepare to witness the awe-inspiring might of Obliterators, towering behemoths that seamlessly meld Chaos Space Marine and daemon-infused weaponry into a grotesque symphony of destruction. These formidable beings possess the uncanny ability to reshape their living armory in an instant, adapting to the ever-changing demands of the battlefield. Emerging directly from warp fissures, they take up ideal firing positions and unleash devastating barrages of flame, metal, and warp-tainted energy upon their hapless foes.
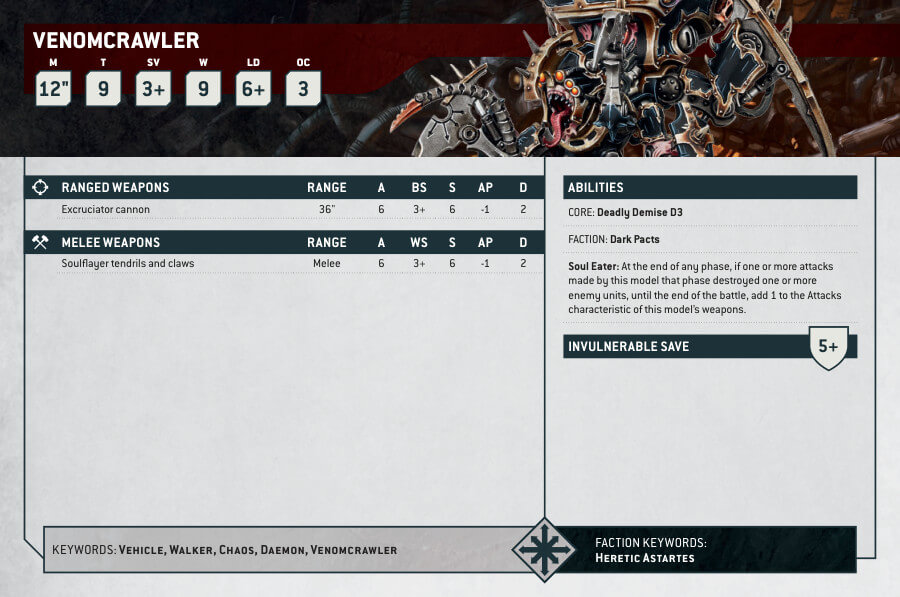
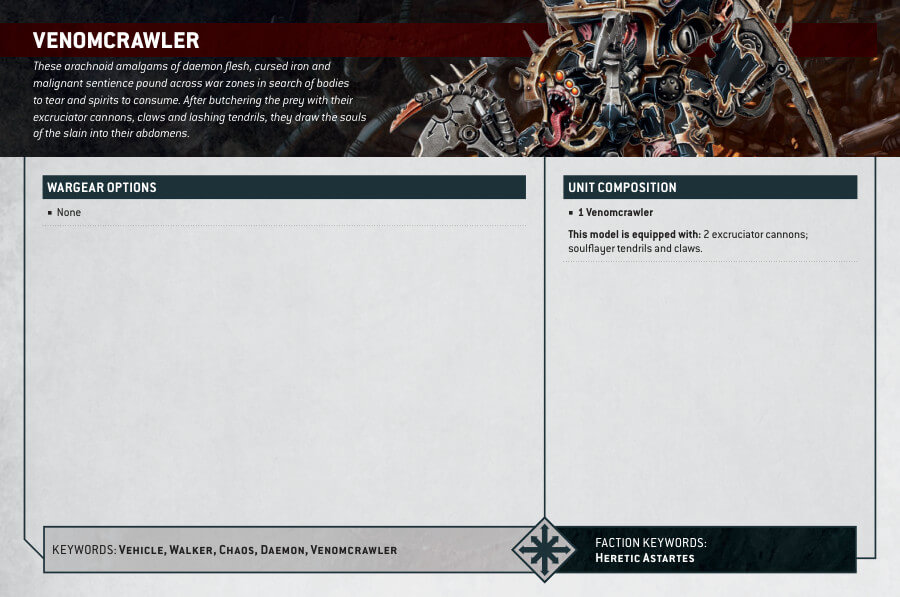
In contrast, Venomcrawlers manifest as eerie arachnid-like amalgamations of daemonic flesh and cursed iron, propelled by a malignant sentience that compels them to scuttle relentlessly across war-torn zones. Driven by an insatiable hunger, they seek out bodies to rend asunder and spirits to consume. Armed with excruciator cannons, claws, and lashing tendrils, they methodically butcher their prey before drawing the souls of the fallen into their ravenous abdomens.
Immerse yourself in the realm of nightmarish warfare with this extraordinary multipart plastic kit. Within its contents, you will find the means to construct not only a Venomcrawler, an abhorrent creation boasting gruesome insectoid features, abdomen-mounted excruciator cannons, soulflayer tendrils, and six menacingly clawed legs, but also two Obliterators. Each Obliterator possesses a distinctive appearance and pose, their warped armor and exposed mutant hides bulging with an assortment of fleshmetal guns. These warpforged biomechanical monstrosities stand ready to unleash a barrage of hellish firepower upon any who dare to challenge their dominance.
Also available in this box set:
Venomcrawler and Obliterators Datasheets
Venomcrawler
Obliterators
What’s in the Warpforged: Venomcrawler and Obliterators box
- x49 plastic components that make 2 Obliterators and 1 Venomcrawler.
- x2 Citadel 50mm Round Bases
- x1 100mm Round Base
How to paint the Warpforged: Venomcrawler and Obliterators set
- Step 1: Basecoat
Using a medium-sized brush, apply a basecoat of a suitable color like Leadbelcher or other metallic paint to the metallic areas of the models, such as the weapons and armor. - Step 2: Base Colors
Choose the appropriate colors for different sections of the models. For the Venomcrawler, consider using colors like Mephiston Red or other suitable red shades for the fleshy parts, and use colors like Abaddon Black or other dark tones for the mechanical elements. For the Obliterators, select colors for the armor and exposed mutant hides, such as Death Guard Green or similar greens, and choose complementary colors for the fleshmetal guns. - Step 3: Detailing
Use a smaller brush to add fine details to the models. Paint the eyes, teeth, and other small features using colors like Averland Sunset or other suitable tones. Apply additional colors to distinct areas, such as bone details or lenses, to add variety and make them stand out. For example, you can paint lenses with colors like Caliban Green or other vibrant hues. - Step 4: Washes
Apply washes to the models to enhance depth and create shadows. Use a wash like Nuln Oil or other suitable shades for the metallic areas, and consider using Agrax Earthshade or other appropriate washes for the fleshy parts and exposed mutant hides. - Step 5: Highlights and Drybrushing
Using a lighter shade of the base colors or a mix with white, carefully highlight the edges and raised areas of the models. This step adds dimension and brings out the details. Additionally, use a drybrush technique with a light color to lightly dust certain areas, like the mechanical elements or the flesh, for added texture and a weathered appearance. - Step 6: Fine Details
Focus on painting smaller details such as lenses, teeth, or symbols. Use contrasting colors to make them stand out, like painting lenses with a bright color or using a suitable color for the teeth or symbols. Take your time and be patient with these intricate details. - Step 7: Warp Effects (Optional)
For a more otherworldly appearance, you can add warp effects to certain areas. Use suitable colors like Pink Horror or other appropriate hues to create a warp-tainted look. Apply these colors sparingly to give a subtle hint of the chaotic energies. - Step 8: Bases
Paint the bases using colors that match your preferred theme, such as a desolate battlefield or a corrupted, daemonic ground. Consider using texture paints, drybrushing, or adding additional details like rocks or debris to enhance the overall look. - Step 9: Varnish (Optional)
To protect your painted models and ensure their longevity, consider applying a varnish spray as a final step. This helps seal the paint, guarding against chipping, and adds a protective layer to the models.

