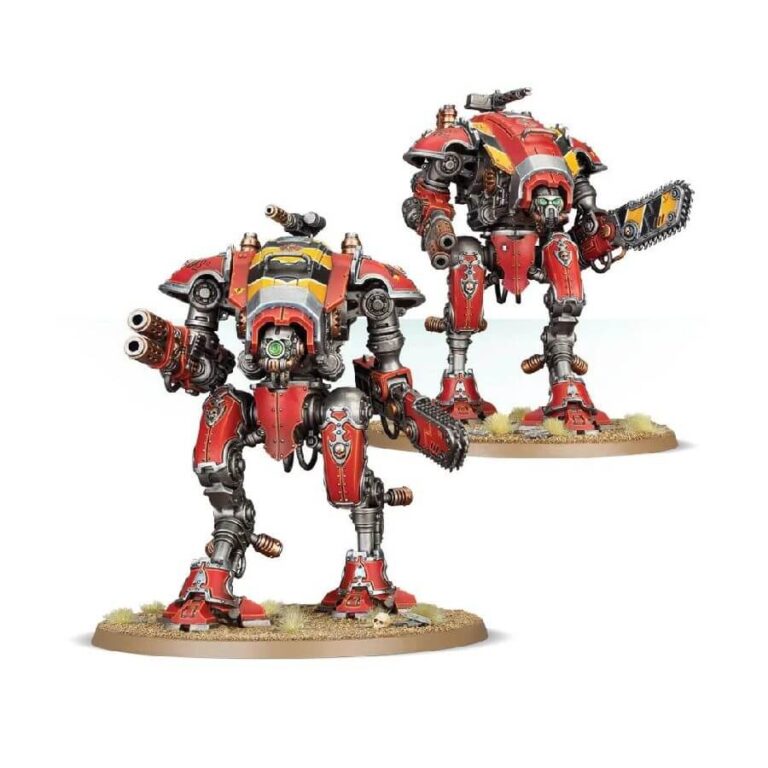
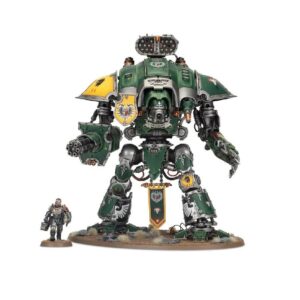
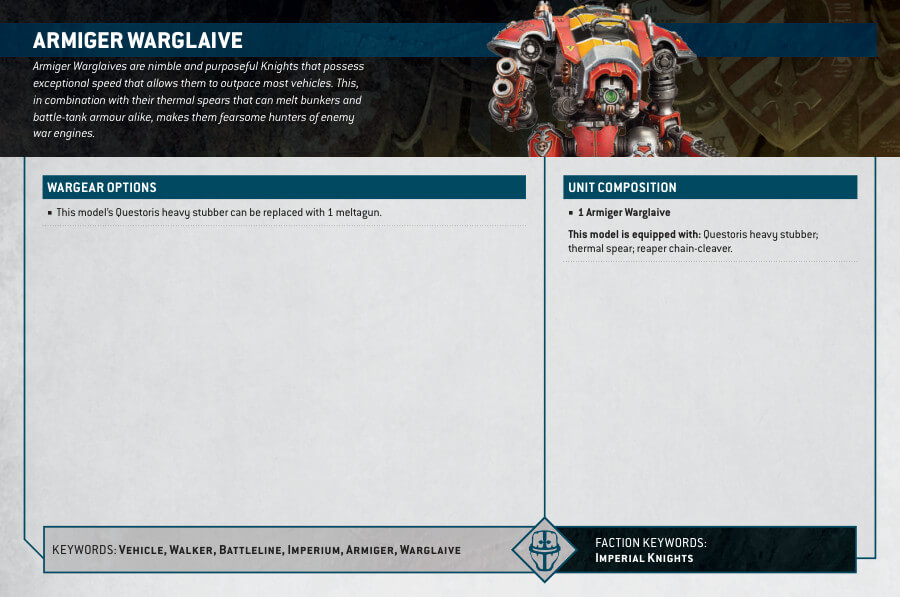
Armiger-class Knights, smaller and agile war machines of incredible power, provide mobile support and outrider capabilities to larger Knights, ensuring they are not surrounded in battle. Piloted by young squires or lowborn pilots, these nimble engines receive commands through the Helm Mechanicum from their Noble lords. The Armiger Warglaives, featured in this multipart plastic kit, excel at hunting down enemy armor with their deadly close combat weapon and thermal spear capable of melting through the toughest bunkers.
Additionally, the kit allows for the assembly of Armiger Helverins, a close-ranged Lords of War choice that provides valuable melee support to Imperial Knights armies or can be incorporated as a Freeblade squadron for other Imperium forces. Each Armiger Warglaive offers customization options with articulated poses, armor plating, six unique faceplates, and the choice of a carapace-mounted heavy stubber or meltagun. With their large carapaces, these models offer an engaging painting project.
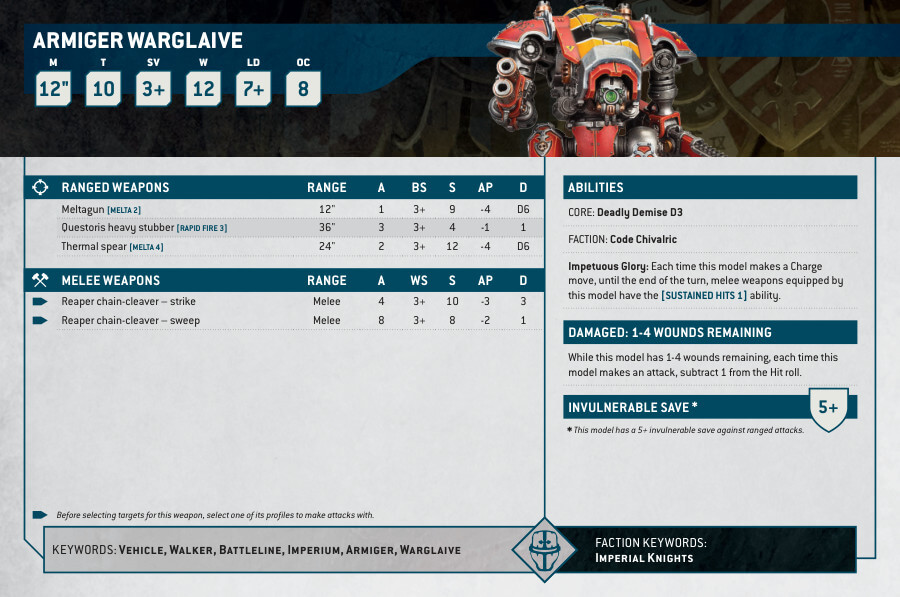
Armiger Warglaives Datasheets
What’s in the Armiger Warglaives box
- x148 plastic components: This kit includes all the necessary plastic components to build 2 Armiger-class Knights. For Chaos Knights armies, the kit can alternatively be assembled as a pair of War Dog Executioners or War Dog Huntsmen, adding versatility to your forces.
- x2 Citadel 100mm Round Bases: The kit comes with two Citadel 100mm Round Bases to provide a stable foundation for each Armiger.
- x1 Armiger transfer sheet: Included in the kit is a transfer sheet featuring heraldry specifically designed for Imperial Knights. These transfers allow you to add intricate and detailed markings to your Armiger models, enhancing their visual appeal and personalization.
How to paint the Armiger Warglaives set
- Step 1: Prime the model
Apply a thin and even layer of Chaos Black spray primer to the Armiger Warglaive. - Step 2: Base coat
Start by applying a base coat of Leadbelcher to the armor plates, Rhinox Hide to the weapon grip, and Mephiston Red to any decorative elements. - Step 3: Layering
Use Ironbreaker to highlight the edges of the armor plates, Gorthor Brown to highlight the weapon grip, and Evil Sunz Scarlet to highlight the decorative elements. - Step 4: Details
Paint the lenses on the helmet with Baharroth Blue, and the insignias with Pallid Wych Flesh. - Step 5: Wash
Apply a wash of Nuln Oil to the entire model, focusing on the recessed areas. - Step 6: Highlights
Add final highlights using Stormhost Silver on the edges of the armor plates, XV-88 on the edges of the weapon grip, and White Scar on the lenses and insignias. - Step 7: Basing
Paint the base with Mechanicus Standard Grey, drybrush it with Administratum Grey, and add patches of Astrogranite texture paint for a rocky effect. You can also glue on some grass tufts for additional detail. - Step 8: Varnish
Apply a layer of Ardcoat to the model to protect the paintwork and add a glossy finish.

