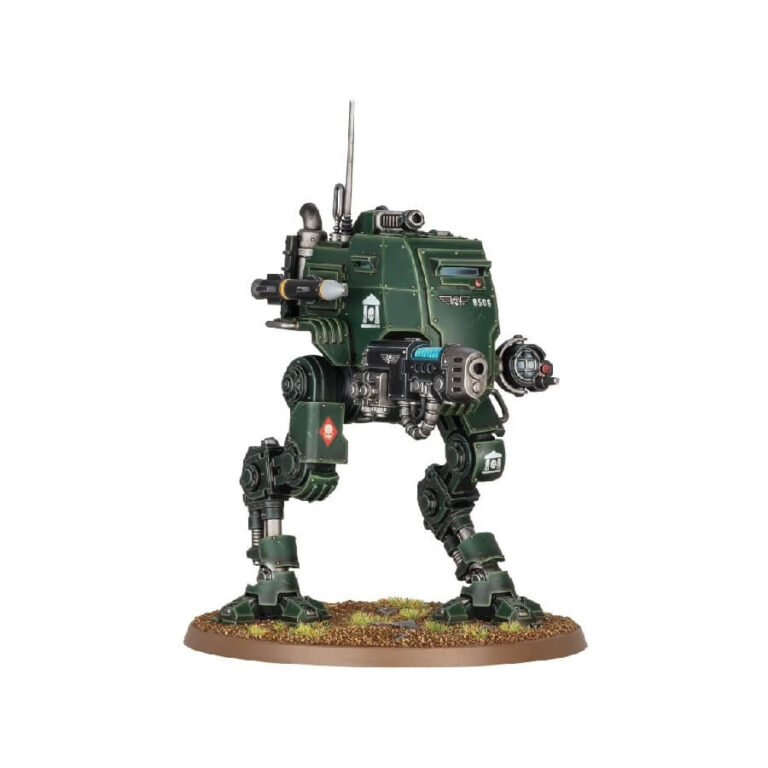
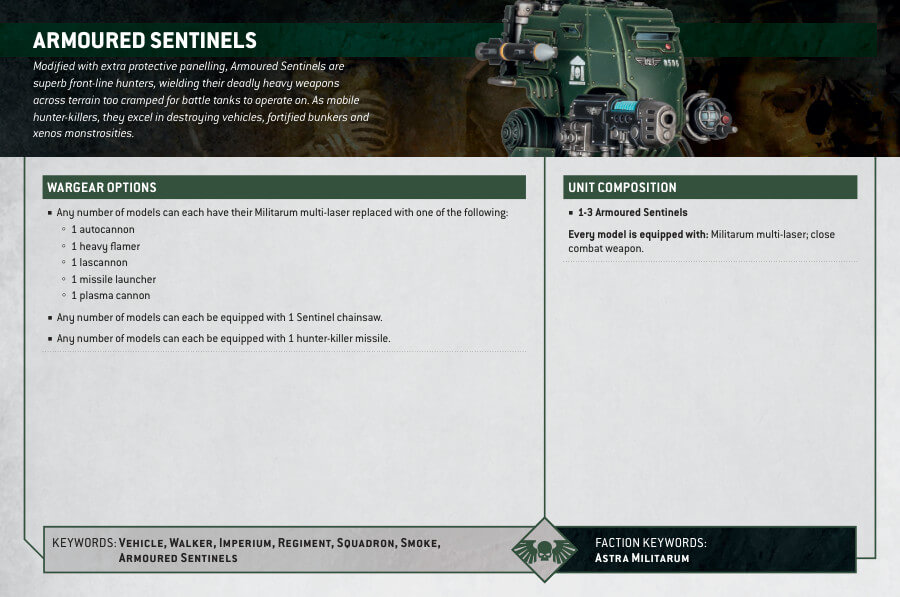
Bipedal all-terrain vehicles employed by the Astra Militarum for patrolling rugged terrains and delivering swift and powerful firepower when needed. Among them, the Armoured Sentinels stand out as exceptional frontline predators, boasting additional protective panelling that enables them to excel in challenging combat situations. These formidable mobile hunter-killers carry devastating heavy weapons, making them formidable against vehicles, fortified bunkers, and even monstrous xenos creatures.
This multipart plastic kit allows you to construct an Armoured Sentinel, a nimble walker equipped with an array of heavy firepower on a sturdy frame. With a plethora of options, you can tailor your Sentinel for any battlefield role, choosing from an autocannon, heavy flamer, missile launcher, multi-laser, or plasma cannon. For enhanced close-quarters combat, you can equip your walker with a poseable Sentinel chainsaw, while a hunter-killer missile provides an extra punch of firepower. Additionally, the kit offers cosmetic options such as a searchlight, smoke launchers, stowage and spare equipment racks, and extra fuel canisters.
Alternatively, this versatile kit also allows you to assemble a Scout Sentinel featuring an open cockpit. While sacrificing some durability, the Scout Sentinel compensates with exceptional speed, making it ideal for warzones that demand swift mobility.
Armoured Sentinel Datasheets
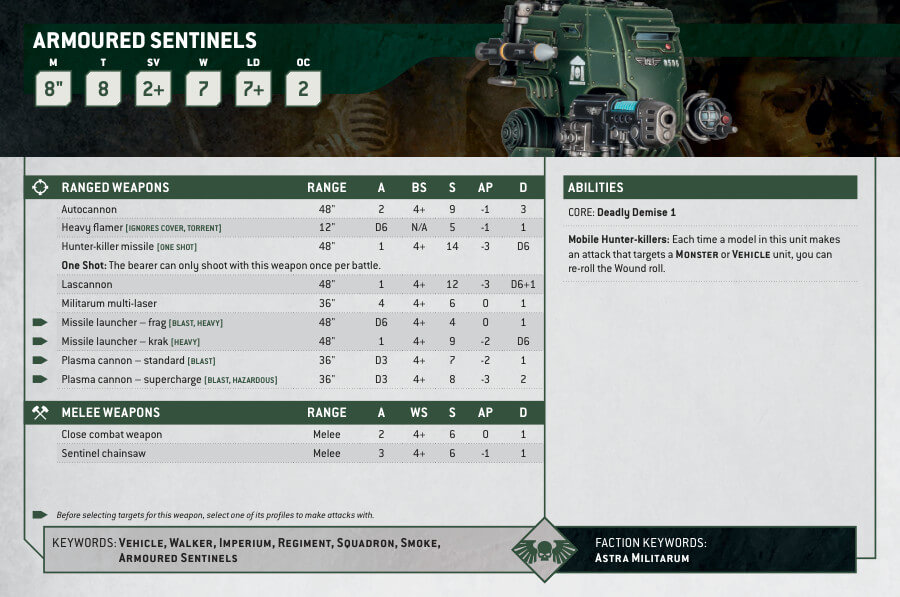
What’s in the Armoured Sentinel box
- x91 plastic components that make 1 Armoured Sentinel
- x1 Citadel 80mm Round Base
- x1 Astra Militarum Vehicle Transfer Sheet, with 475 transfers featuring numerals, sigils, and a variety of regimental heraldry.
How to paint the Armoured Sentinel set
- Step 1: Prime the Model
Start by priming the Armoured Sentinel with Chaos Black or White Scar spray primer. This provides a smooth surface for the paint to adhere to. - Step 2: Basecoat the Armor
Using a large brush, apply a basecoat of Abaddon Black to the entire armor of the Armoured Sentinel. Ensure even coverage and smooth application. - Step 3: Highlight the Armor
With a medium-sized brush, carefully apply highlights to the armor using Mechanicus Standard Grey. Focus on the raised edges and prominent details to create depth and contrast. - Step 4: Paint the Details
Use Leadbelcher to paint the metallic areas of the Armoured Sentinel, such as the weapons and joints. Apply thin layers for a smooth finish, and use a smaller brush for precision. - Step 5: Add Color to the Weapon Casings
Choose a color for the weapon casings, such as Mephiston Red or Macragge Blue. Paint the designated areas, making sure to stay within the lines and achieve clean, even coats. - Step 6: Apply Shades
Using shades like Nuln Oil or Agrax Earthshade, apply washes to the metallic areas and recessed parts of the model. This adds depth and enhances the details. - Step 7: Highlight the Weapon Casings
Using a lighter shade, such as Evil Sunz Scarlet for red or Alaitoc Blue for blue, carefully apply highlights to the weapon casings. Focus on the edges and raised areas to create definition. - Step 8: Paint the Details
Using colors like Retributor Armor or Liberator Gold, paint the smaller details on the Armoured Sentinel, such as sensors, lenses, and insignia. Use a fine brush for precision. - Step 9: Weathering (Optional)
For a weathered look, you can add effects like dry brushing with Ryza Rust or applying Typhus Corrosion to simulate wear and tear. Experiment with different techniques to achieve the desired effect. - Step 10: Varnish the Model
Once the paint is dry, apply a coat of varnish, to protect the model and give it a finished look.

