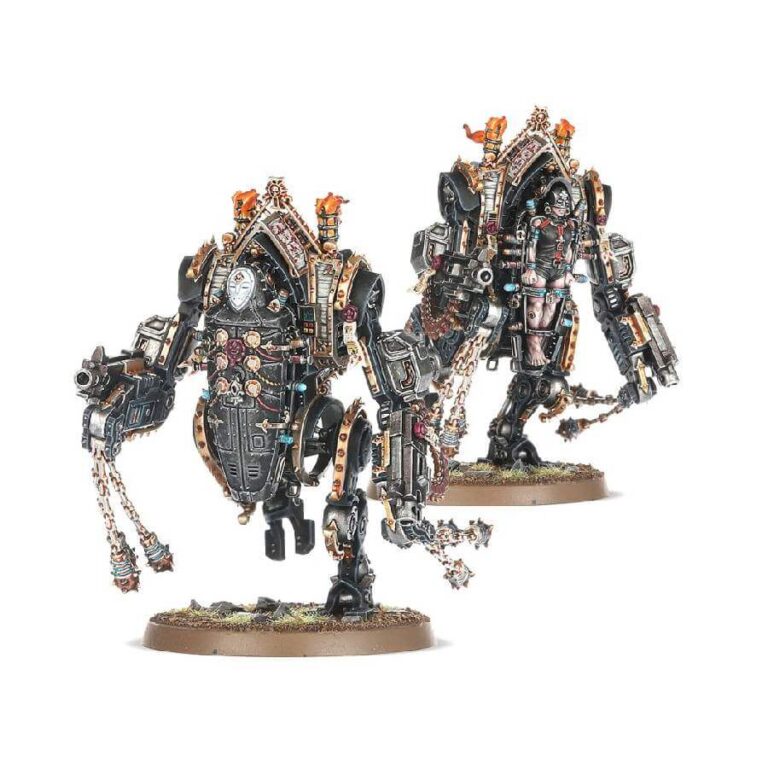
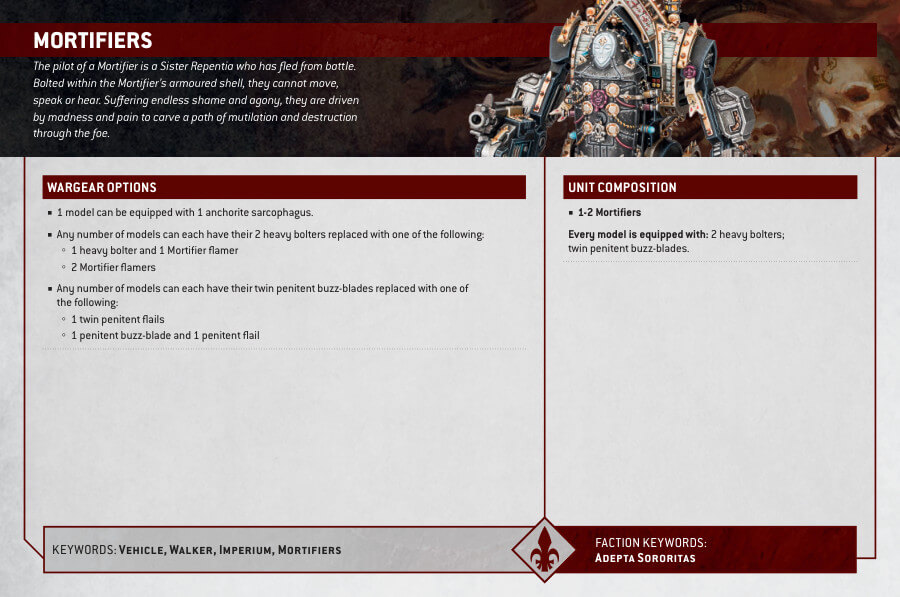
Engaging in battle, a Sister Repentia’s duty is absolute, and to flee from redemption is considered one of the gravest sins within the realm of the Adepta Sororitas. For these wayward Sisters, the path of atonement takes a harrowing turn. Encased within the unyielding armor of a Mortifier, their movements, voices, and senses are imprisoned. Enduring boundless shame and agony, they succumb to madness and suffering, ruthlessly carving a path of mutilation and destruction through their foes. Among these tormented souls, the most wretched find themselves sealed within adamantine casings, deprived even of the solace of death. These solemnly titled Anchorites endure years of isolation and excruciation behind lifeless masks until their ultimate release. To witness the fervor and anguish that drives these Sisters is to grasp the unwavering dedication and the profound cost they bear in service to the Emperor.
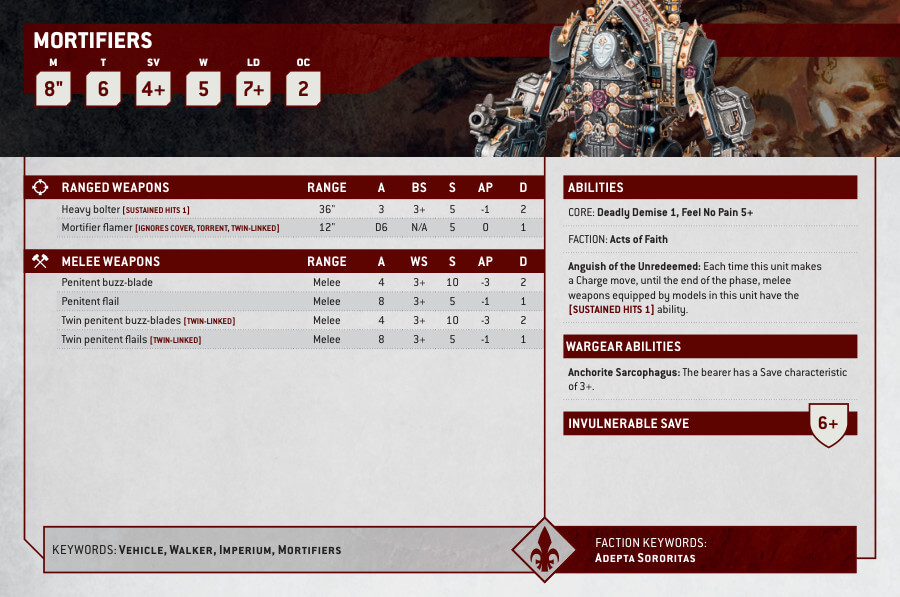
Mortifiers Datasheets
What’s in the Mortifiers box
- x126 plastic components: This multipart plastic kit builds two Mortifiers. These grim mechanical walkers offer durable fire support and brutal melee power, combining the berserk toughness of the Penitent Engine with the training and focus of a Battle Sister. Each Mortifier is equipped with any combination of two ranged weapons chosen from heavy bolters or heavy flamers, and two melee weapons chosen from penitent buzz-saws or penitent flails, and can also be assembled with an Anchorite sarcophagus. Alternatively, each miniature can be built as a Penitent Engine.
- x2 Citadel 50mm Round Bases.
How to paint the Mortifiers Set
- Step 1: Prepare Your Work Area
Ensure you have a well-lit and well-ventilated workspace. Lay down protective material to avoid any paint spills or stains. - Step 2: Prime the Miniature
Using a suitable primer, such as Wraithbone, apply a thin and even coat to the Mortifier. Allow it to dry completely before proceeding. - Step 3: Apply Base Colors
Using a medium-sized brush, paint the various areas of the Mortifier with the base colors. For example, you can use Leadbelcher for the metallic parts, Khorne Red for any red details, Averland Sunset for yellow accents, and Abaddon Black for the weapons and joints. - Step 4: Layering
Using a smaller brush, apply lighter or darker shades to create depth and highlights. For instance, you can use Ironbreaker to highlight the metallic areas and Evil Sunz Scarlet to add brighter tones to the red details. - Step 5: Wash
Apply a wash, such as Nuln Oil, to recessed areas and crevices to enhance the shadows and add depth to the model. Ensure the wash is diluted with water for a smoother application. - Step 6: Dry Brushing
Using a dry brush, lightly pick up paint, such as Runefang Steel, and remove most of it on a paper towel. Gently brush it over raised edges and textures to bring out the details of the Mortifier. - Step 7: Detailing
Use a fine brush to paint smaller details, like insignias and symbols, with precise strokes. Add highlights with lighter shades, such as Yriel Yellow for the yellow accents or Wild Rider Red for the red details. - Step 8: Basing
Finish the Mortifier by painting the base. Apply texture paint or glue sand and paint it accordingly. Add static grass or other scenic elements for a final touch.

