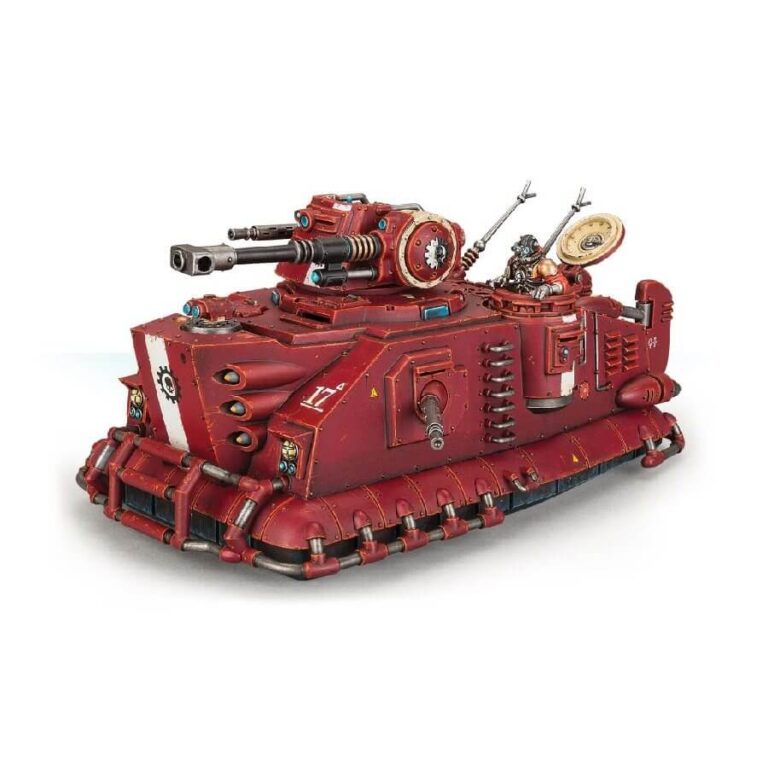
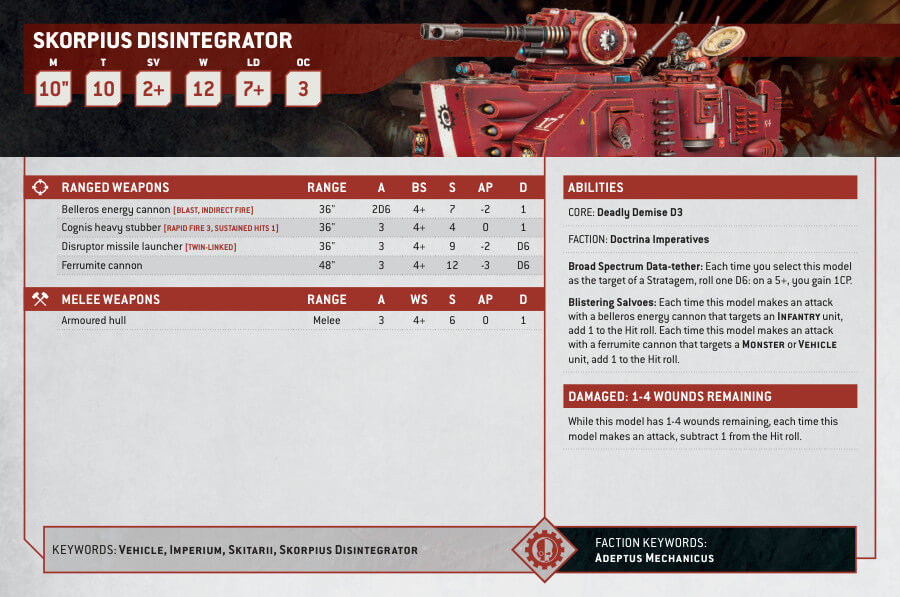
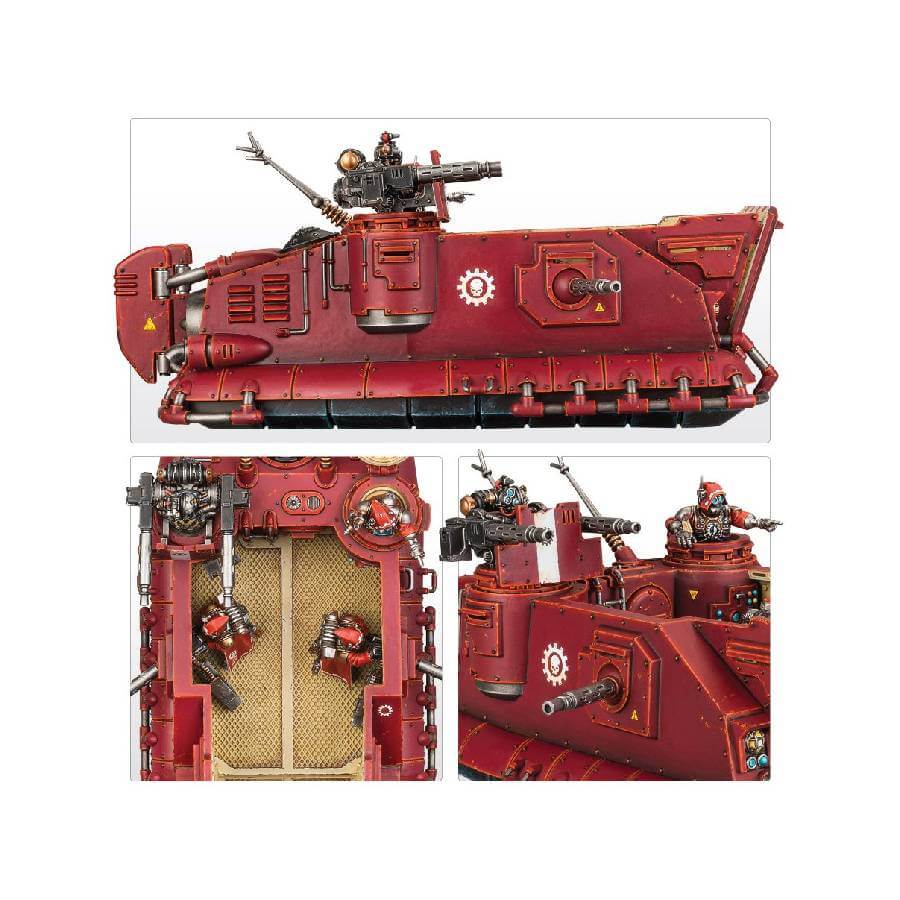
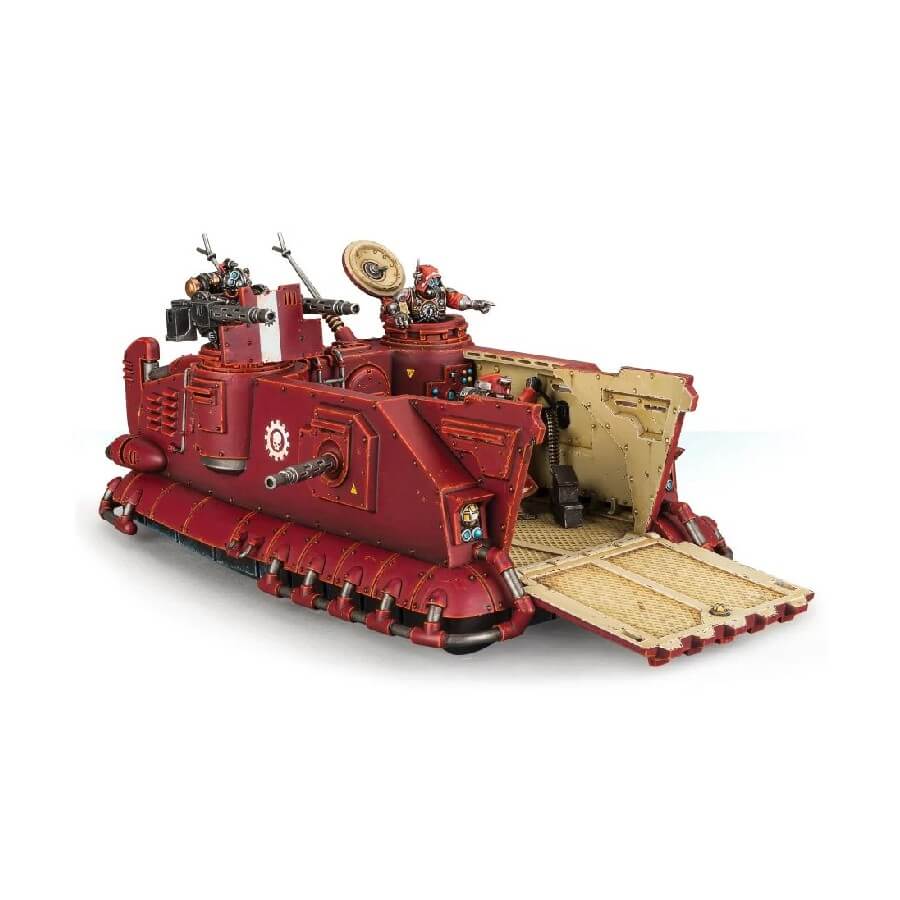
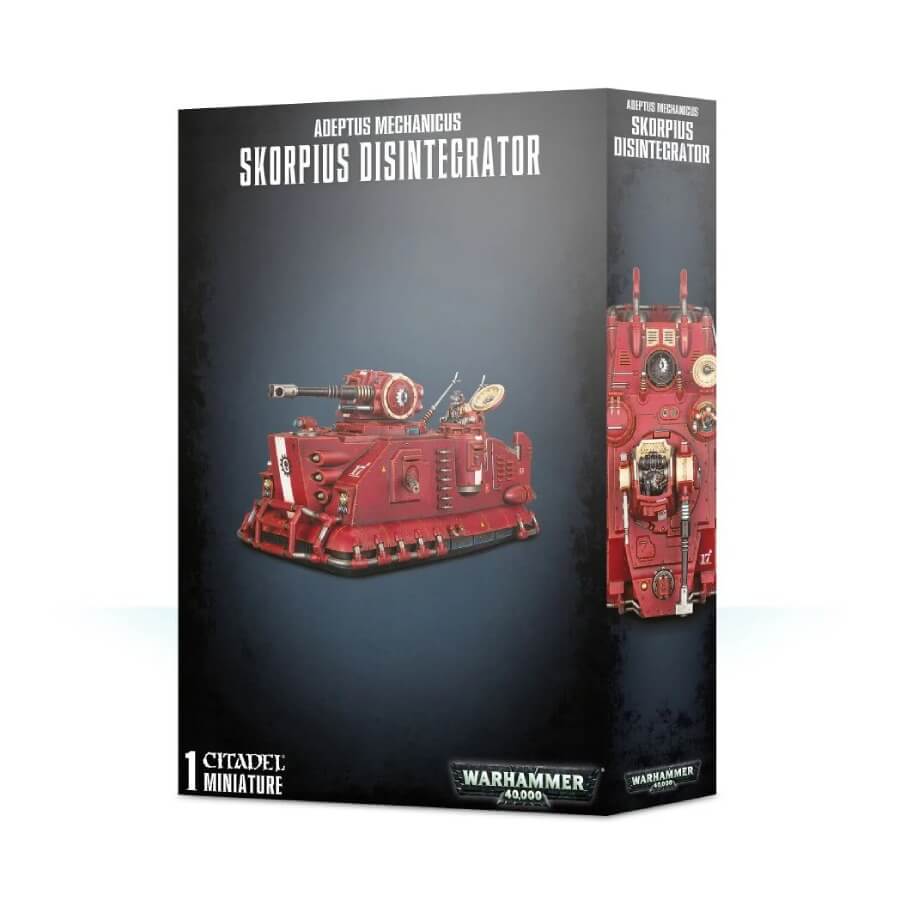
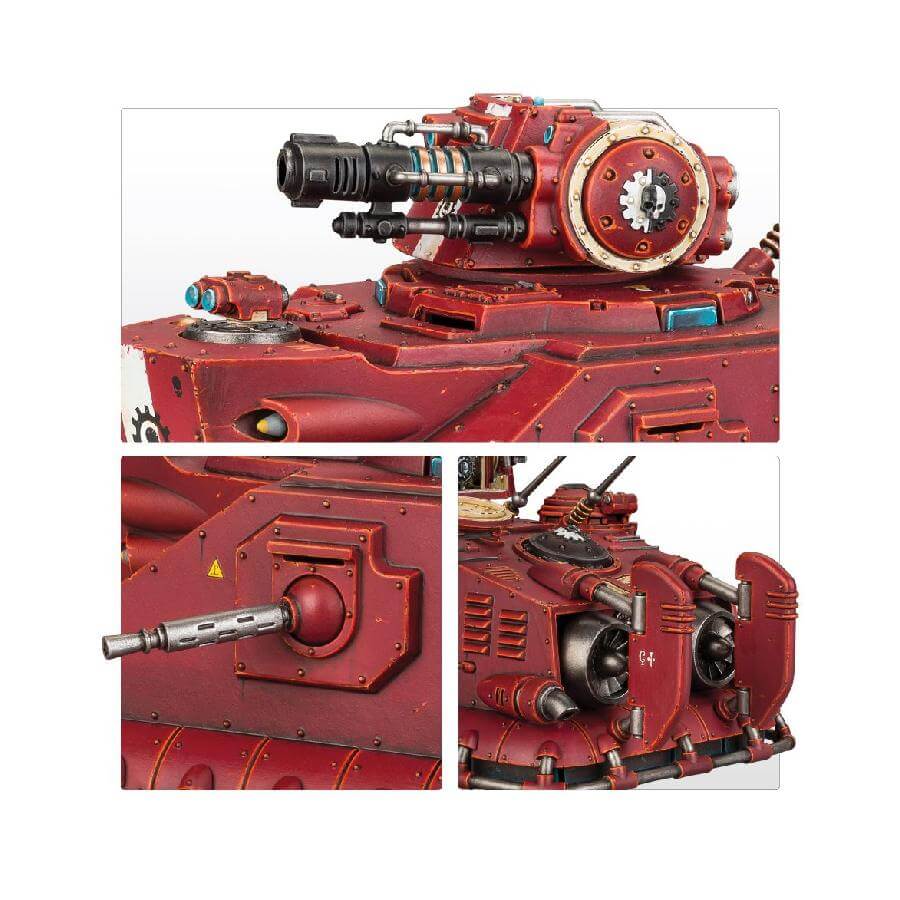
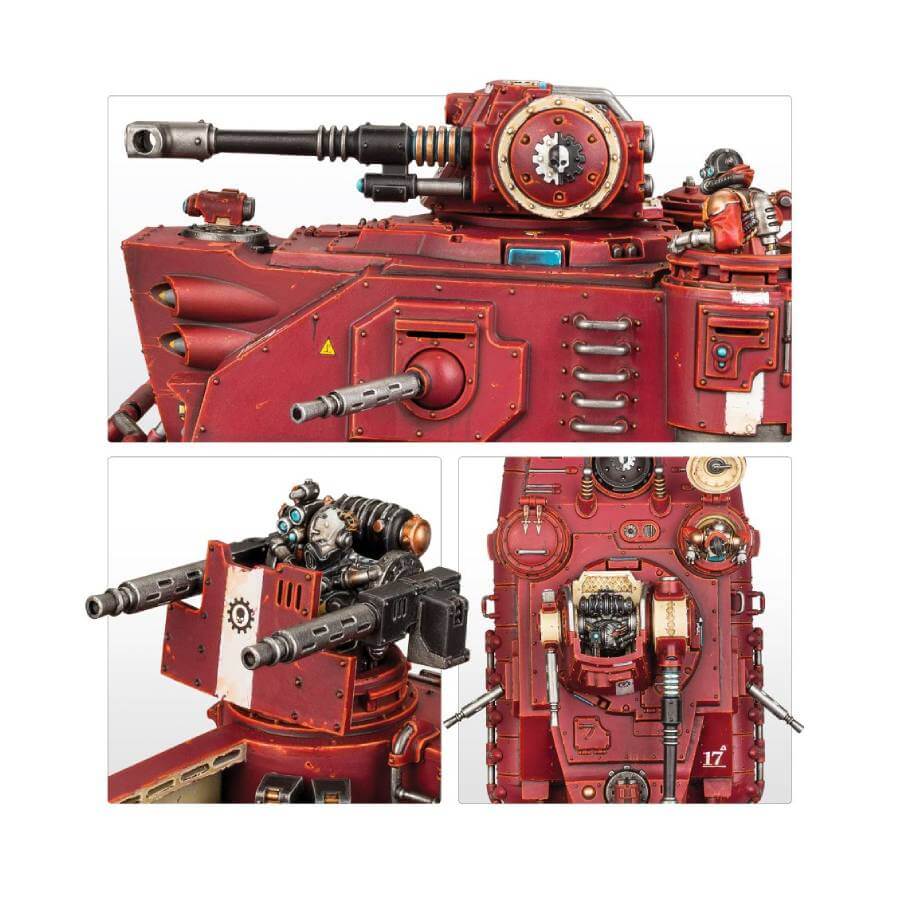
The Skorpius Disintegrator is a powerful anti-gravity vehicle used by the Adeptus Mechanicus. It is equipped with ferrumite or belleros energy cannons and flanking cognis heavy stubbers, as well as a disruptor missile launcher mounted on its prow. The vehicle’s primary turret weapon is operated by a Servitor gunner who is hard-wired into the weapon system to achieve maximum efficiency. The Skorpius Disintegrator is often deployed alongside Skitarii phalanxes to unleash devastating firepower on any threats to the Mechanicus forces.
Skorpius Disintegrator Datasheets
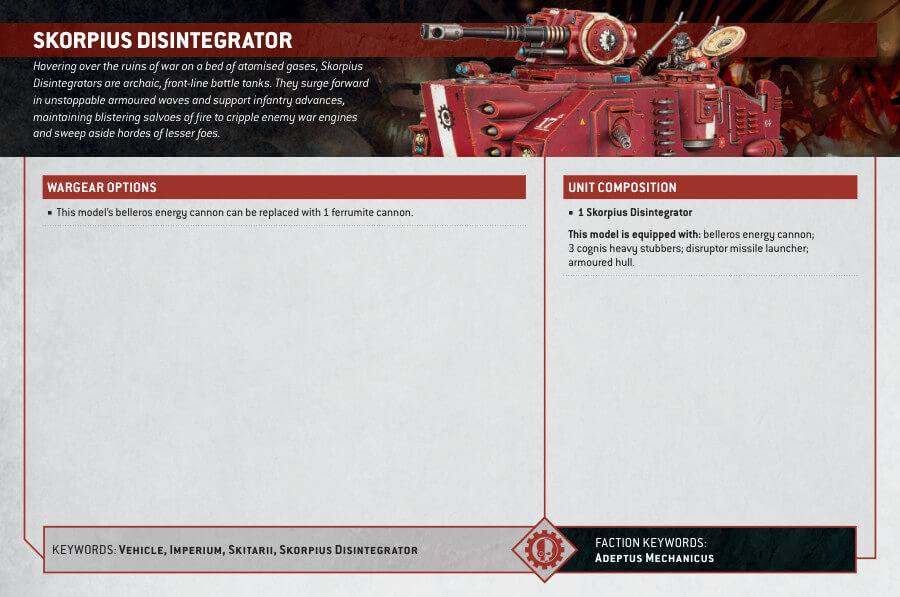
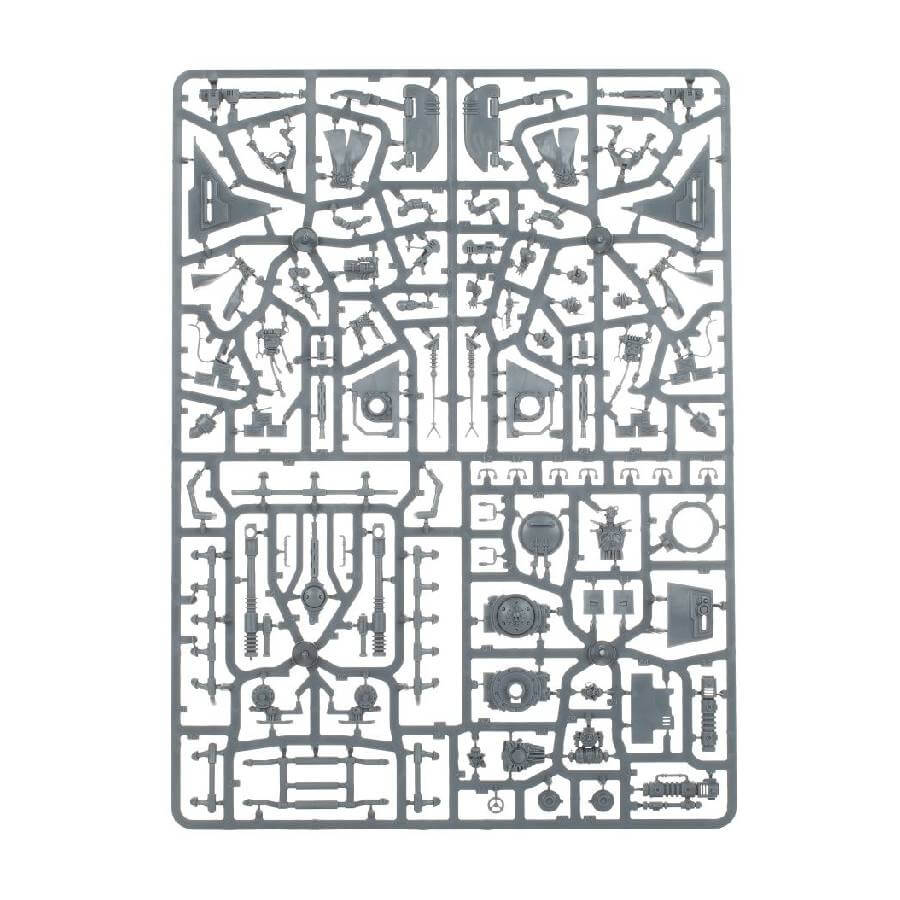
What’s in the Skorpius Disintegrator box
- x104 plastic components which make one Skorpius Disintegrator that can be assembled with a crewman set in one rear cupola, or with both hatches closed.
How to paint the Skorpius Disintegrator Set
- Step 1: Priming
Begin your journey to paint the Skorpius Disintegrator by applying a coat of Mephiston Red spray primer. This fiery red primer will serve as the base for the model’s distinctive color scheme. - Step 2: Red Armor
Now, let’s work on the iconic red armor of the Skorpius Disintegrator. Use Wild Rider Red to layer the red areas of the tank. Apply this paint evenly, covering the majority of the vehicle’s surface. This step gives your model a vibrant red foundation.
For added depth and dimension, shade the red areas with Carroburg Crimson. Apply this shade selectively, allowing it to settle into the recesses and panel lines. This will create shadows and enhance the overall appearance of the red armor. - Step 3: Black and Metallic Details
Moving on to the details, focus on the black elements of the Skorpius Disintegrator, such as turrets and other black accents. Use Abaddon Black to carefully paint these areas, ensuring clean and precise lines. The contrast between the black and red will make these details stand out.
Now, let’s work on the metallic components, such as the ladder and antennas. Apply Leadbelcher to these parts, covering them evenly. Afterward, add depth by layering with Stormhost Silver. This combination creates a realistic metallic sheen, making the details pop. - Step 4: Brass Accents
Highlight the brass details of the Skorpius Disintegrator, like ornate accents or trim, using Screaming Bell. This rich brass color adds an elegant touch to the model. To enhance the depth of these details, apply Reikland Fleshshade as a shade. This will create shadows and give the brass elements a weathered appearance. - Step 5: White Details
Turn your attention to the white details, such as stripes and icons. Use White Scar to carefully paint these elements. This step adds a clean and striking contrast against the red armor, making the details easily recognizable. - Step 6: Varnishing
To protect your beautifully painted Skorpius Disintegrator and give it a finished look, apply a layer of Munitorum Varnish. This varnish not only safeguards your paintwork but also provides a consistent matte finish across the entire model. Be sure to allow the model to dry completely before moving it or adding it to your collection.

