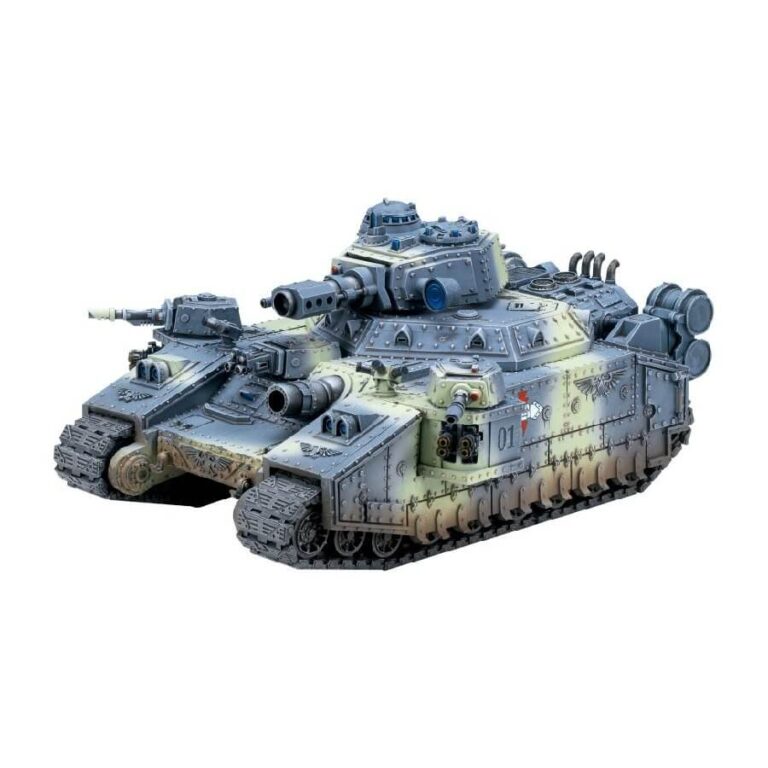
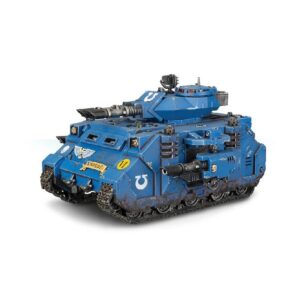
This extensive multipart plastic kit assembles a super heavy Hellhammer tank, a formidable Astra Militarum lords of war option, armed to the teeth and capable of withstanding immense punishment. If you’re seeking a central force to anchor a potent armored formation, a super heavy tank is an excellent choice, capable of both astonishing your adversaries and enduring a torrent of enemy firepower, thereby safeguarding the remainder of your forces.
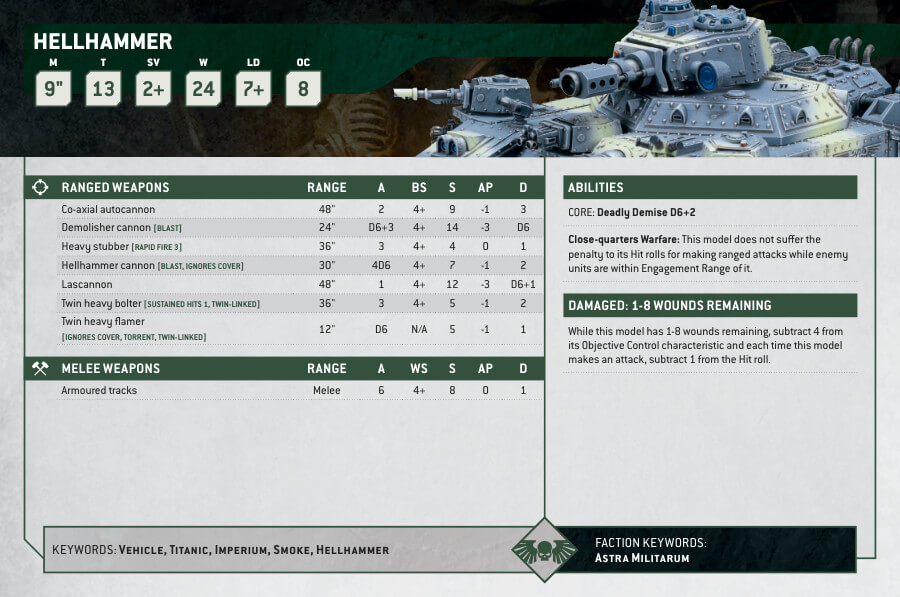
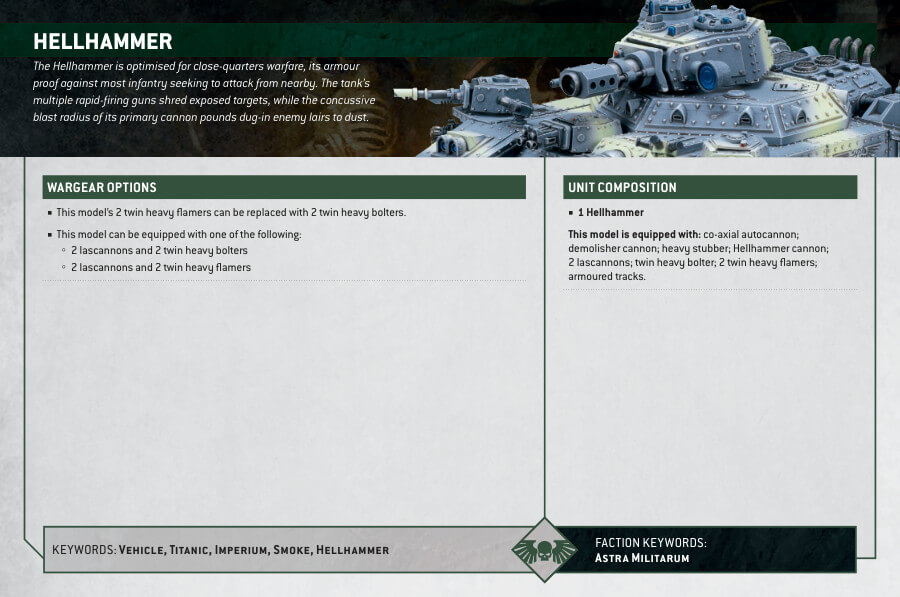
This colossal tank boasts a formidable armament, including a hellhammer cannon and coaxial autocannon mounted on the turret, a demolisher cannon on the forward hull, 2 lascannons on side turrets, twin heavy bolters on the forward hull turret, 2 twin heavy flamers in sponson mounts, and a heavy stubber in a pintle mount atop the turret. The sheer firepower it brings to the battlefield is truly impressive.
Furthermore, you’ll discover various cosmetic options available, such as additional stowage, added armor plating for the treads, tow hooks, fuel tanks, and choices for gunners and tank commanders stationed in the hatches, including different head options. Alternatively, you can build the tank commander on foot, arming them with a bolt pistol or laspistol in one hand and a power sword or a commanding pointing hand in the other. Regardless of your chosen configuration, you’ll have surplus plastic parts to enhance your bits box.
This massive kit can alternatively build a variety of other super-heavy tanks:
- Baneblade – armed with a baneblade cannon for maximum versatility
- Banesword – armed with a quake cannon to punish vehicles and fortifications at extreme range
- Shadowsword– armed with a tank-slagging volcano cannon
- Doomhammer – armed with a titan-slaying magma cannon and troop-carrying capacity
- Stormsword – armed with a bunker-busting stormsword siege cannon
- Banehammer – armed with a tremor cannon to slow down an aggressive opponent
- Stormlord – armed with a vulcan mega-bolter and large troop-carrying capacity
Hellhammer Datasheets
What’s in the Hellhammer box
- x381 plastic components to buid the Hellhammer or other astra militarum variant.
- x1 Baneblade Transfer Sheet with 253 transfers
How to paint the Hellhammer Set
- Step 1: Prime the Model
Before you start painting, it’s essential to prime your Hellhammer tank. Priming helps the paint adhere better to the surface and gives it a consistent base. Use a can of gray or black primer spray and apply a thin, even coat over the entire model. Let it dry completely before moving on to the next step. - Step 2: Basecoat the Tank
Start by applying a basecoat to the tank’s body and chassis. For the pale tone, you can use colors like Zandri Dust, Ushabti Bone, or Pale Wych Flesh. Use a medium-sized brush and apply the paint evenly, covering all areas of the tank. It’s better to apply multiple thin coats rather than one thick coat. Allow each coat to dry before applying the next one. - Step 3: Create Blue Camouflage
To achieve a blue camouflage pattern, we’ll use a technique called “dry brushing.” Choose a blue color like Kantor Blue or Altdorf Guard Blue. Dip a large dry brush into the paint and wipe off most of it onto a tissue or paper towel. Lightly brush the dry brush over the tank’s surface in a random pattern, focusing on the raised areas. This will create a faded and weathered look. Repeat the process with a lighter blue, such as Calgar Blue or Fenrisian Grey, to add more depth to the camouflage pattern. - Step 4: Paint the Details
Now it’s time to paint the smaller details of the Hellhammer tank. This includes the tracks, weapons, insignias, and any additional decorations. Use a fine detail brush for precision. For the tracks, you can use a dark color like Rhinox Hide or Dryad Bark. For the weapons, choose metallic colors like Leadbelcher or Balthasar Gold. Paint the insignias and other accents with contrasting colors that complement the overall scheme. For example, you can use Mephiston Red for the insignias on a predominantly pale tone tank with blue camouflage. - Step 5: Apply Washes and Weathering
To add depth and realism to the tank, apply washes and weathering effects. Use a wash color like Nuln Oil or Agrax Earthshade and apply it to the recessed areas and crevices of the tank. This will create shadows and enhance the details. Additionally, you can use a dry brush technique with a lighter color, such as Tyrant Skull or Pallid Wych Flesh, to highlight edges and add weathering effects like chipping or dust accumulation. Apply these techniques sparingly for a subtle and realistic look. - Step 6: Varnish the Model
Once you’re satisfied with the painting, it’s essential to protect your work by applying a varnish. Use a matte varnish to give the tank a non-shiny, realistic finish. Apply the varnish evenly over the entire model using a large brush or a varnish spray. Let it dry completely before handling or displaying your Hellhammer tank.

