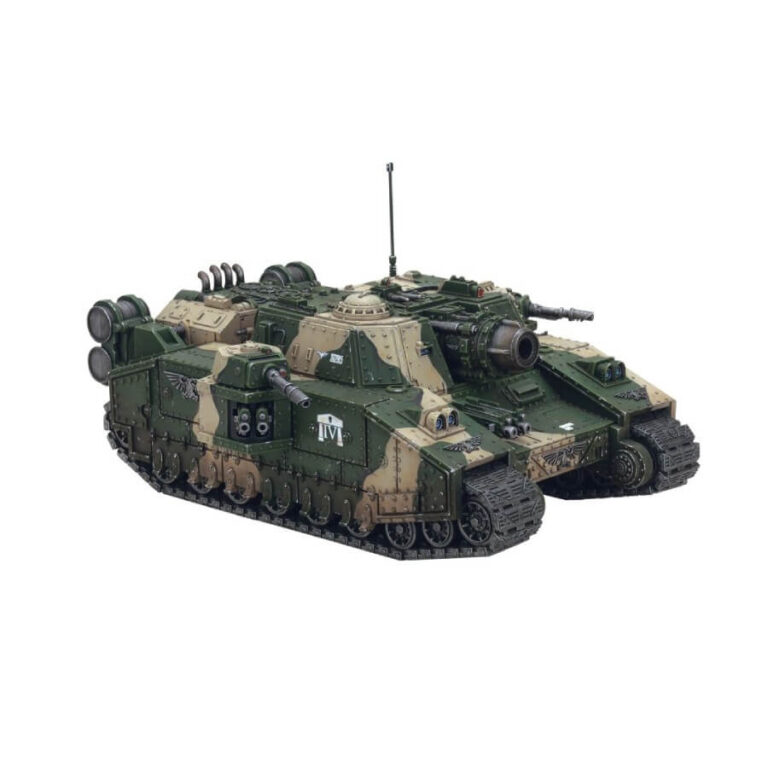
Building the Banehammer from this gargantuan multipart plastic kit grants you a super heavy tank that embodies sheer might and versatility. This war machine can withstand punishment that would obliterate a small army, making it the ideal centerpiece for your Astra Militarum army. A super heavy tank like the Banehammer can not only strike fear into your foes but also act as a formidable shield, absorbing colossal amounts of firepower and allowing the rest of your army to advance unscathed.
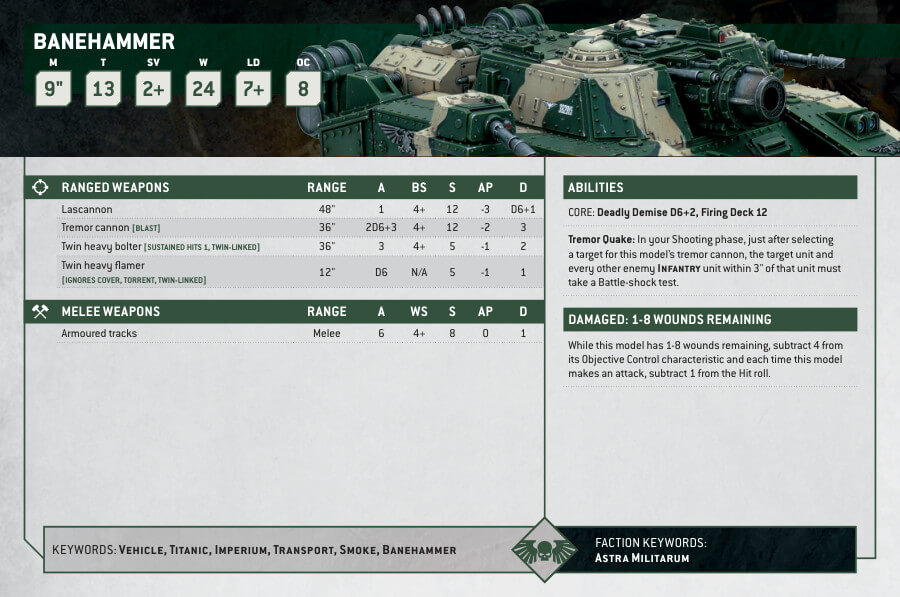
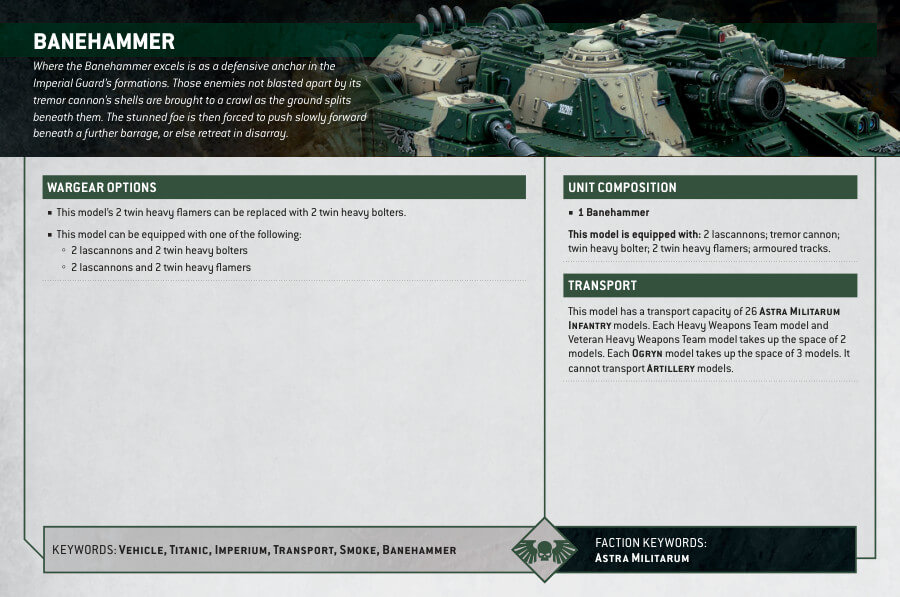
The Banehammer comes equipped with a formidable arsenal that will make your adversaries quiver. Its turret houses the mighty tremor cannon, a weapon that can devastate both infantry and vehicles alike. Additionally, it boasts 2 lascannons on side turrets, twin heavy bolters mounted on the forward hull turret, and 2 twin heavy flamers in sponson mounts. The flexibility of this war machine is astounding. You have the option to replace the sponson flamers with 2 twin heavy bolters for even more firepower. Furthermore, you can enhance its destructive potential by adding extra sponsons armed with lascannons or either twin heavy bolters or twin heavy flamers. The sheer firepower at your disposal is staggering, ensuring no enemy remains unscathed.
But the Banehammer offers more than just its devastating weaponry. It also provides ample troop-carrying capacity and a firing deck for embarked units, making it a mobile fortress and a force multiplier on the battlefield.
Delve into the realm of customization with cosmetic options that allow you to add your personal touch. Extra stowage, additional armor plating on the treads, tow hooks, and fuel elements give you the freedom to create a unique Banehammer. Additionally, options for gunners and tank commanders in the hatches, including a selection of different heads, offer diversity in the way you depict your tank’s crew. You even have the choice to build the tank commander on foot, armed with a bolt pistol or laspistol in one hand, and a power sword or pointing hand in the other. With this kit, your bits box will find itself enriched with an abundance of spare plastic components that can be used to further enhance your miniatures and conversions.
This massive kit can alternatively build a variety of other super-heavy tanks:
- Baneblade – armed with a baneblade cannon for maximum versatility
- Banesword – armed with a quake cannon to punish vehicles and fortifications at extreme range
- Shadowsword– armed with a tank-slagging volcano cannon
- Doomhammer – armed with a titan-slaying magma cannon and troop-carrying capacity
- Stormsword – armed with a bunker-busting stormsword siege cannon
- Stormlord – armed with a vulcan mega-bolter and large troop-carrying capacity
- Hellhammer – armed with a hellhammer cannon for close-quarters warfare
Banehammer Datasheets
What’s in the Banehammer box
- x381 plastic components that make 1 Banehammer or one of the tanks mentioned above^.
- x1 Baneblade Transfer Sheet with 253 transfers
How to paint the Banehammer Set
- Step 1: Prime the Miniature
Apply a thin, even coat of primer to the Banehammer tank. Choose a primer color that matches your intended base coat. Grey or white primers work well. - Step 2: Basecoat the Tank
Using a large brush, apply a basecoat of Caliban Green or Waaagh! Flesh to the entire tank. Ensure an even coverage, and let it dry completely before moving to the next step. - Step 3: Apply Camouflage Pattern
To create a camouflage pattern, choose two or three additional colors. For example, you can use Straken Green, Elysian Green, and Loren Forest. Using a smaller brush, randomly paint irregular shapes and patches of these colors on the tank’s surface. Make sure to leave some areas with the basecoat showing through. - Step 4: Highlight the Edges
To add depth and definition to the tank, use a lighter green shade like Moot Green to highlight the edges and raised areas. Apply the highlight color sparingly with a small brush, focusing on the edges of the tank and any exposed details. - Step 5: Weathering and Detailing
For added realism, you can add weathering effects and details to the tank. Drybrush a bit of Ryza Rust or Typhus Corrosion on the edges and areas prone to wear and tear. You can also paint additional details like hatch handles, headlights, tracks and exhaust pipes using Abaddon Black, Yriel Yellow, Leadbelcher. - Step 6: Varnish the Miniature
Once the paint is completely dry, protect your work by applying a coat of varnish. Use a matte varnish for a more realistic finish, or a gloss varnish if you prefer a shiny appearance. Apply the varnish as per the manufacturer’s instructions.

