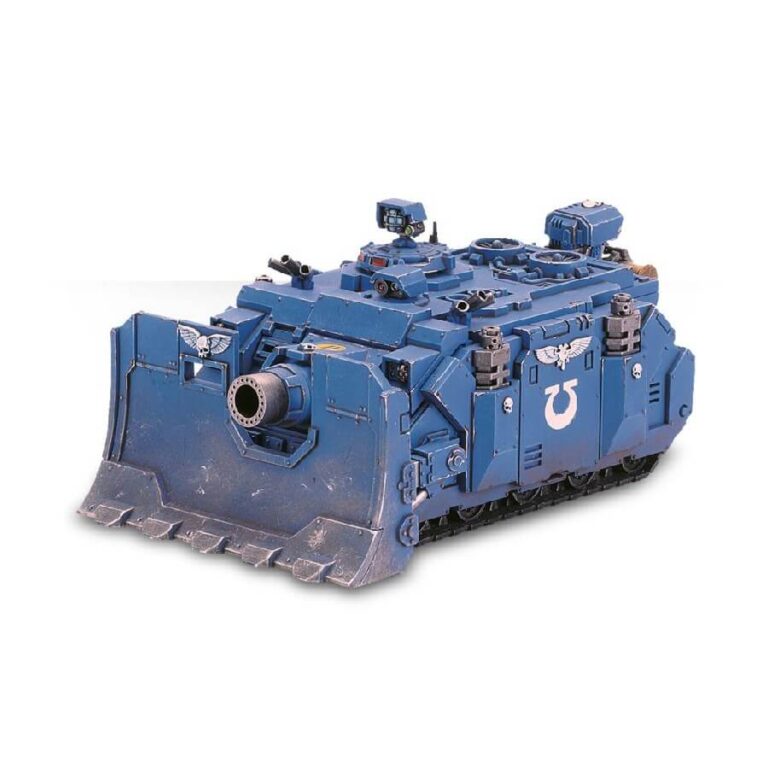
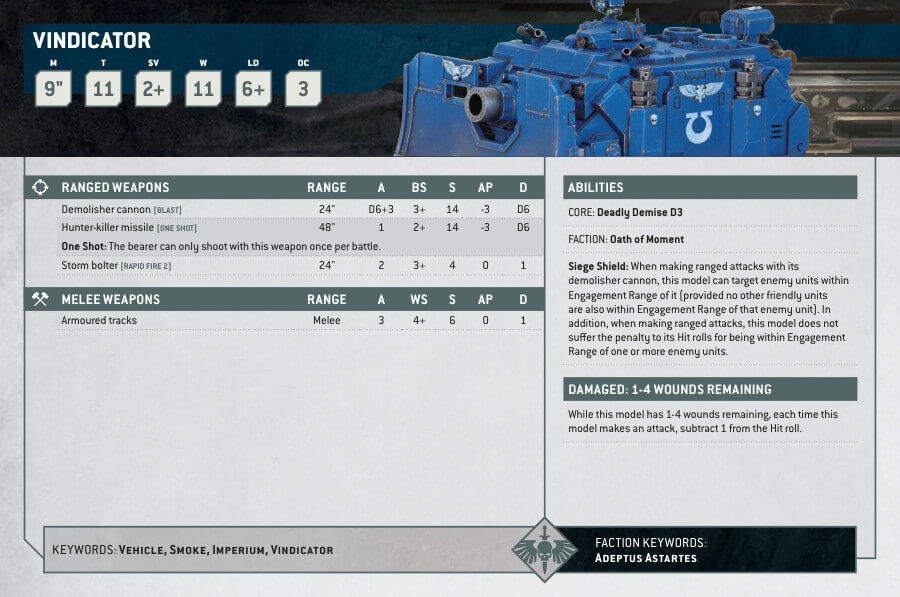
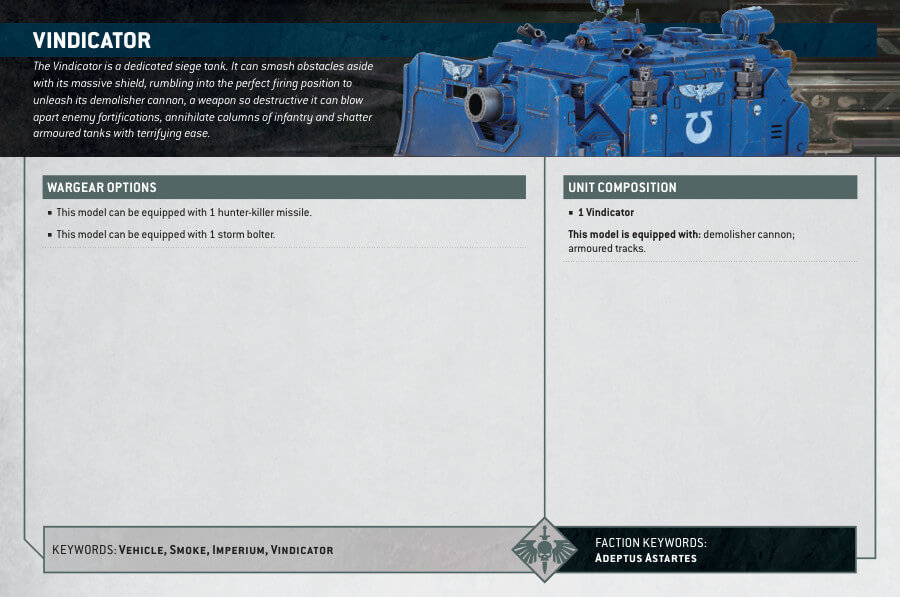
The Vindicator is a formidable siege tank that uses a Rhino chassis and is equipped with the most powerful weapon in the Space Marines arsenal – the demolisher cannon. This weapon is ideal for the Imperium’s forces when confronting entrenched enemy infantry in densely populated areas, such as in a cityfight or siege. The massive demolisher shells can create a tremendous explosion that can even demolish buildings that the enemy may use for cover.
Vindicator Datasheets
What’s in the Vindicator box
- x99 plastic components that make one Vindicator.
How to paint the Vindicator Set
- Step 1: Prime the model
Apply a thin, even coat of Chaos Black or White Scar spray primer to the Vindicator tank. This will provide a smooth base for the paint. - Step 2: Base coat the tank
Using a medium-sized brush, apply Macragge Blue to the hull and turret of the tank. Use a couple of thin coats for even coverage. - Step 3: Highlight the edges
Using a smaller brush, carefully highlight the edges of the tank with Kantor Blue. Focus on raised areas and edges to create a subtle contrast and definition. - Step 4: Paint the details
Use Leadbelcher to paint the metal areas of the tank, such as the tracks, guns, and exhaust pipes. For any lenses or lights, use Baharroth Blue or Spiritstone Red to add a vibrant touch. - Step 5: Apply shade
Use Nuln Oil or Agrax Earthshade to apply a thin wash over the entire tank. This will add depth and shadow to the recessed areas, enhancing the overall appearance. - Step 6: Drybrush the tank
Take a drybrush and lightly dip it into Ulthuan Grey. Remove most of the paint on a paper towel, then gently brush it over the tank’s surface to highlight the edges and add a weathered effect. - Step 7: Add decals and markings
Apply the desired decals and markings to the tank, using water or decal setting solution to help them adhere smoothly. Citadel Transfer Sheets offer a variety of options for Space Marine vehicles. - Step 8: Seal the model
Once the paint has fully dried, apply a protective coat of Citadel Munitorum Varnish. This will help preserve the paint job and add a subtle sheen to the model.

