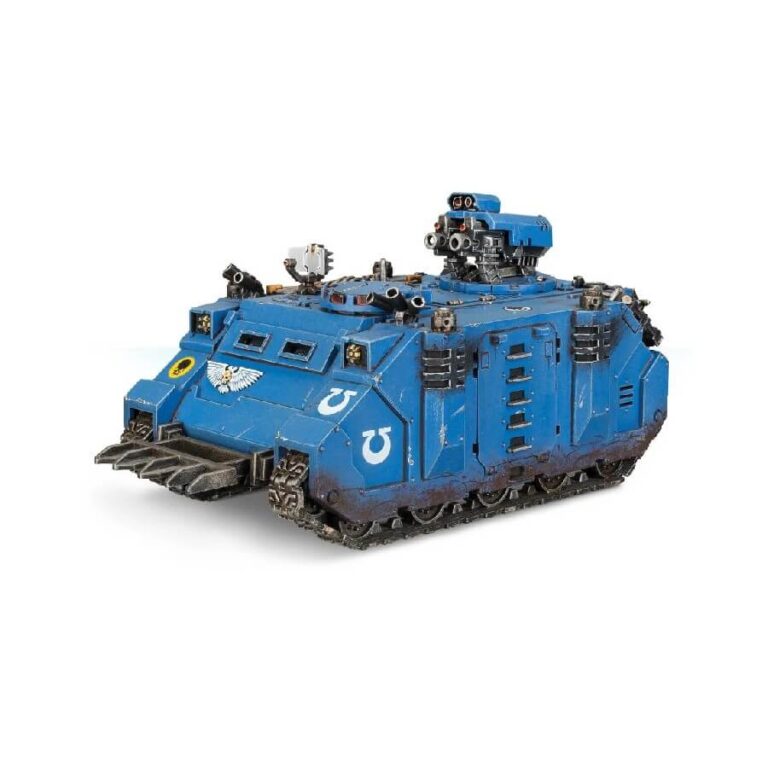
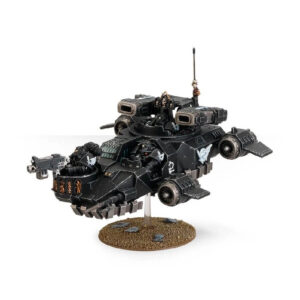
The Razorback is a versatile variant of the Rhino chassis, capable of providing effective fire support to the squads it carries with its turret-mounted heavy weapon systems. This kit offers a choice of powerful weapons for the main turret, including a twin heavy bolter or twin lascannon, along with a range of optional extras such as a spiked ram, ammo crate, fuel canisters, cable, smoke launchers, comms relay, hunter-killer missile, and tow hooks. It boasts a fully detailed interior featuring a communications array and boltgun on arming rack, as well as an optional Space Marine driver/gunner, making it an impressive addition to any collection.
The Razorback/Rhino kit features a fully detailed interior, including a communications array and boltgun on arming rack. A variety of optional extras are included in the kit, such as a spiked ram, ammo crate, fuel canisters, cable, smoke launchers, comms relay, hunter-killer missile, and tow hooks. It can be armed with a choice of weapons for the main turret, including a twin heavy bolter or twin lascannon, offering effective fire support before and after troops disembark.
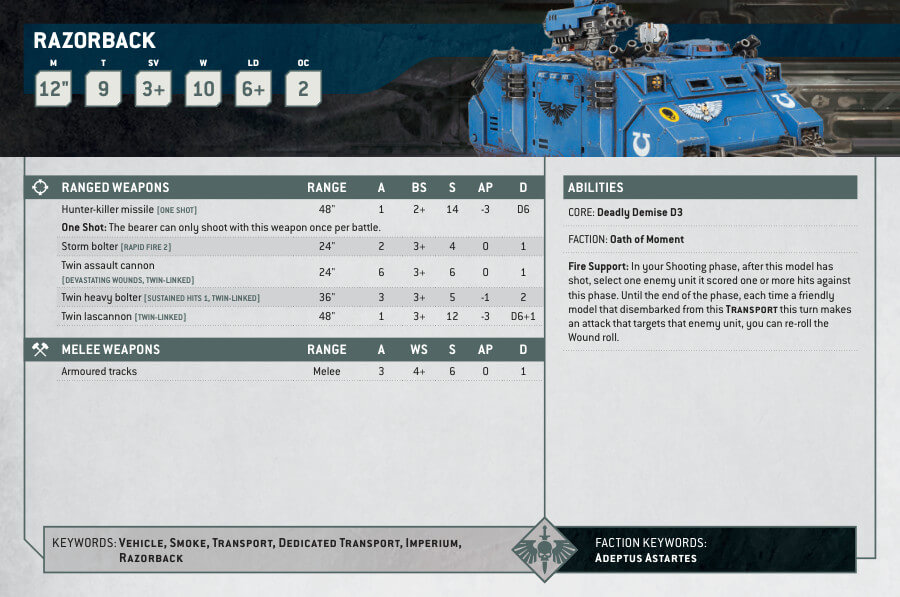
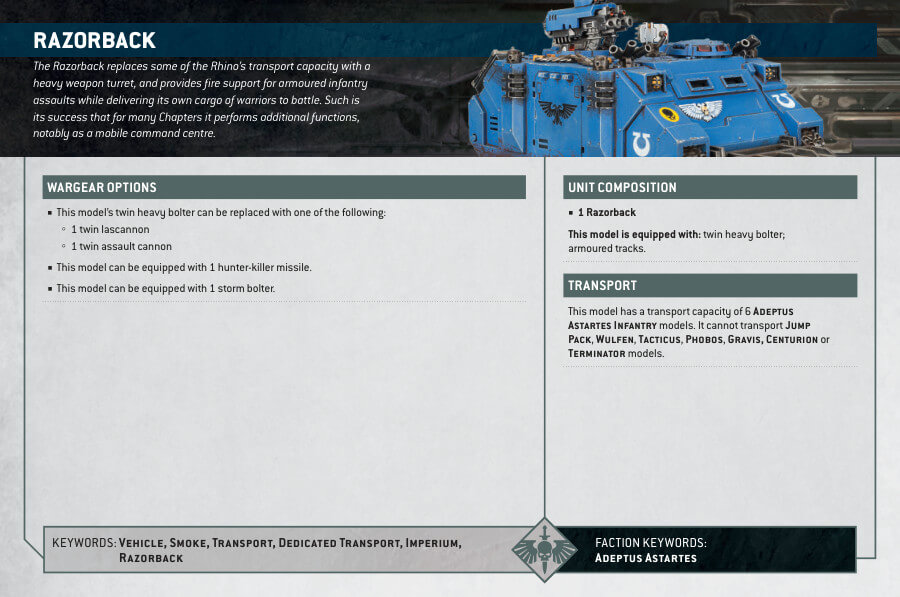
Razorback Datasheets
What’s in the Razorback box
- x76 plastic kit pieces are included in the box to make either one Razorback or one Rhino.
- x1 Ultramarines Vehicle Transfer sheet to add decals and markings to the vehicle.
How to paint the Razorback
- Step 1: Painting the Hull
Begin by painting the hull of the Razorback with Kantor Blue to create a blue base. Ensure you cover the entire hull evenly. - Step 2: Shading the Hull
Enhance the depth of the blue hull by applying a shade of Drakenhof Nightshade. Focus on the recesses and crevices of the hull, allowing the shade to settle and create shadows. - Step 3: Layering the Hull
To add highlights and dimension to the hull, layer it with Altdorf Guard Blue. Focus on the raised areas and edges for a polished look. - Step 4: Painting the Tracks
For the tracks, use Leadbelcher to give them a metallic appearance. Ensure even coverage on the tracks. - Step 5: Shading the Tracks
Enhance the realism of the tracks by applying a shade of Nuln Oil to create shadowed areas. This adds depth and contrast. - Step 6: Layering the Tracks
To highlight the tracks, layer them with Ironbreaker. Concentrate on the raised areas to make them appear worn and reflective. - Step 7: Painting Parchments
Paint any parchments on the Razorback with Screaming Skull. Be precise when painting these small details to make them stand out. - Step 8: Painting Emblems
Use Retributor Armour to paint emblems and other golden details on the Razorback. Ensure clean lines and coverage for these elements. - Step 9: Final Touch – Protecting Your Work
Consider applying a protective varnish to your Razorback. A varnish like Ardcoat can safeguard your model and give it a polished finish.

