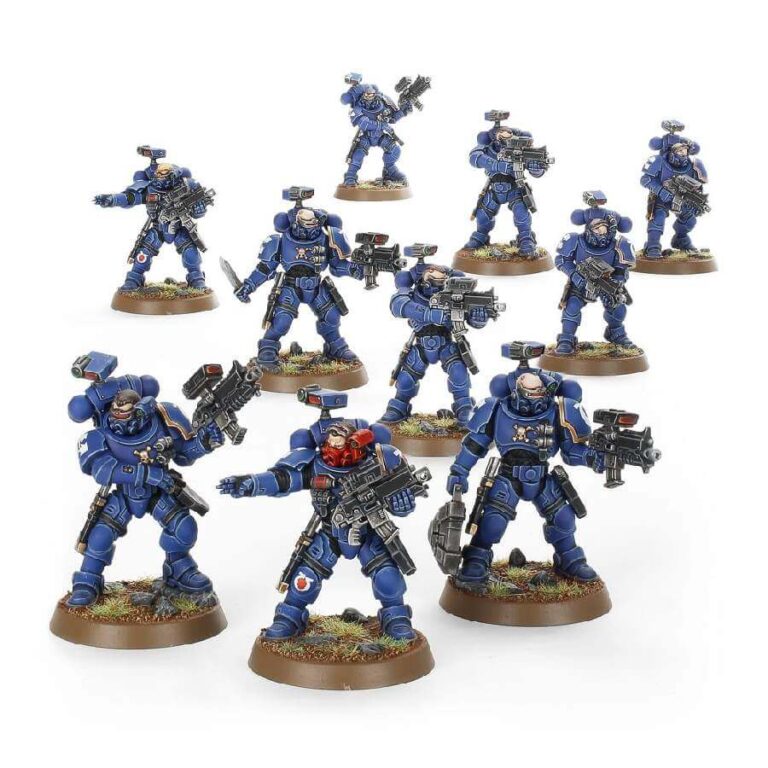
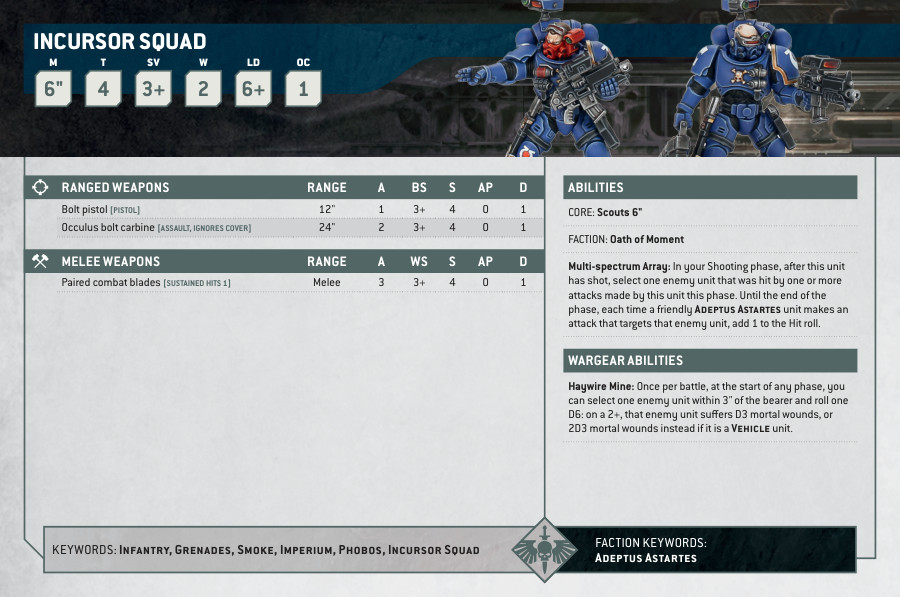
These troops are equipped with the latest Mk X Phobos armour, making them lighter and faster on the battlefield. But their real strength lies in their weapons: the occulus bolt carbine and multi-spectrum targeting array. With these tools, they can take down their targets with deadly accuracy, no matter what the battlefield conditions may be. And if that’s not enough, each Incursor squad also carries haywire mines, capable of taking out even the most heavily-armoured enemy vehicles.
But the Incursors marksmanship doesn’t stop there. Each member of the squad is a superb shot, able to take out their targets with ease, even through the thickest cover. And with additional parts included, you can even build up to two squad Sergeants, adding even more firepower and leadership to your forces.
So if you’re looking for a fast and deadly addition to your Space Marine army, look no further than the Primaris Incursors. They’re the perfect choice for any commander who demands precision and versatility from their warriors.
Primaris Incursors Datasheets
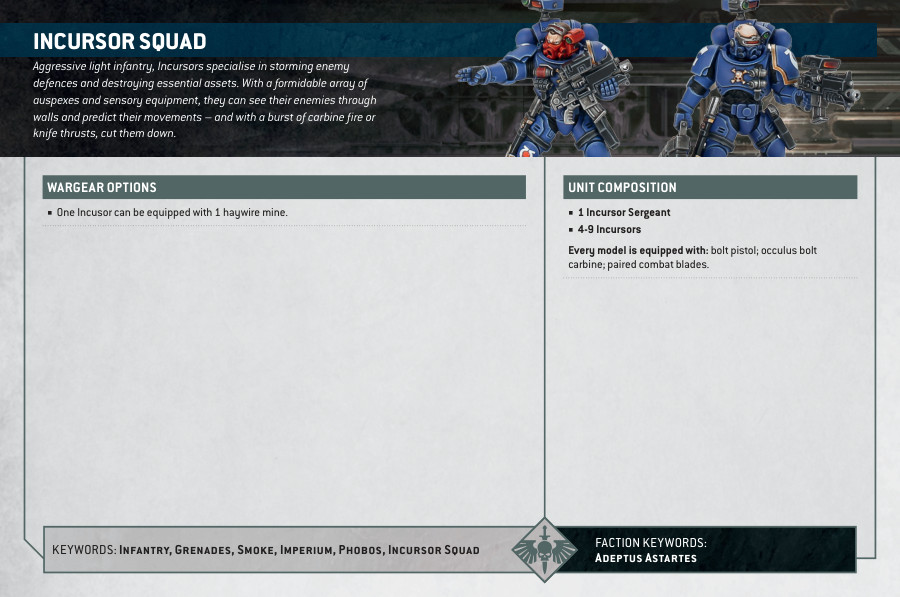
What’s in the Primaris Incursors box
- x266 plastic components that make 10 miniatures, which are contained in two identical frames, each with five models that can be built as either Infiltrators or Incursors, giving you plenty of customization options. The Primaris Incursors come equipped with occulus bolt carbines, perfect for taking out both infantry and vehicles. Each squad also includes haywire mines, making them a versatile and deadly addition to any Space Marine army. Comes with additional parts to build up to two squad Sergeants, adding even more leadership and firepower to your forces.
- x10 Citadel 32mm round bases.
- x1 Space Marines Infantry Transfer Sheet, making it easy to add these warriors to your army and customize their appearance.
How to paint the Primaris Incursors
- Step 1: Prime the Miniature
Begin by applying a thorough coat of Chaos Black primer to the entire miniature. Ensure that the primer covers all surfaces evenly. This step creates a solid base for the subsequent paint layers and enhances the paint’s adhesion. - Step 2: Paint the Armor
Take your Macragge Blue paint and, using a fine brush, meticulously apply it to the Incursors’ armor plates. Pay close attention to the shoulder pads, chest plate, and leg armor. Aim for a smooth and even coat, covering every inch of the blue armor. - Step 3: Apply Shade for Depth
Utilize Nuln Oil for shading. Carefully apply this shade over the entire miniature, ensuring that it doesn’t accumulate in one area. The shading will accentuate the miniature’s details, creating realistic shadows and depth. - Step 4: Layer the Armor for Highlights
To add dimension and highlights to the armor, use Ultramarines Blue. Apply this paint to the edges and raised areas of the armor. This technique enhances the three-dimensional effect and makes the armor stand out. - Step 5: Detail the Gold
For the gold details, including trims and emblems, use Retributor Armour. Exercise precision in your application to avoid any spills onto the blue armor. The gold adds regal accents to the miniature. - Step 6: Add Depth to Gold
Apply a thin layer of Agrax Earthshade to the gold details. This enriches the gold’s appearance by creating shadows and depth. - Step 7: Paint Belts and Pouches
With Abaddon Black, meticulously paint the belts and pouches on the Incursors. Maintain neatness and precision during this step, as clean lines make a significant difference. - Step 8: Highlight Belts and Pouches
Layer the black belts and pouches with Eshin Grey. This technique adds depth to these areas, making the belts and pouches appear more realistic. - Step 9: Metallic Detailing
Use Leadbelcher to paint metallic details such as bolt pistol casings, magazines, and knives. Take your time to emphasize these elements, as they contribute to the miniature’s character and realism. - Step 10: Base Coloring
Turn your attention to the base. Choose a suitable color for your terrain type; for example, Astrogranite works well for rocky bases. Apply this color evenly to the base, ensuring a consistent and appealing finish. - Step 11: Varnish for Protection
To protect your painstakingly painted miniature and achieve a polished look, apply a coat of Stormshield. This final step not only safeguards your work but also reduces the shine from the paints, providing a more realistic appearance to your Incursors.

