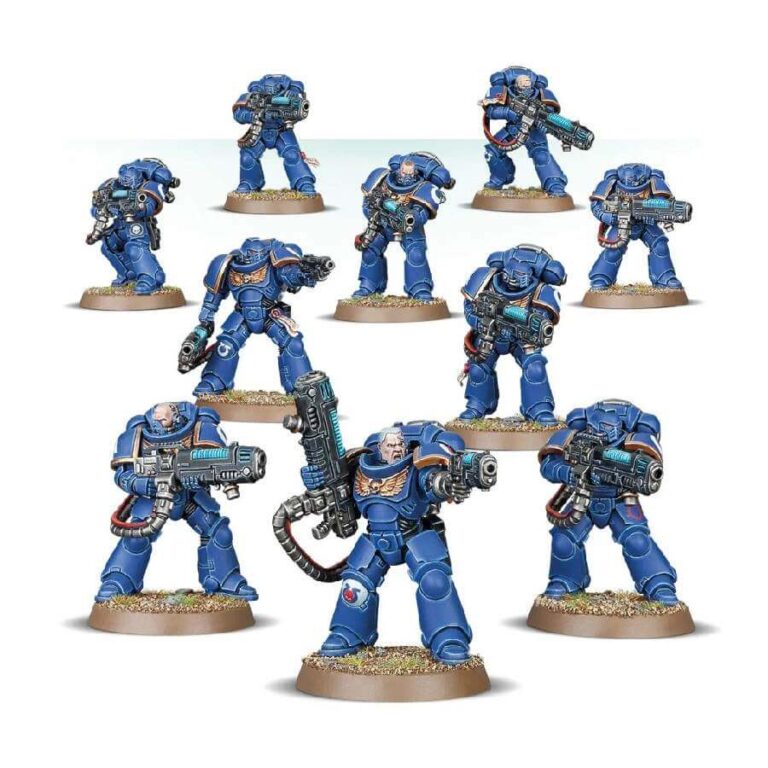
The Primaris Hellblasters are a Space Marines force to be reckoned with on the battlefield, with their plasma weaponry capable of incinerating enemies and even armored vehicles.
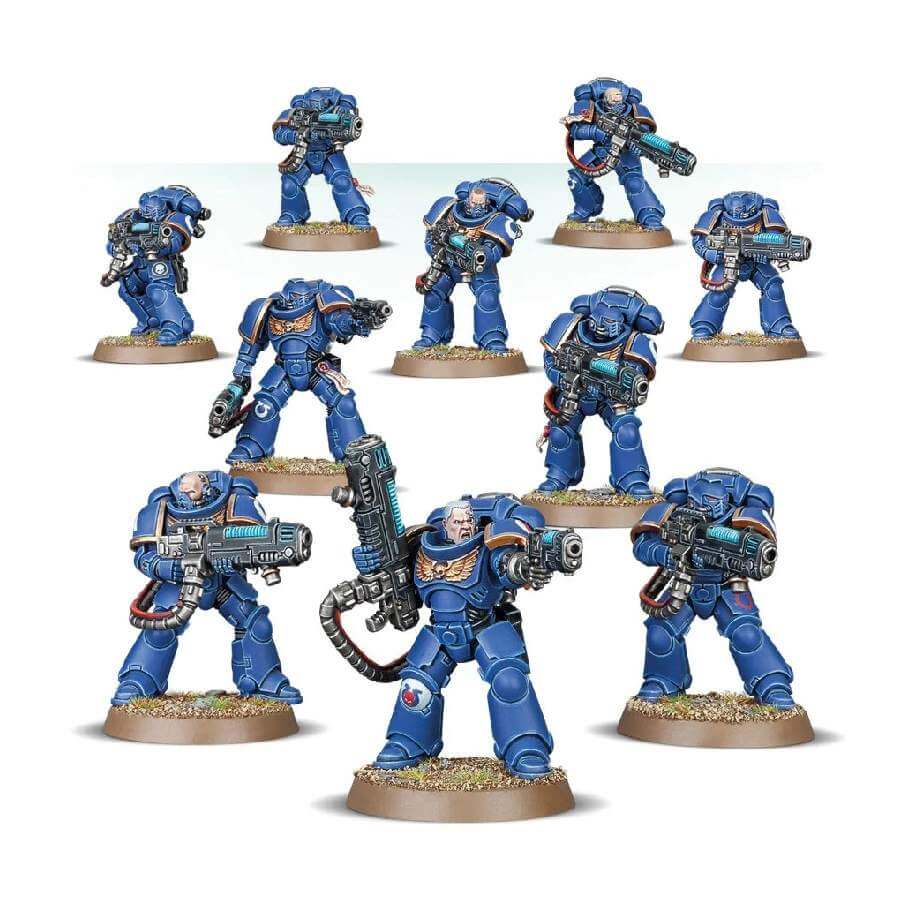
This kit allows you to assemble a set of 10 Hellblasters in Mk X Tacticus power armor, specializing in a single-armament specialism – plasma.
The models can be assembled as either a 10-man squad, a squad of 9 Hellblasters with a Sergeant, or 2 separate 5-man squads, each with a Sergeant of their own.
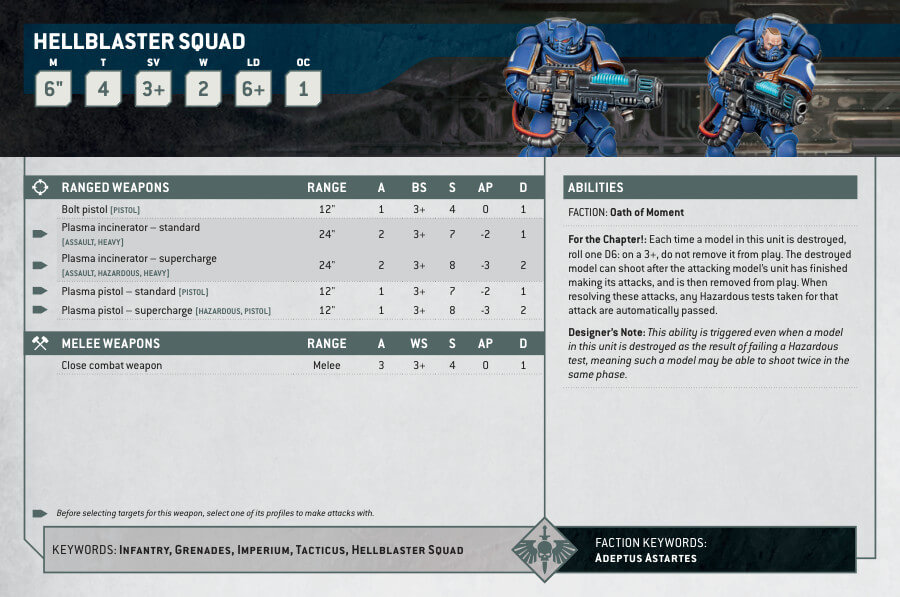
The squad comes with 10 plasma incinerators, which can be customized into either an assault plasma incinerator or a heavy plasma incinerator.
Additionally, there are optional components for those who wish to add some extra flair to their models, such as bare heads for the Sergeant and bionic arms for those who have suffered plasma accidents. With the Primaris Hellblasters on your side, you can take on even the most titanic alien fiend.
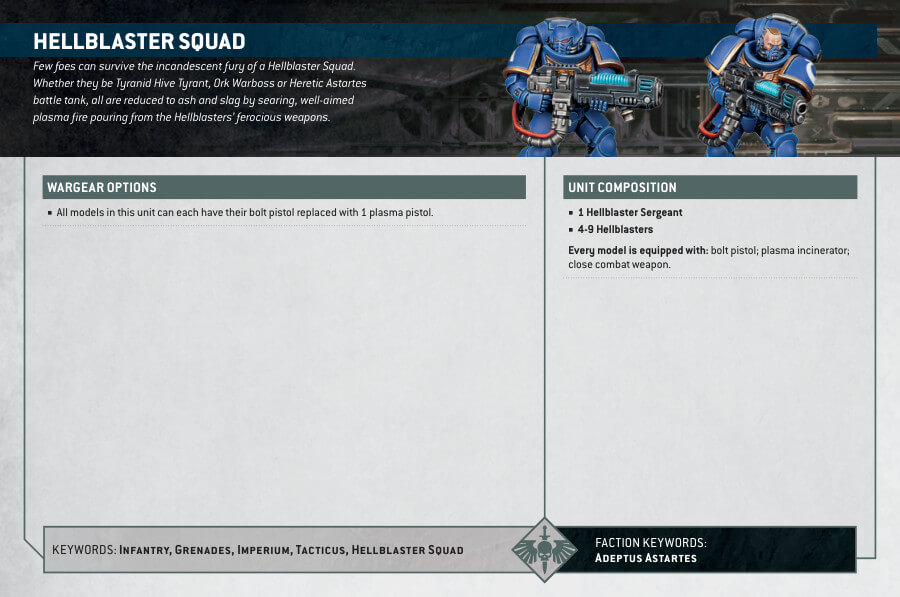
Primaris Hellblasters Datasheets
What’s in the Primaris Hellblasters box
- x250 plastic components that make 10 Primaris Hellblasters.
- x10 Citadel 32mm Round bases
- x1 transfer sheet, which is used for detailing and customization of the miniatures
How to paint the Primaris Hellblasters
- Step 1: Armor in Macragge Blue
Begin by painting the armor with Macragge Blue, ensuring a smooth and even coat for their iconic blue appearance. - Step 2: Trims and Emblems with Retributor Armour
Highlight the trims, emblems, and any ornate details on the armor using Retributor Armour. This will make these elements stand out. - Step 3: Lenses or Heads
If your Hellblasters have helmets, paint their lenses with Mephiston Red for a striking visual effect. If they don’t have helmets, focus on painting their heads with flesh tones like Kislev Flesh to give them a lifelike appearance. - Step 4: Plasma Incinerators in Abaddon Black
For the plasma incinerators, use Abaddon Black to give them a sleek, menacing look. This will make their weapons appear powerful and ready to unleash destruction. - Step 5: Plasma Energy with Asurmen Blue
Paint the plasma energy emanating from the incinerators with Asurmen Blue. This will create a vibrant, sci-fi glow effect. - Step 6: Detail Parts with Leadbelcher
Enhance the intricate details on the plasma incinerators by using Leadbelcher. This will add depth and realism to the weapons. - Step 7: Shading for Depth
To add depth and dimension, apply appropriate shade paints. Use Nuln Oil for the armor, Agrax Earthshade for the weapons, Reikland Fleshshade for skin, and Seraphim Sepia for details. These shades will create realistic shadows and enhance the overall look. - Step 8: Layering for Highlights
Apply lighter shades to create highlights. For the armor, use Calgar Blue; for the trims and emblems, use Liberator Gold; for lenses or other red details you may have painted, like helmets, use Evil Sunz Scarlet and for the weapons add thin lines with Eshin Grey. This will add dimension to your Hellblasters. - Step 9: Creating a Textured Base
To create a textured base for your Hellblasters, use texture paints like Astrogranite Debris, Stirland Battlemire or any preferred texture paint. Apply it to the base to mimic a realistic terrain. - Step 10: Varnishing for Protection
Protect your carefully painted Hellblasters by applying a protective varnish over the entire miniatures. Use Ardcoat varnish to give them a polished finish. Ensure the varnish is fully dry before displaying your Primaris Hellblasters on the battlefield.

