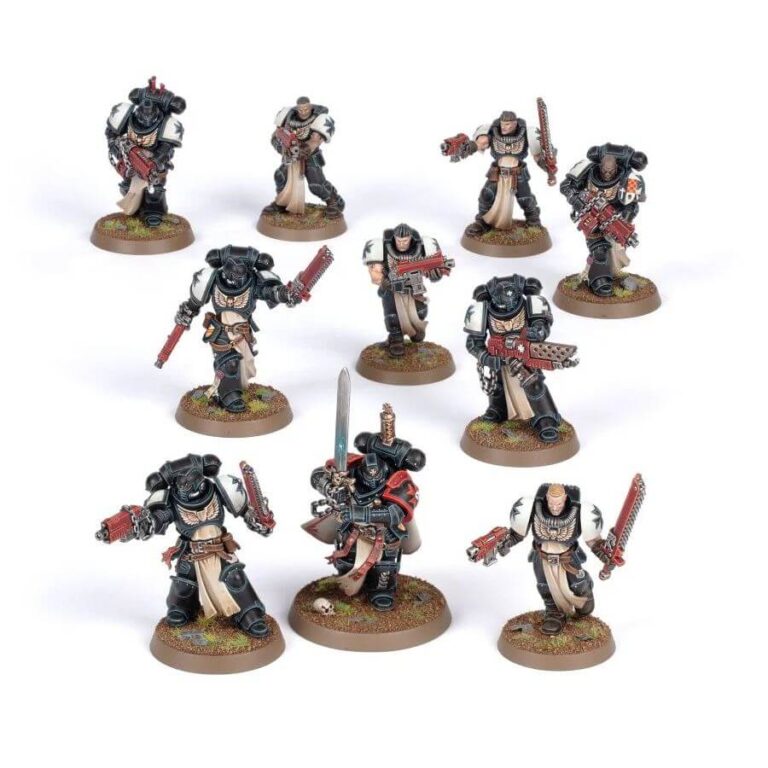
Get ready to unleash the fury of the Black Templars on the battlefield with the Crusader Squad, a formidable mix of 5 Primaris Initiates and 4 Neophytes led by a Veteran Sword Brother. These Troops come equipped with a range of devastating weapons, from pyreblasters and power fists to heavy bolt pistols and Astartes chainswords.
To build your Crusader Squad, choose from a variety of helmeted and unhelmeted heads for the Initiates, and equip them with auto bolt rifles, heavy bolt pistols, pyreblasters, or power fists. One Initiate can be built as a Sword Brother, with options for a power sword or power axe, and a heavy bolt pistol or pyre pistol. The Neophytes come with four unhelmeted head options and can be equipped with bolt carbines or bolt pistols and Astartes chainswords. With this diverse range of loadout options, your Crusader Squad is ready to prove their worth in close combat or at range.
Also available in this box:
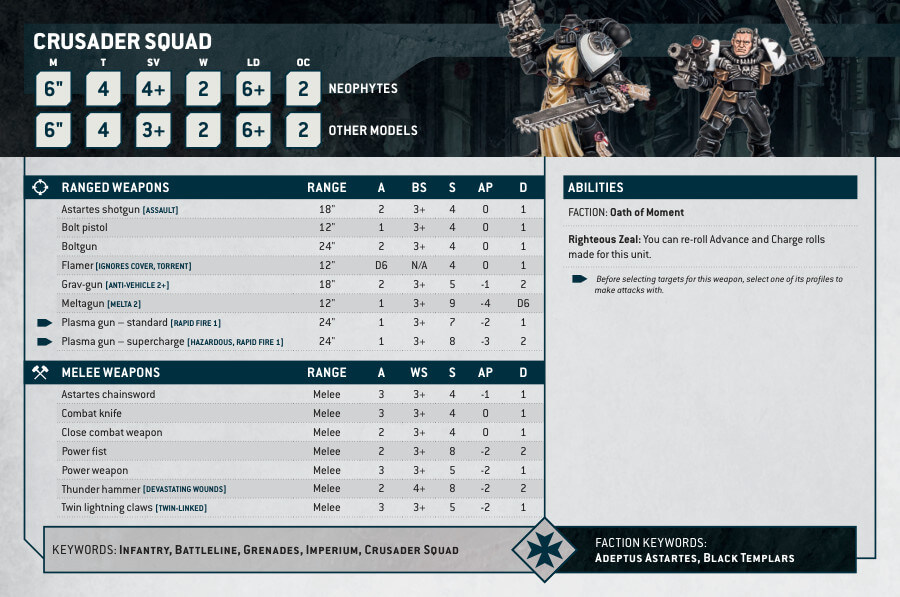
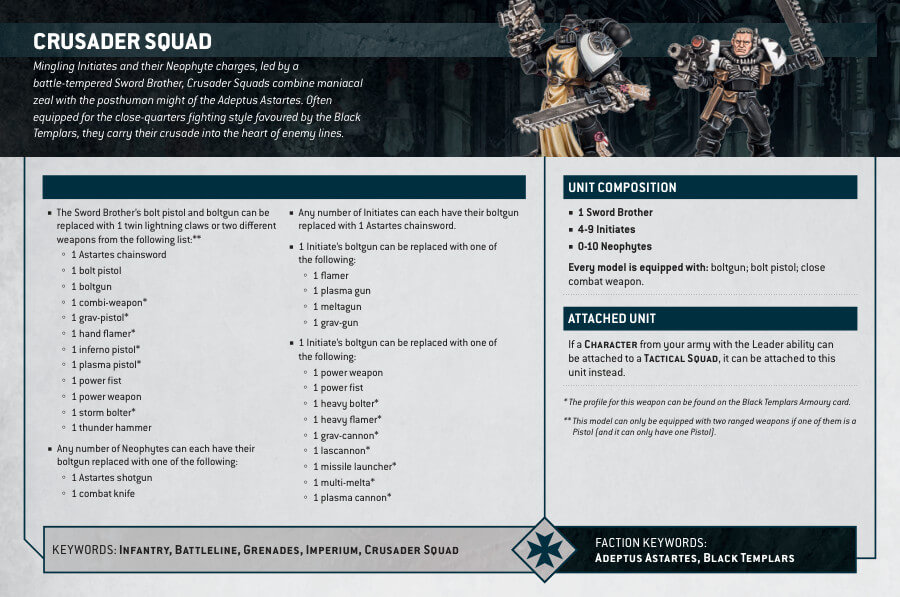
Primaris Crusader Squad Datasheets
What’s in the Primaris Crusader Squad box
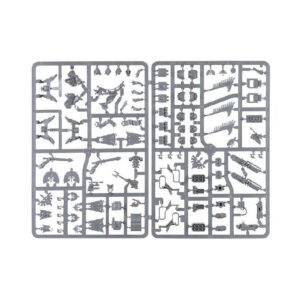
- x228 plastic components allowing you to assemble 5 Primaris Initiates, 1 Sword Brother and 4 Neophytes with various weapon options.
- x1 Citadel 40mm Round base (Sword Brother).
- x5 Citadel 32mm Round bases (Initiates).
- x4 Citadel 28mm Round bases (neophytes).
How to paint the Primaris Crusader Squad
- Step 1: Armor
Begin by painting the armor of your Crusaders with Abaddon Black. Apply this paint evenly to create a solid, imposing appearance for your squad. - Step 2: Metallic Components
Turn your attention to the metallic parts, such as swords, chains, and other intricate details. Use Leadbelcher to bring out the metallic shine in these components. - Step 3: Red Details
Khorne Red is your choice for the vivid red details. Paint the shoulder pads of the Sword Brother, as well as the bolt pistols, chainsword details, and helmet lenses. This crimson hue adds a bold and striking accent to your squad. - Step 4: Parchments, Clothing, and Skull Details
Utilize Screaming Skull to paint parchments, clothing, and skull details. Pay close attention to detail in this step, as it enhances the visual impact of these elements. - Step 5: Exposed Heads
For the exposed heads of your Crusaders, select Kislev Flesh. This paint adds a lifelike flesh tone, giving your miniatures a realistic touch. - Step 6: Layering for Depth
Now, it’s time to add depth and dimension to your miniatures. Apply Nuln Oil to the black armor, Carroburg Crimson to the red details, and Agrax Earthshade to the metallic components. These washes settle into the recesses, emphasizing details and creating depth. - Step 7: Base with Texture Paints
To create a visually engaging base, choose from a selection of texture paints such as Astrogranite Debris, Stirland Mud, and Armageddon Dunes. Apply these paints to the base surface, replicating a textured and realistic terrain for your miniatures to stand on. - Step 8: Varnishing
Preserve your meticulous work by applying a protective coat of Ardcoat over the entire miniatures. This not only safeguards your paint job but also imparts a glossy finish. Ensure the varnish is fully dry before proudly deploying your Primaris Crusader Squad on the battlefield.

