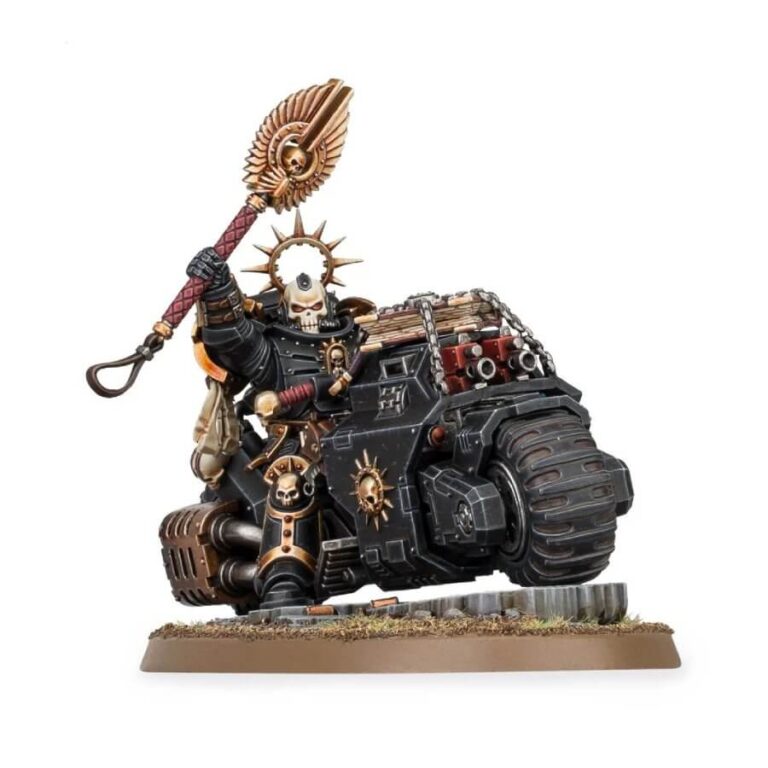
If you’re a Space Marines player and want to enhance nearby troops with a suite of powerful abilities while keeping pace with the fastest elements of your army, you need a Chaplain on Bike. The Raider-pattern bike allows the Chaplain to keep up with even the swiftest armoured advance or spearhead breakthrough, bellowing catechisms to urge his brothers to victory and charging headlong into the foe with his swinging crozius arcanum. The Primaris Chaplain on Bike is the perfect accompaniment to your Outriders or forward units like Incursors, acting as a tactical lynchpin and ceramite-clad comet of righteous fury, making zealotry faster and more deadly than ever.
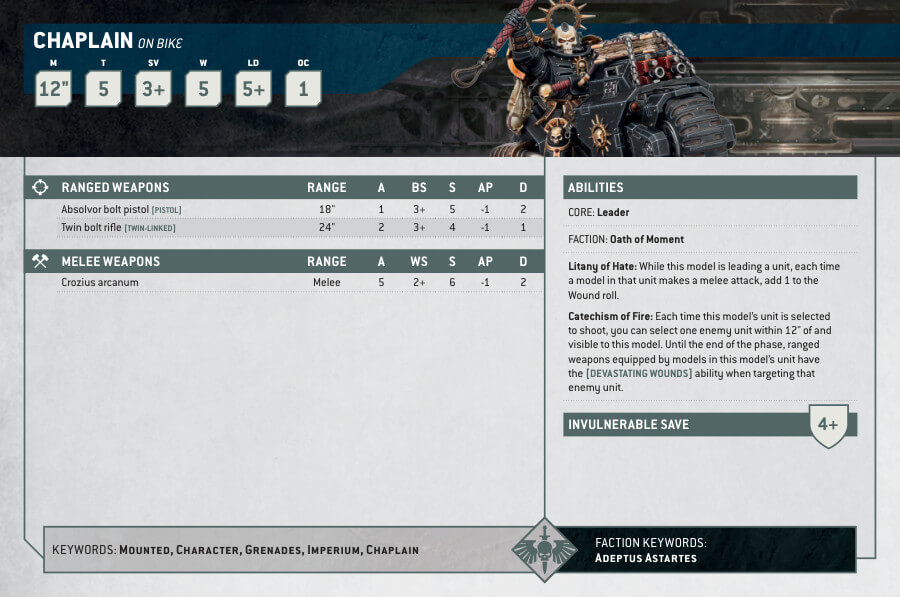
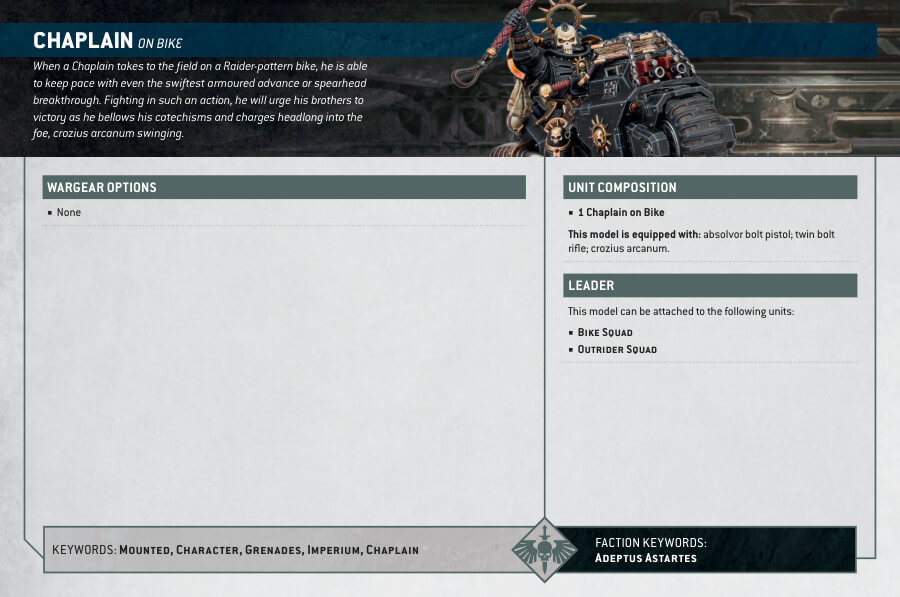
Primaris Chaplain on Bike Datasheets
What’s in the Primaris Chaplain on Bike box
- x33 plastic components to assemble the Chaplain on his Raider-pattern bike.The kit also includes both helmeted and unhelmeted heads to allow for customization.
- x1 90mm oval base for the completed model to stand on
- x1 Primaris Character Transfer Sheet is included with the kit, featuring various icons for customization of the Chaplain’s armor
How to paint the Primaris Chaplain on Bike
- Step 1: Armor and Bike in Abaddon Black
With Abaddon Black, paint both the armor of the Chaplain and the bike. Ensure even coverage for a sleek black finish. - Step 2: Metal Parts with Leadbelcher
Use Leadbelcher to paint the metal parts of the bike, such as the exhausts. Make these parts gleam with a metallic shine. - Step 3: Red Details with Khorne Red
Apply Khorne Red to details like the crozius arcanum handle and any other red elements you desire. This adds a bold touch of red to your miniature. - Step 4: Gold Details with Retributor Armour
Highlight the gold details on both the armor and the bike, including emblems, trims, weapons, and ornaments, with Retributor Armour. This adds a touch of regal splendor. - Step 5: Painting the Skull Helmet and Parchment Parts with Screaming Skull
Use Screaming Skull to paint the Chaplain’s skull helmet and any parchment parts on the armor and bike, such as purity seals or scrolls. Pay attention to detail to make these elements stand out. - Step 6: Creating Depth with Nuln Oil
Apply a wash of Nuln Oil over the entire miniature. This wash settles into the recesses, creating depth and shadows, giving your miniature a weathered appearance. - Step 7: Highlighting the Black Parts with Eshin Grey
With Eshin Grey, highlight the edges and corners of the black parts with thin lines. This step enhances the depth and brings out the intricate details. - Step 8: Highlighting the Metal Parts with Stormhost Silver
Make the metal parts shine by using Stormhost Silver to highlight the edges and corners with thin lines. This creates a metallic gleam. - Step 9: Highlighting the Gold Parts with Liberator Gold
To make the gold details stand out even more, use Liberator Gold to highlight the edges and corners. This adds a brilliant sheen. - Step 10: Highlighting the Parchment Parts with Ushabti Bone
Use Ushabti Bone to highlight the edges and corners of the parchment parts with thin lines. This adds authenticity to the parchments. - Step 11: Creating a Textured Base
Select a texture paint like Astrogranite Debris or Agrellan Earth to create a textured base for your Chaplain on Bike. Apply it to the base surface and allow it to dry thoroughly.
You can also enhance the base by adding small rocks or grass tufts. This adds realism and dimension to the miniature’s base. Secure them with adhesive. - Step 12: Varnishing for Protection
To safeguard your intricate work and give your Chaplain on Bike a polished finish, apply Ardcoat varnish over the entire miniature. This protective coat will preserve your paint job and give it a glossy finish. Allow it to dry completely before showcasing your miniature on the tabletop.

