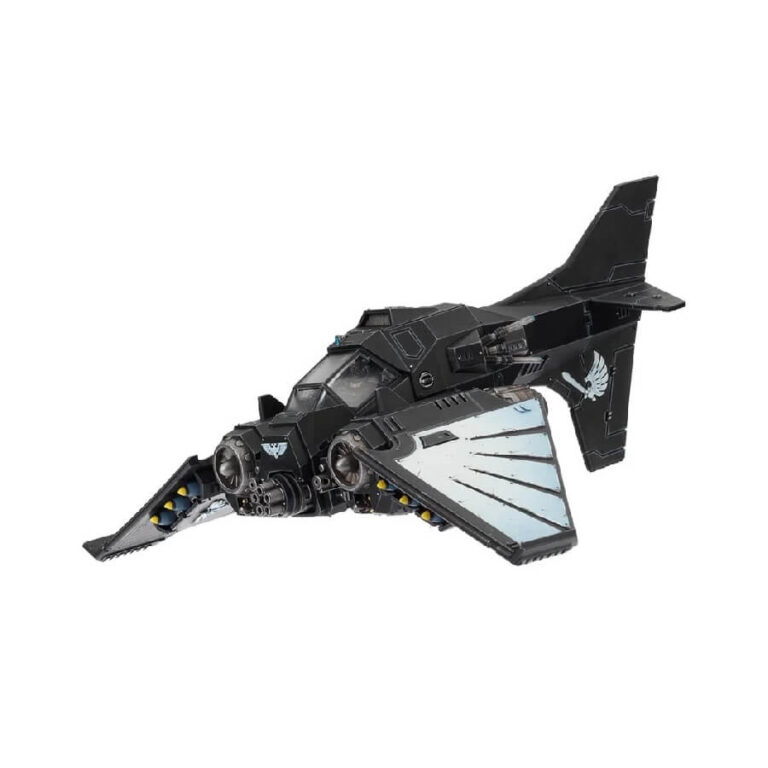
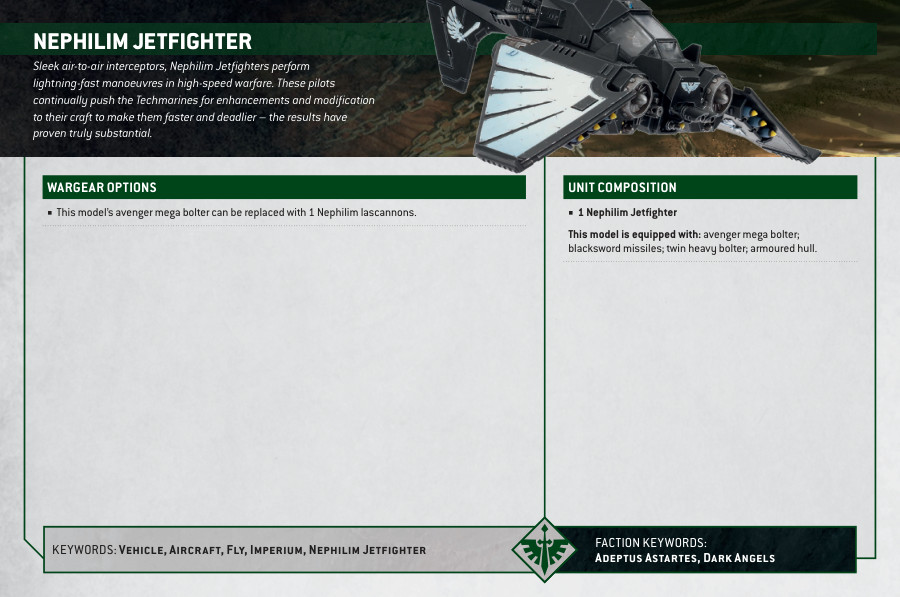
The Nephilim Jetfighter is a versatile aircraft designed for the Dark Angels to establish air superiority over the battlefield, allowing their troops to focus on ground targets. The kit includes 88 components with which you can assemble either a Ravenwing Dark Talon or a Nephilim Jetfighter. Both options are impressive-looking miniatures that would make a great addition to any Dark Angels collection. The design of the Nephilim Jetfighter closely resembles that of the Storm Talon, with Dark Angels iconography adorning its metal panels and rivets. The kit comes with a range of imposing weaponry, including a twin-linked heavy bolter, twin-linked lascannon, and Blacksword missiles, ensuring your Nephilim Jetfighter is well-equipped to take on any foe.
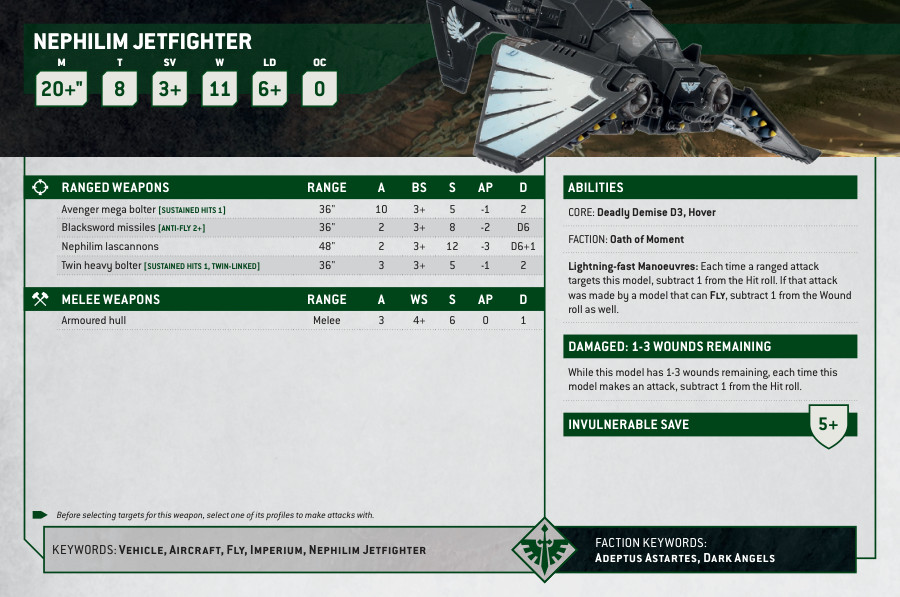
Nephilim Jetfighter Datasheets
What’s in the Nephilim Jetfighter box
- x88 plastic components that make 1 Nephilim Jetfighter model.
- x1 flying stem
- x1 large oval base with which to make either a Nephilim Jetfighter or a Ravenwing Dark Talon.
How to paint the Nephilim Jetfighter
- Step 1: Base Coat
Using a medium-sized brush, apply a smooth and even coat of Abaddon Black paint to cover the entire miniature. Make sure you get into all the nooks and crannies. This is our base color. - Step 2: Layer
Now, we want to add some depth. With a smaller brush, lightly paint over the black areas with Eshin Grey. Leave some of the black showing in the deepest parts, like the panel lines and edges. This makes it look shaded and detailed. - Step 3: More Layering
Continuing with the smaller brush, add another layer using Dawnstone. Focus on the raised areas and edges of the model. This creates highlights and makes the details pop. - Step 4: Details
For the jet’s engines and other metallic details, use Mechanicus Standard Grey. Carefully paint these parts to give them a metallic look. You can be more precise here.
To make the rocket tips stand out, use a bright color like Yriel Yellow. Apply it to the very tips of the rockets carefully. This adds a cool contrast to the dark body of the jet.
For the jet’s wing details, use White Scar. Paint any symbols or lines you want to stand out on the wings. You can use a fine brush for this part. - Step 5: Weathering with Typhus Corrosion
To make your jet look battle-worn and realistic, apply Typhus Corrosion to areas where you want rust and corrosion. Focus on edges, joints, and areas that would naturally wear over time. Allow it to dry. - Step 6: Varnishing
To protect your hard work and give your jet a nice finish, apply a matte varnish. This seals the paint and keeps it looking great. Let it dry completely.

