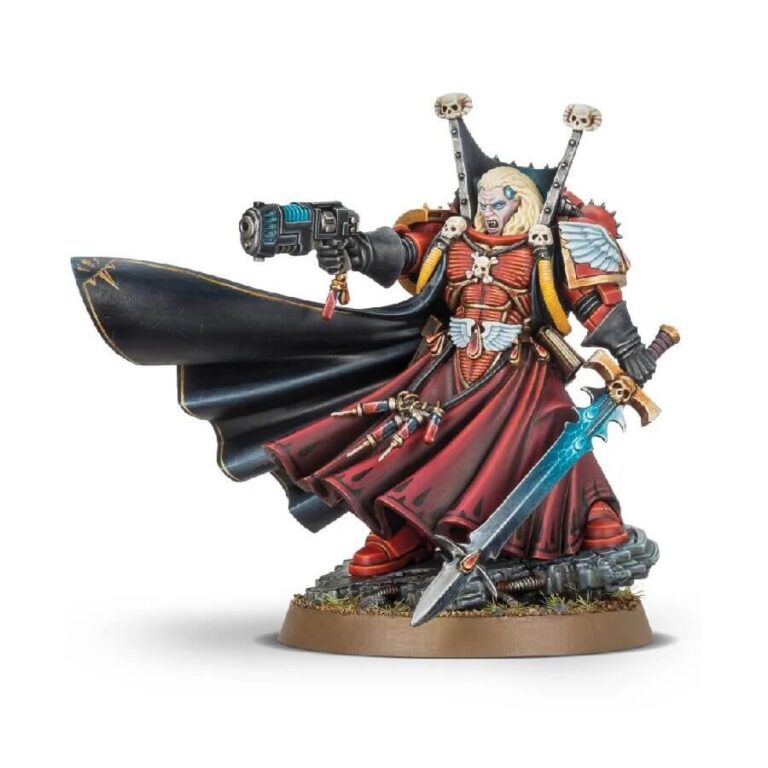
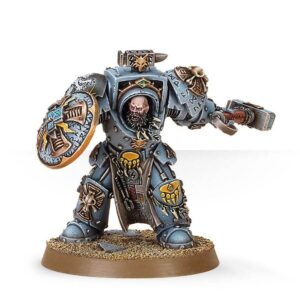
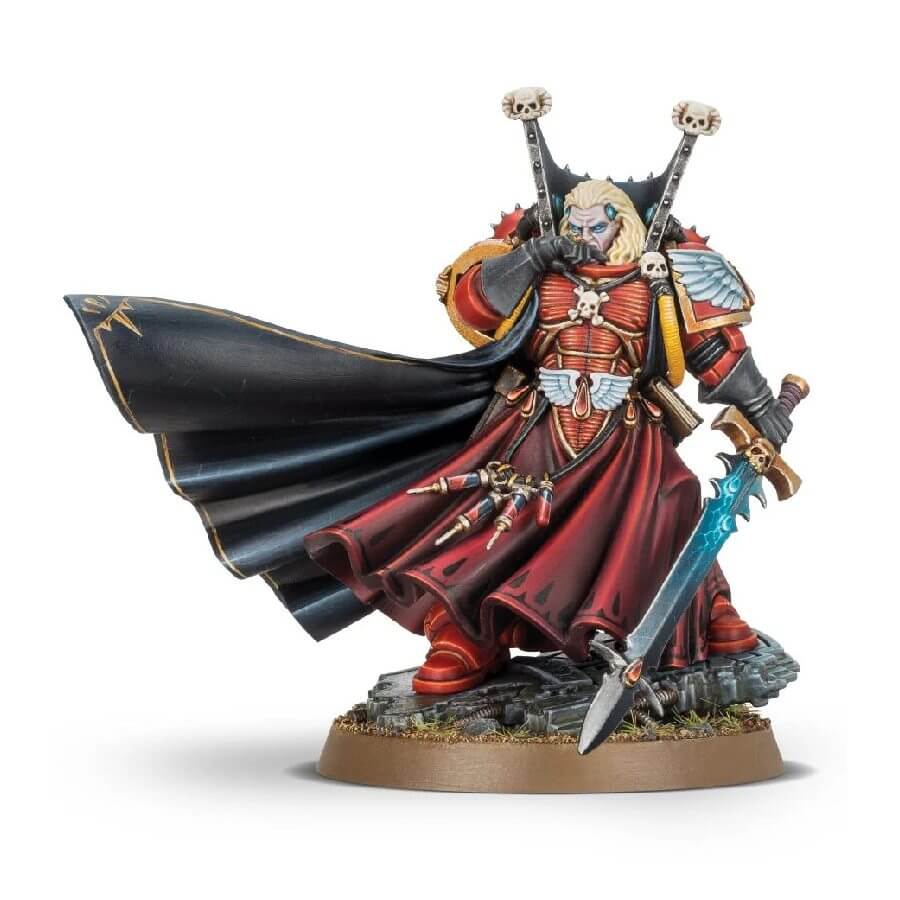
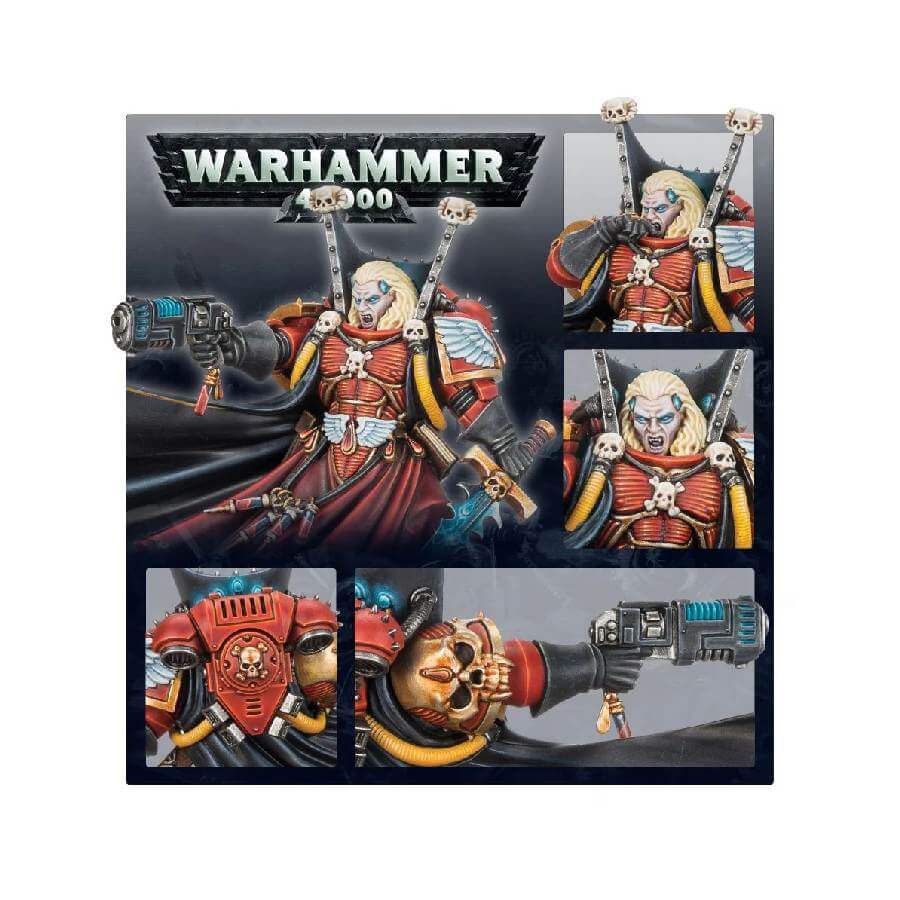
Chief Librarian Mephiston is a revered and awe-inspiring figure among the Blood Angels due to his unmatched strength and willpower, having surmounted the curse of the Black Rage through near-death battles. Having undergone the Rubicon Primaris, Mephiston has not only demonstrated the Blood Angels acceptance of their new battle-brothers, but has also become more powerful than ever before. As a formidable psyker, Mephiston wields the force sword Vitarus and a plasma pistol with ease, and can be assembled in two different poses – aiming his pistol with his right hand or wiping his mouth on the back of his gauntlet, possibly to wipe the blood from his fangs.
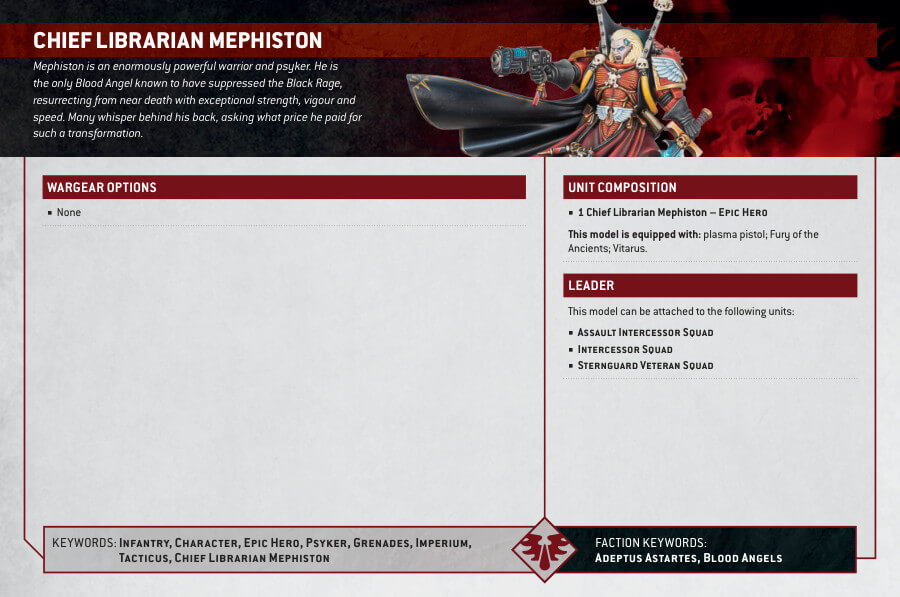
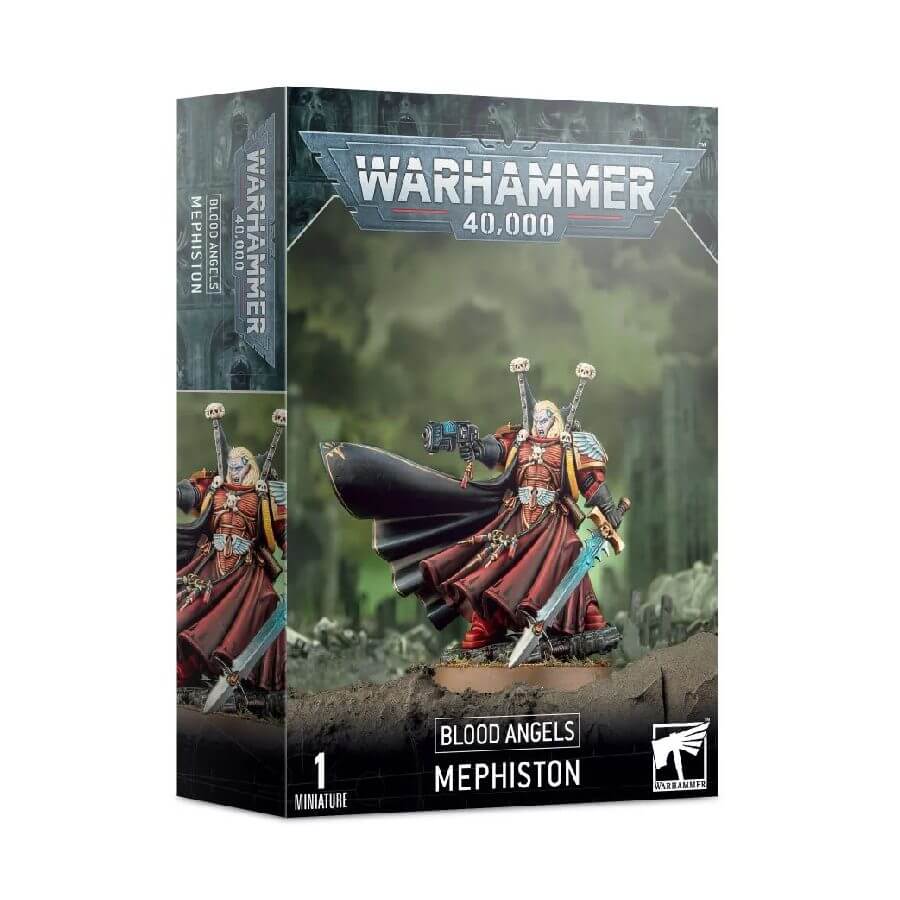
Mephiston Datasheets

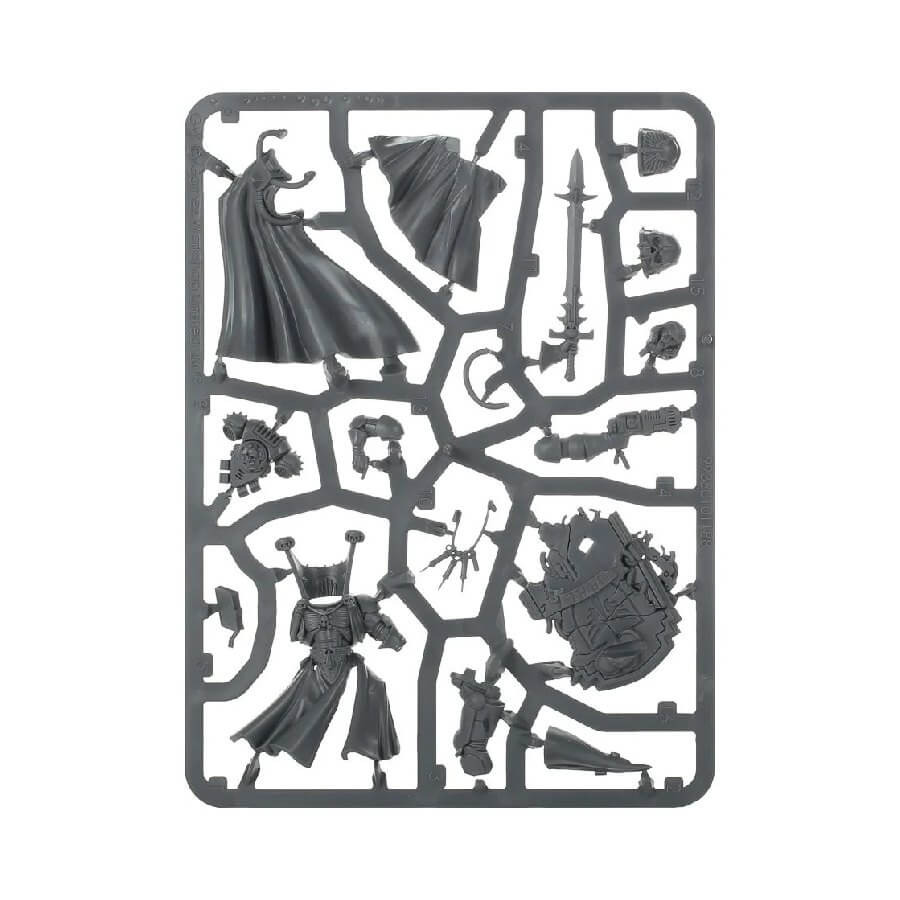
What’s in the Mephiston box
- x16 plastic components that make one Mephiston, Lord of Death.
- x1 Citadel 40mm Round Base.
How to paint Mephiston
- Step 1: Priming
Start by priming the entire miniature with Chaos Black spray paint. This provides a solid base for the subsequent paint layers and helps the colors adhere better. Allow the primer to dry completely before moving on to the next steps. - Step 2: Base Colors
Begin with the armor, paint it with Mephiston Red for a rich red hue. For the robes, apply Khorne Red. Paint the cape with Genestealer Purple. Use Cadian Fleshtone for the exposed head, and for metallic elements like the pistol, sword, and collar, opt for Iron Warriors. - Step 3: Layering
To add depth and dimension, layer the armor with Evil Sunz Scarlet, focusing on recesses and edges. Layer the robes with Wazdakka Red. Layer the cape with Xereus Purple. Layer the exposed head with Ulthuan Grey, and enhance the metallic elements with Iron Hands Steel. - Step 4: Details
Diversify your miniature’s details with additional paints. Paint the hair with Dorn Yellow for a pale yellow look. Apply White Scar paint for the Blood Angels symbols. Use Ahriman Blue for the energy sources on the pistol and sword. For the sword handle details, apply Balthasar Gold, and paint the gloves with Abaddon Black. - Step 5: Shading
Shading is crucial for adding depth. Apply Agrax Earthshade to the armor, clothing, and cape, allowing it to settle in the recesses for a realistic effect. For the exposed head, consider using a shade of Reikland Fleshshade, and for the metallics, use Nuln Oil. - Step 6: Highlights
Highlight the armor Wild Rider Red to make it stand out. Lightly dry brush the robes with Khorne Red for added texture. Use Sigvald Burgundy for the cape, and for the exposed head, highlight with Pallid Wych Flesh. Enhance the metallics with Stormhost Silver. - Step 7: Basing with Texture
Choose your basing style to match your gaming table or diorama. Utilize texture paints, paints, and tufts to create a realistic effect. For the base texture, you can use Astrogranite Debris for a gritty, urban look. Apply it to the base and allow it to dry thoroughly. Once dry, you can add additional details like small rocks, grass tufts, or other terrain elements to suit your desired theme. - Step 8: Varnishing
To protect your hard work, apply a matte varnish evenly over the entire miniature using a varnish like Ardcoat and allow it to dry thoroughly.