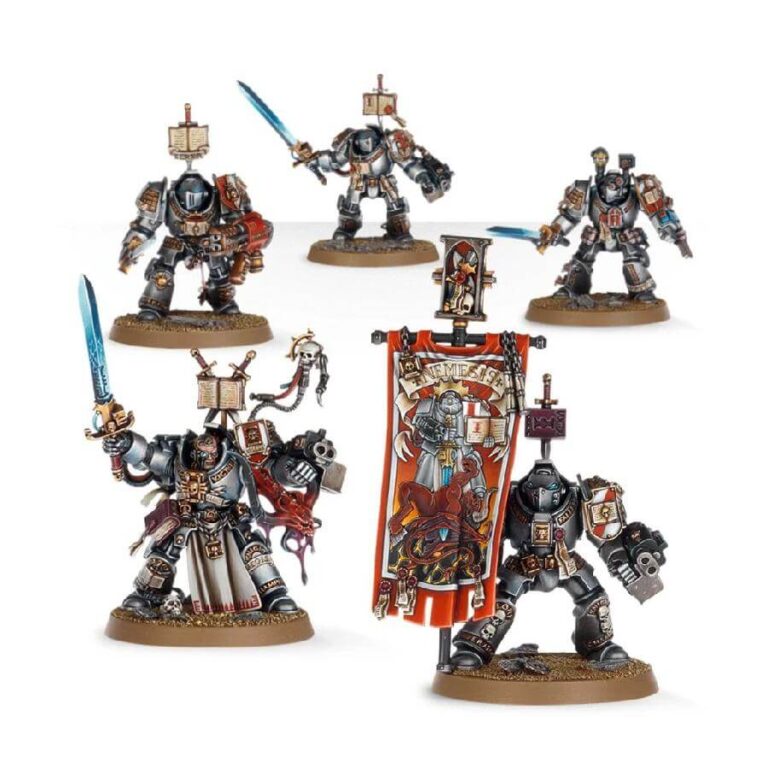
The Grey Knights Paladins are renowned as the bravest and most honorable warriors within the Grey Knights Chapter, equipped with an impressive arsenal of close combat and ranged weaponry. These highly detailed models showcase the distinctive iconography of the Grey Knights, with intricate designs featuring books, skulls, purity seals, chains, and personal heraldry adorning their armor. Their armor style is reminiscent of a more ancient design influence, further emphasizing the power and longevity of the Grey Knights.
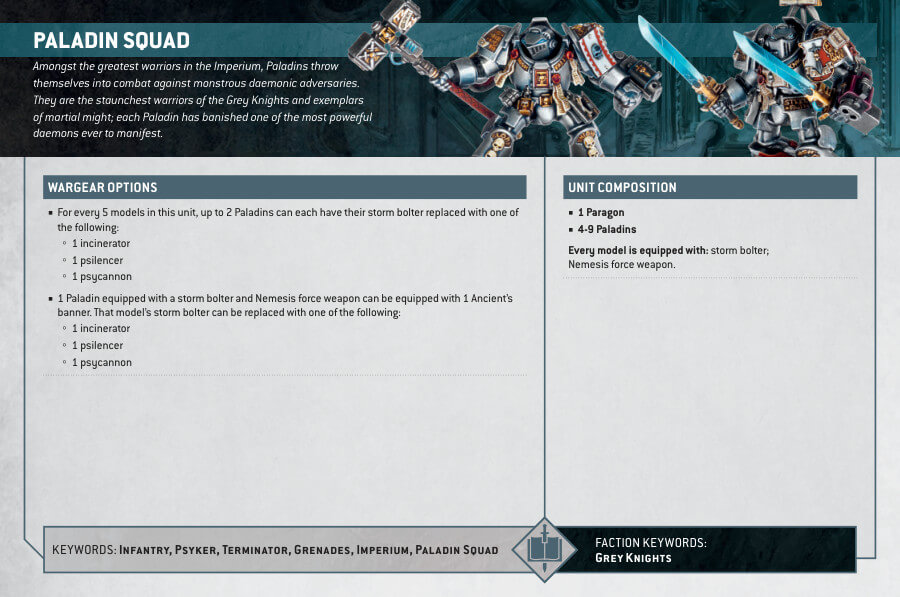
The models come with an extensive range of unit upgrades and weaponry options, including Nemesis falchions, Nemesis force halberds, a Nemesis Daemon hammer, a Nemesis warding stave, a psycannon, a psilencer, and an incinerator.
Grey Knights Paladins Datasheets
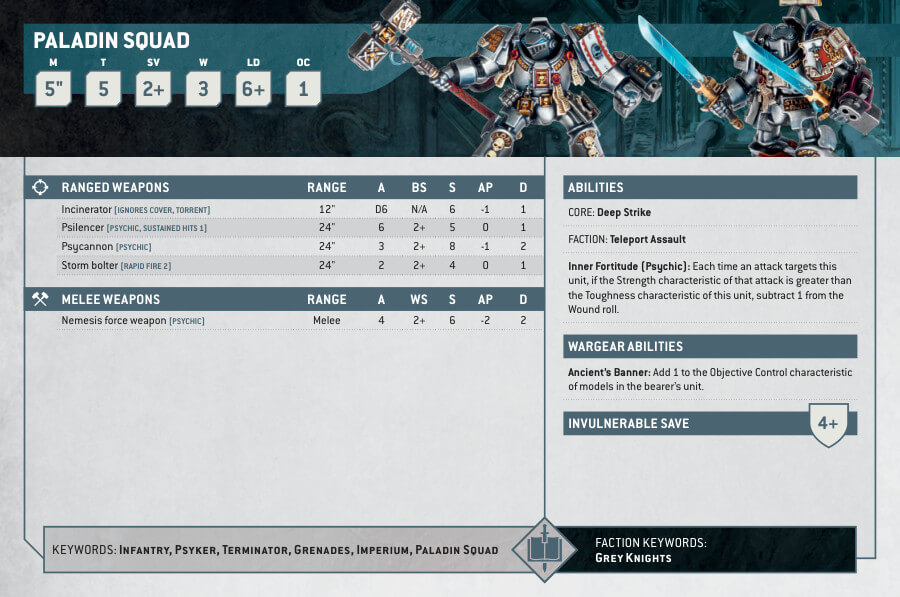
What’s in the Grey Knights Paladins box
- x153 components used to assemble either a Grey Knight Paladin Squad or Grey Knight Terminator Squad.
- x5 40mm round bases.
How to paint the Grey Knights Paladins set
- Step 1: Primer
Start by applying a primer to your Grey Knights Paladins. A white or grey primer is ideal as it provides a good base for the following colors to adhere to. - Step 2: Base Colors
Begin by applying the base colors to your miniatures. Paint their armor with Leadbelcher, which gives them a metallic appearance. - Step 3: Shading
To add depth to the armor, apply Drakenhof Nightshade as a shade. Focus on the recesses and crevices of the armor. - Step 4: Layering
Lightly layer the armor with Ironbreaker, especially on raised surfaces and edges. This will create highlights and add dimension to the metallic look. For an extra shine, use Stormhost Silver on the very edges of the armor. - Step 5: Helmet Lenses and Facial Features
If the Grey Knights Paladins have exposed heads, start by painting their facial features. Use Rakarth Flesh as a base color for their skin, followed by a shade like Reikland Fleshshade to add depth. Highlight their facial features with a lighter flesh tone, such as Flayed One Flesh.
If they don’t have exposed heads, proceed to paint the helmet lenses with Lothern Blue to create a striking contrast with the metallic armor. - Step 6: Swords
Paint the blades of their swords with a vibrant blue paint like Caledor Sky. To give the swords an electrifying effect, add streaks of lighter blue using Baharroth Blue and White Scar. These streaks should be applied diagonally along the length of the sword to mimic a glowing effect. - Step 7: Red and Gold Details
For the red details on their armor, use Mephiston Red. Be precise in painting the trim and any red insignias. For the gold details, like ornamental elements and insignias, use Retributor Armor. - Step 8: Basing
Consider adding a suitable base to complete your models. You can use textured paints or materials like sand to create a realistic terrain effect. Use Astrogranite or Stirland Mud, depending on the desired terrain effect. - Step 9: Varnish
To safeguard your painstaking work and add a protective layer, apply a varnish like Ardcoat or Munitorum Varnish. This ensures your beautifully painted Grey Knights Paladins remain vibrant and resilient during intense battles.

