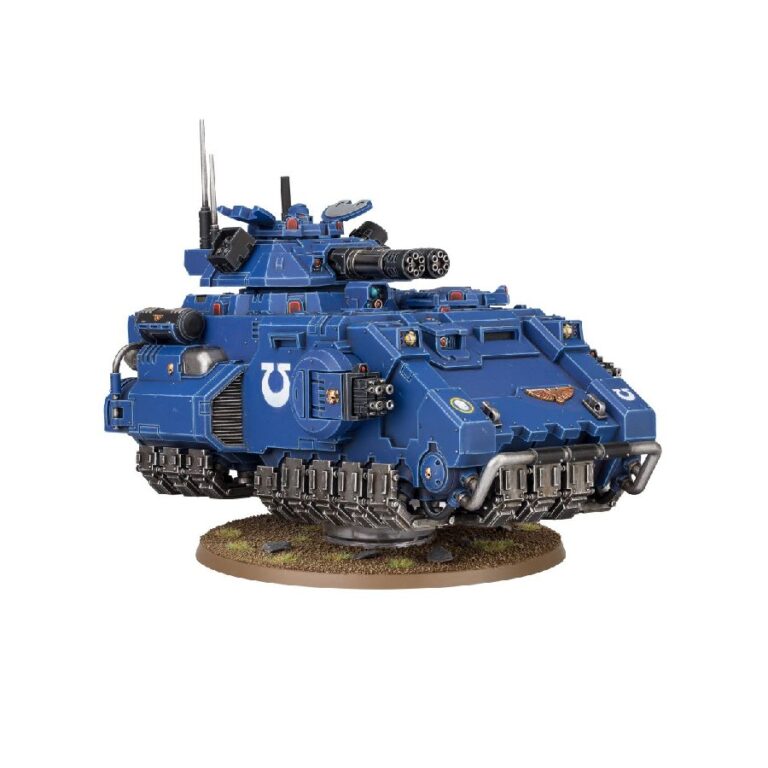
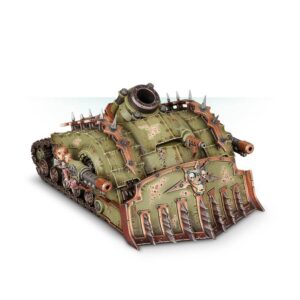
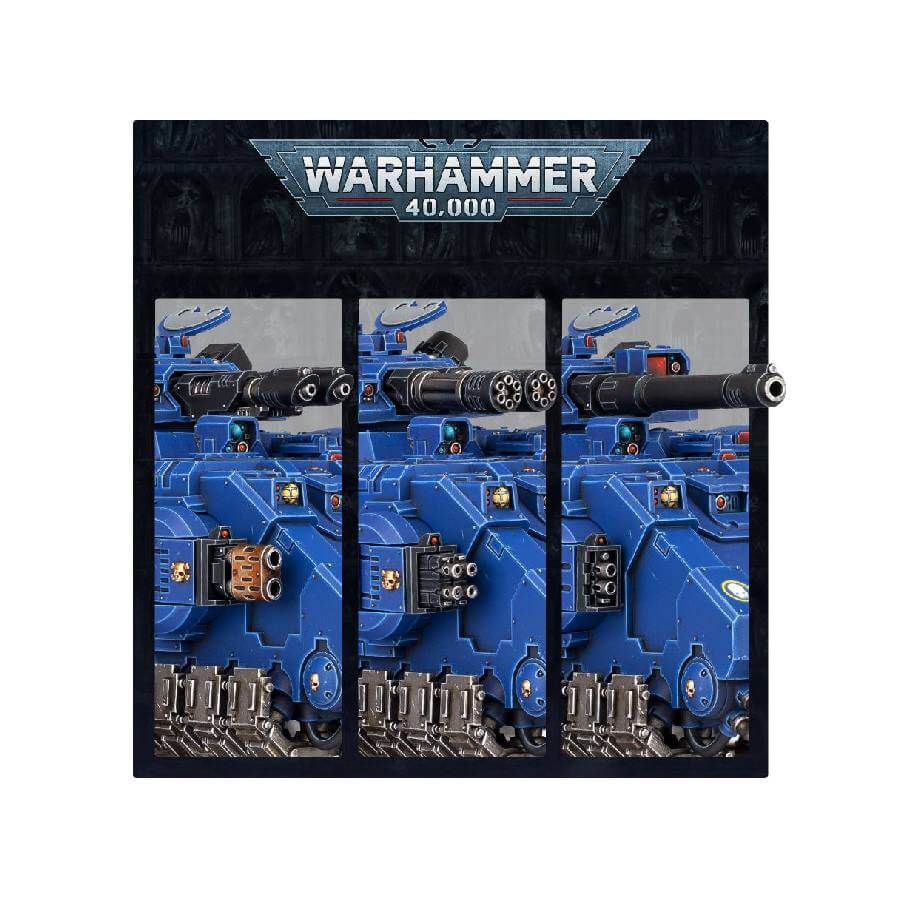
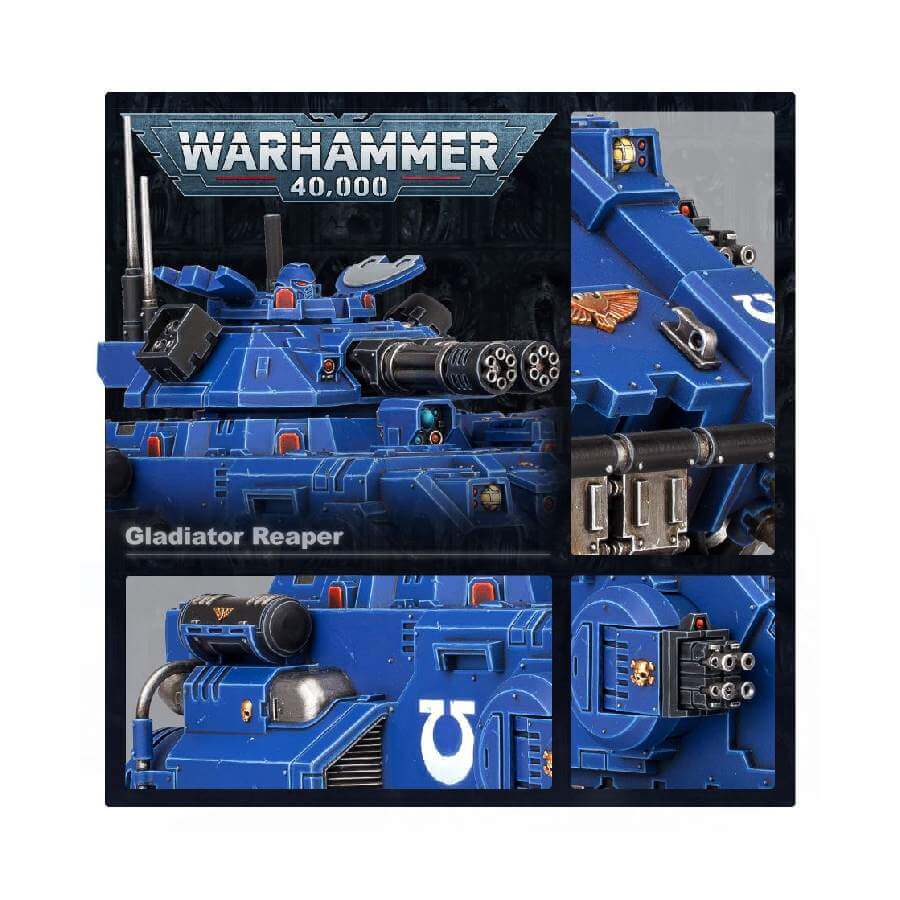
The Gladiator Reaper is a formidable Space Marines battle tank with twin heavy onslaught gatling cannon and two tempest bolters, making it the ultimate choice for obliterating enemy hordes. The design of the Gladiator is based on the Impulsor’s chassis and has been created to serve as a front-line battle tank, rather than a transport vehicle. The intense sound of the cannons spinning to full pitch is enough to make the teeth of all nearby itch with the vibrations, as thousands of spent casing pour over the tank’s armoured hide while it erases enemies with a storm of fire. If you want to bolster your batteline with some serious firepower, the Gladiator Reaper is the way to go.
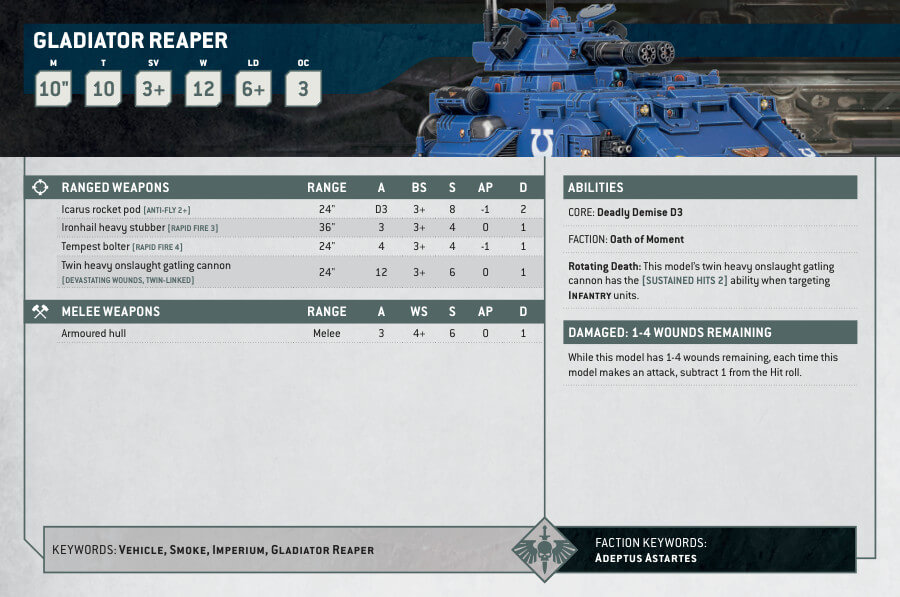
Gladiator Reaper Datasheets

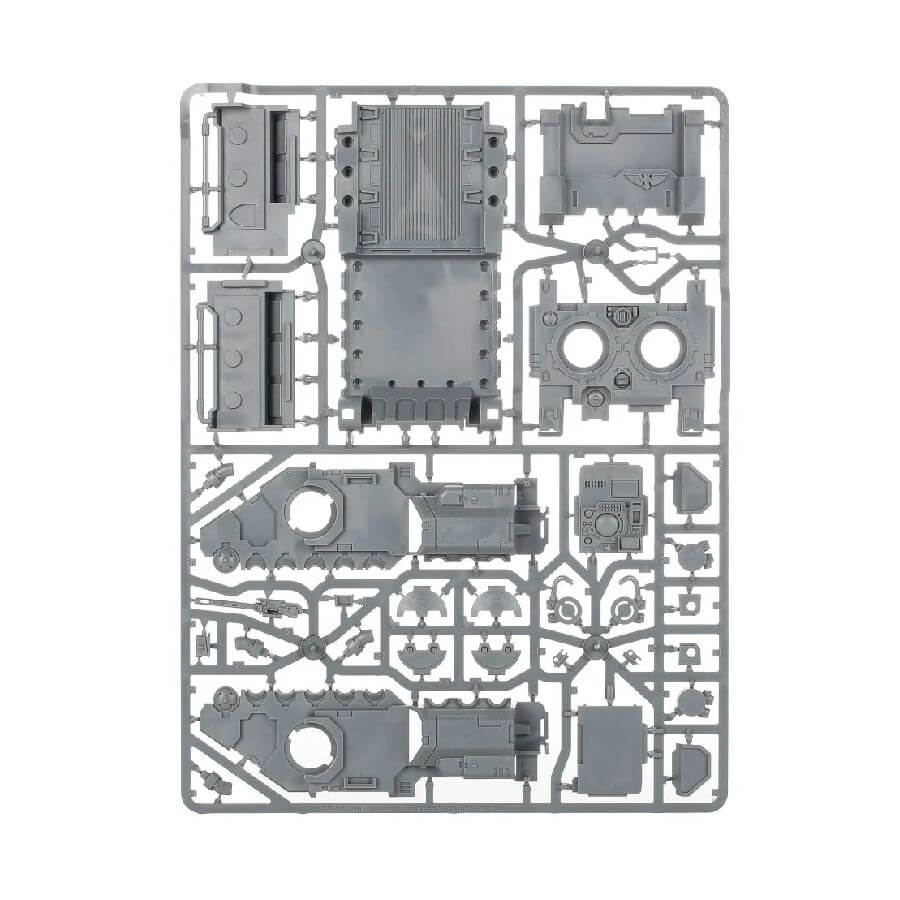
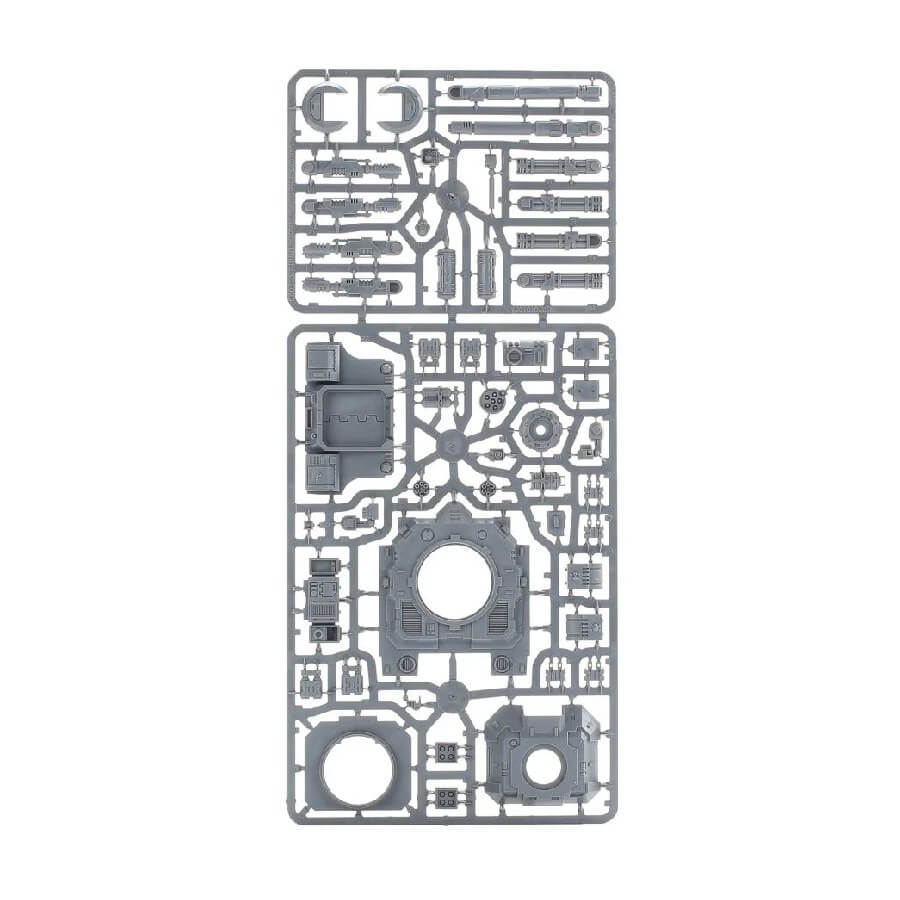
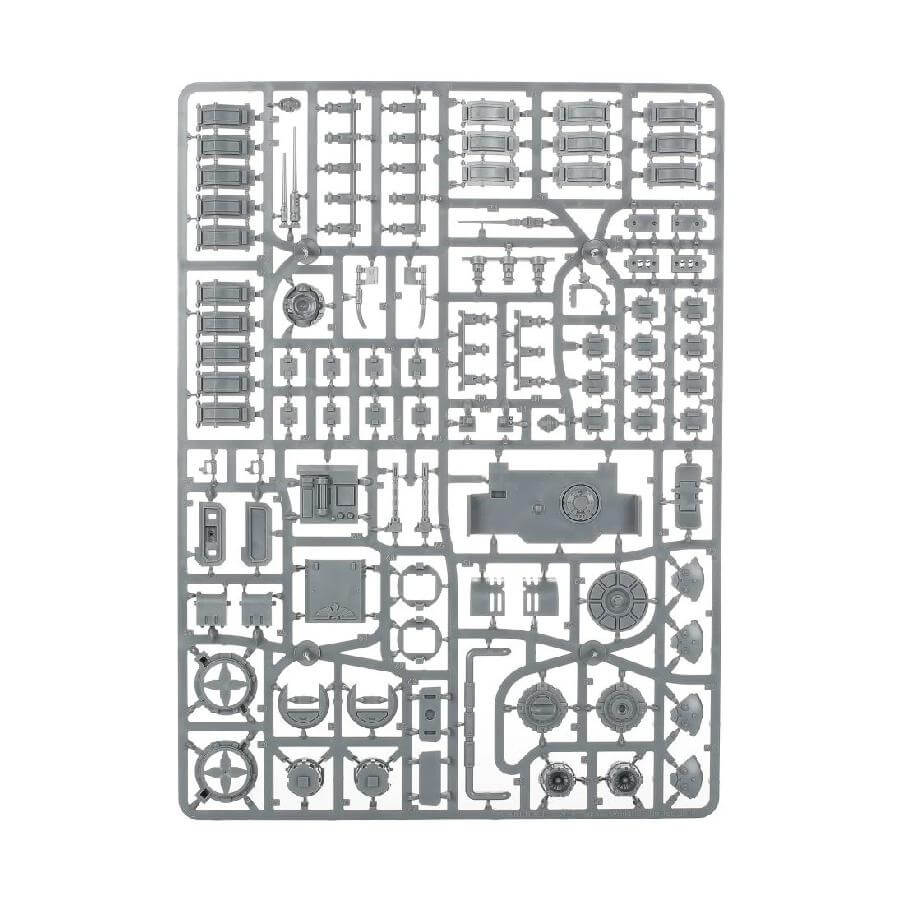
What’s in the Gladiator Reaper box
- x157 plastic components included in the set wich can be alternatively used to build a Gladiator Valiant, Gladiator Lancer, or an Impulsor.
- x1 Citadel 100mm Round Base
- x1 Clear Tank Hover Stand
- x1 Primaris Vehicle Transfer Sheet
How to paint the Gladiator Reaper
- Step 1: Blue Base Coat
Start by painting the tank’s body with a base coat of blue. Choose a suitable shade of blue, such as Kantor Blue or another blue hue of your choice. Apply the paint evenly and cover the entire surface of the tank’s body. - Step 2: White Details
Add white details to the tank, such as insignias or decorative elements, using White Scar or a similar white paint. Use a fine brush and steady hand for precise application. - Step 3: Metallic Accents
Paint metallic details on the tank using colors like black for gun barrels and gold for trim. For black, use Abaddon Black, and for gold, use Retributor Armor or similar metallic gold paint. Apply the metallic paints smoothly to achieve a realistic appearance. - Step 4: Shading the Armour
Using a darker shade of blue, like Macragge Blue, apply shading to the recessed areas of the tank’s body. This will add depth and dimension to the armor. - Step 5: Highlighting the Armour
Apply a lighter shade of blue, such as Calgar Blue, to the raised areas of the tank’s body to create highlights. This step will make the armor pop and add a sense of realism. - Step 6: Final Touches
Review your work and make any necessary touch-ups to ensure a clean and polished appearance for the tank. - Step 7: Varnish for Protection
To protect your beautifully painted tank, apply a layer of varnish. You can use a suitable varnish like Munitorum Varnish to seal and protect the paintwork.