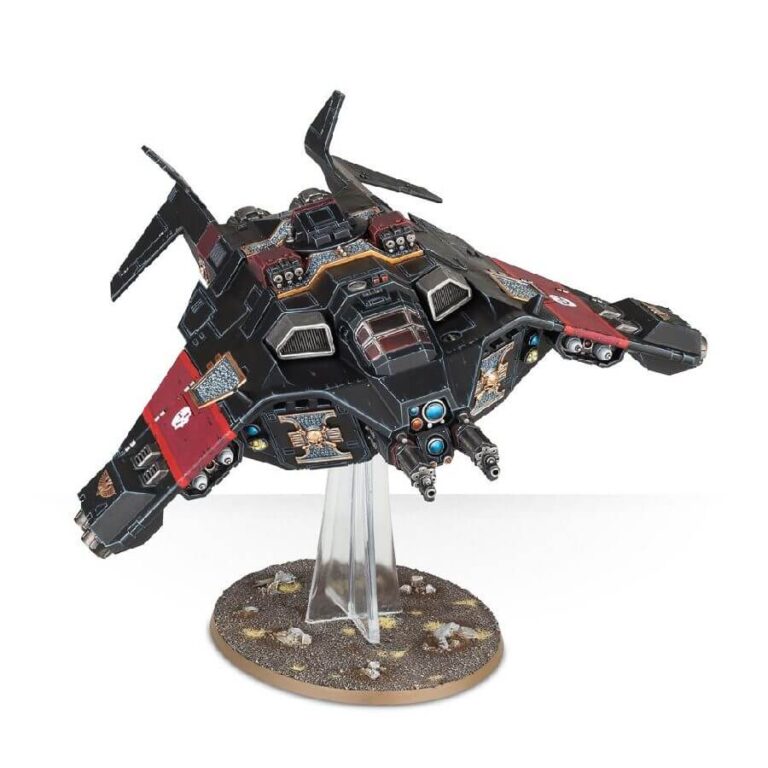
An advanced Imperial craft that surpasses other similar vehicles and is perfect for transporting a Deathwatch Kill Team on their dangerous missions. Designed specifically for hunting aliens, this craft is highly maneuverable and carries heavy weapons that rain destruction from the skies as it descends on its targets. Its halo-launchers create a blur around the ship, and the twin hatches open to release the specialist Deathwatch team charging into battle. This multi-part plastic kit includes all the components needed to build a Corvus Blackstar with a twin-linked assault cannon (or optional twin-linked lascannons), stormstrike missiles (or a twin-linked Blackstar rocket launcher), anti-air ballistics, and ceramite plating for protection.
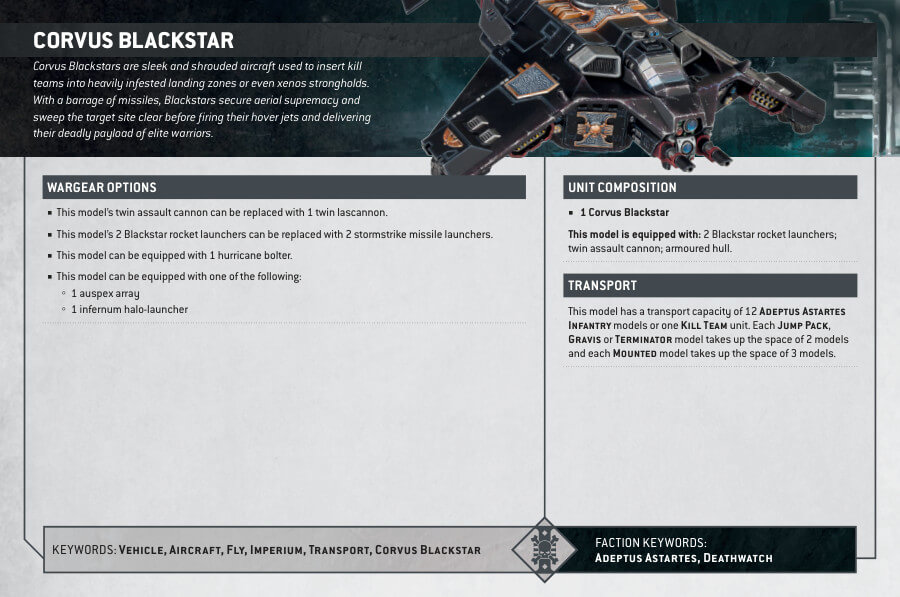
Corvus Blackstar Datasheets
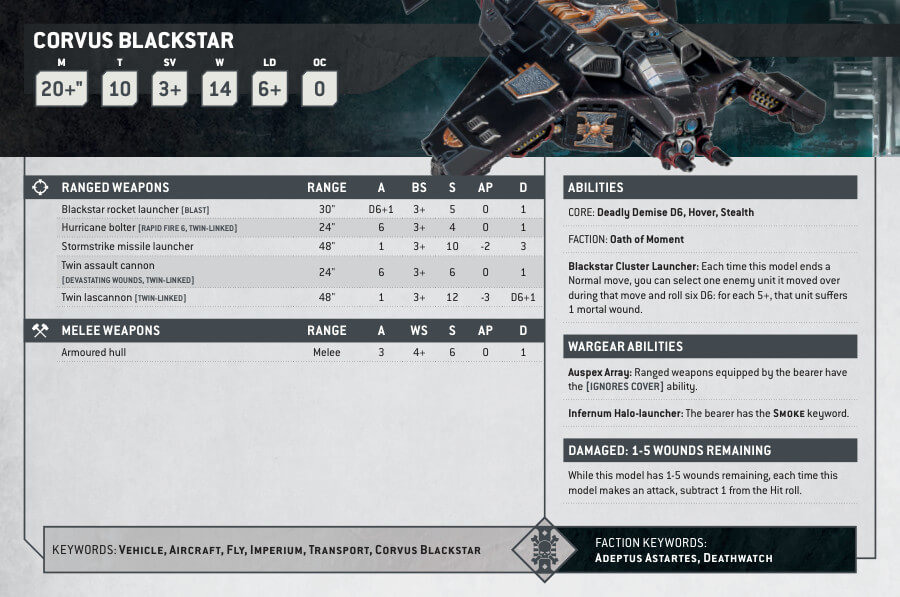
What’s in the Corvus Blackstar box
- x83 plastic components that make 1 Corvus Blackstar figurine.
- x1 Citadel 120x92mm Oval Base with flying stem
How to paint the Corvus Blackstar
- Step 1: Base Coat
Step one is to apply the base coat to the Corvus Blackstar’s main body. Paint it black using a solid black color like Abaddon Black. Apply thin coats to preserve the model’s details. - Step 2: Shading the Main Body
To add depth and dimension to the black body, apply a shade like Nuln Oil. Use a fine detail brush to carefully apply the shade in the recessed areas, such as panel lines and crevices. This will create a natural shadow effect, making the black body look more realistic. - Step 3: Layering the Main Body
After the shade has dried, use a lighter black color like Eshin Grey to reapply highlights on the raised areas of the main body. Focus on edges and surfaces that catch the light. This layering technique will make the black body appear more three-dimensional and dynamic. - Step 4: Red Details on Wings
For the wings, paint the red details using a bright red color like Mephiston Red. This could be any markings, insignia, or other decorative elements on the wings. Be precise and neat with your brushwork to make the red details stand out. - Step 5: Gold Details
Using a gold paint like Retributor Armor, carefully add the gold details on the Corvus Blackstar. This could be any chapter symbols, decorative trim, or other embellishments. Take your time to make the gold details look clean and eye-catching. - Step 6: Silver/Grey Details
Paint any silver or grey details on the model using a suitable color like Leadbelcher or Mechanicus Standard Grey. This could be parts of the weapons, engines, or other mechanical elements on the Corvus Blackstar. - Step 7: White
For white details on the model, like the edges of the wings or other markings, use a white paint like White Scar. Be precise with this step to achieve clean and crisp white details. - Step 8: Final Touches
Examine the model for any places that may require touch-ups. Make sure the colors, shading, and layering are all nice and uniform. This is the moment to include any additional details or highlights. - Step 9: Varnish (Optional)
For protection and a finished look, consider applying a layer of varnish. You can use Citadel’s Ardcoat varnish for a glossy finish, enhancing colors and details on the model. Alternatively, if you prefer a matte finish, you can use Stormshield. Follow the instructions on the bottle and apply in a well-ventilated area. The varnish will protect your paint job and ensure your Corvus Blackstar stays pristine on the battlefield.

