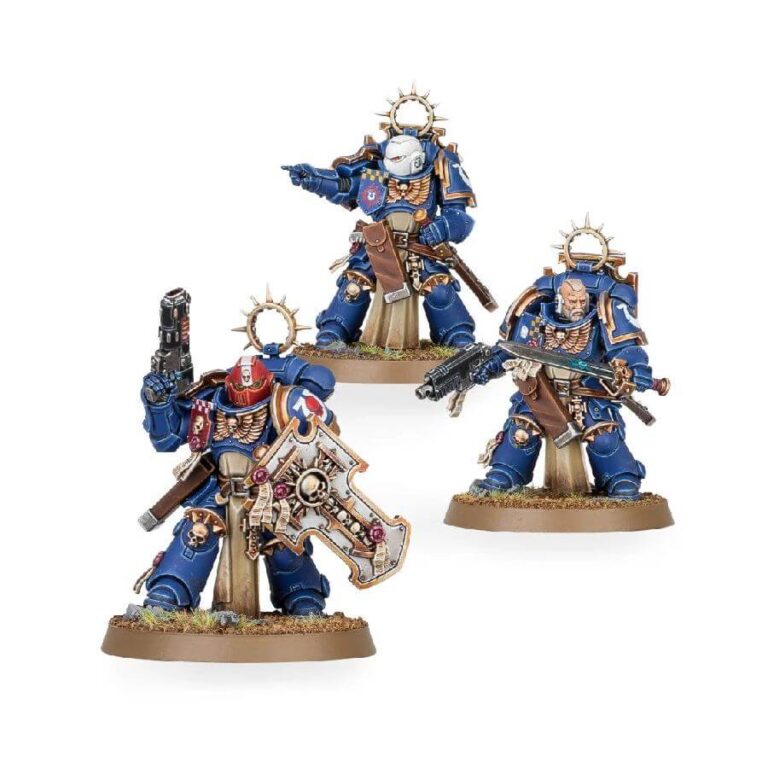
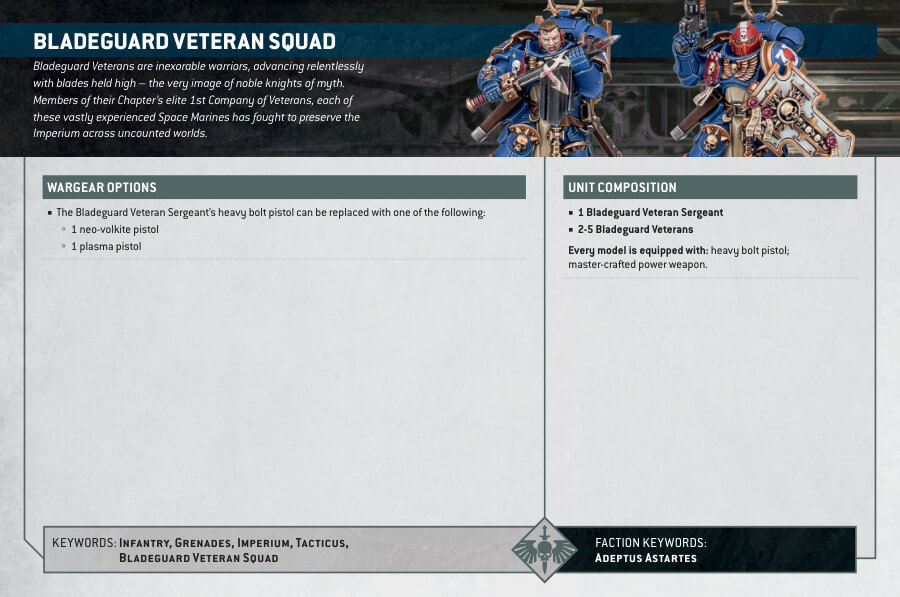
Bladeguard Veterans are the epitome of noble knights, known for their inexorable nature as they advance into battle. These close combat masters are part of the elite 1st Company Veterans of their Chapter, and each Space Marine in the unit is highly experienced from their battles across countless worlds.
Armed with a master-crafted power sword and a storm shield, these veterans can also be customized with various head, tilting plate, pistol, and holster variants, and the sergeant has the option to be equipped with a plasma pistol or neo-volkite pistol. With their fine plate armor, these grizzled veterans are a great addition to any Chapter’s forces.
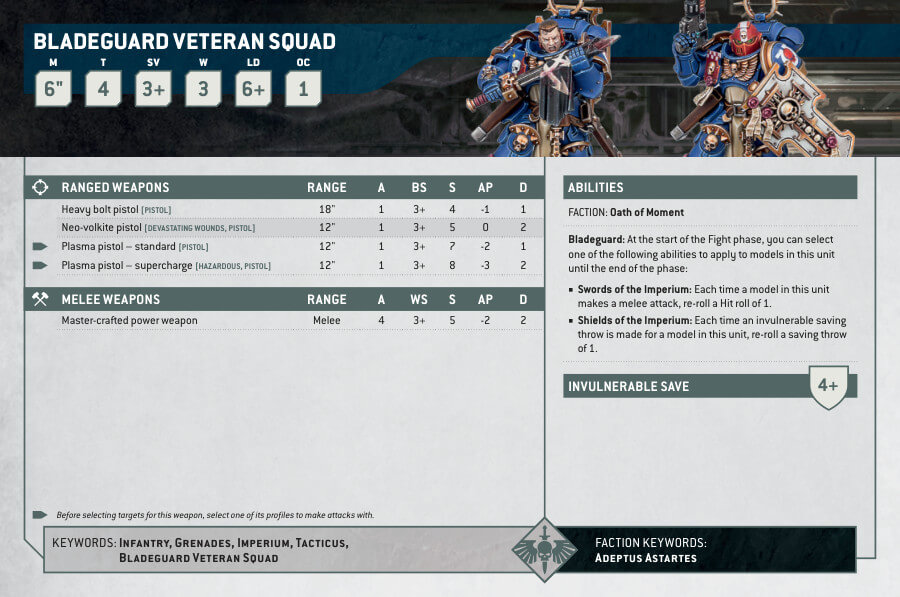
Bladeguard Veterans Datasheets
What’s in the Bladeguard Veterans box
- x78 plastic components that make 3 Bladeguard Veterans.
- x3 Citadel 40mm round bases
- x1 Ultramarines Infantry transfer sheet, which features various decals and symbols that can be applied to the miniatures to customize their appearance.
How to paint the Bladeguard Veterans set
- Step 1: Basecoat the Armor and Helmets
Begin by applying a basecoat of blue paint to the armor of the Bladeguard Veterans. You can use a paint like Macragge Blue, which provides excellent coverage. For the helmets, you have two options: paint them white for a classic look using paints like White Scar or red for a more intense appearance with paints like Mephiston Red. - Step 2: Paint the Eyes Glowing Green
To make the eyes stand out, paint them with a glowing green color. Citadel’s Moot Green is a great choice for this step. Apply the paint carefully to the eye sockets, adding a touch of brightness to the models. - Step 3: Add Colors to Clothing Elements
For the clothing elements on the Bladeguard Veterans, use a pale white color like Ulthuan Grey or any other suitable white shade that complements the blue armor well. Apply the paint to the cloth areas, giving them a clean and crisp appearance. - Step 4: Detail the Gold and Shields
Next, focus on the intricate details. Use a rich gold paint like Retributor Armor for the trim and decorative elements on the armor and the shields. This will add a touch of regal splendor to the models. - Step 5: Paint Exposed Skin (depending on how you assembled them)
If any of the Bladeguard Veterans have exposed skin, give it a lifelike tone. Use a suitable flesh color, such as Cadian Fleshtone, to paint the exposed areas, providing a realistic look to the models. - Step 6: Paint the Guns and Belts
For the guns and belts, use a combination of black and brown paints. Abaddon Black and Rhinox Hide are great choices for these elements. This will add a rugged and weathered appearance to their equipment. - Step 7: Detail the Metallic Elements
Finally, turn your attention to the metallic elements, like the swords. Use metallic silver paints like Ironbreaker to make these weapons gleam and appear deadly in the hands of the Bladeguard Veterans. - Step 8: Final Touches
Take a moment to check your work and make any necessary touch-ups. Ensure that the paint application is neat and clean. You can also add extra details like squad markings or personal insignias if you wish.

