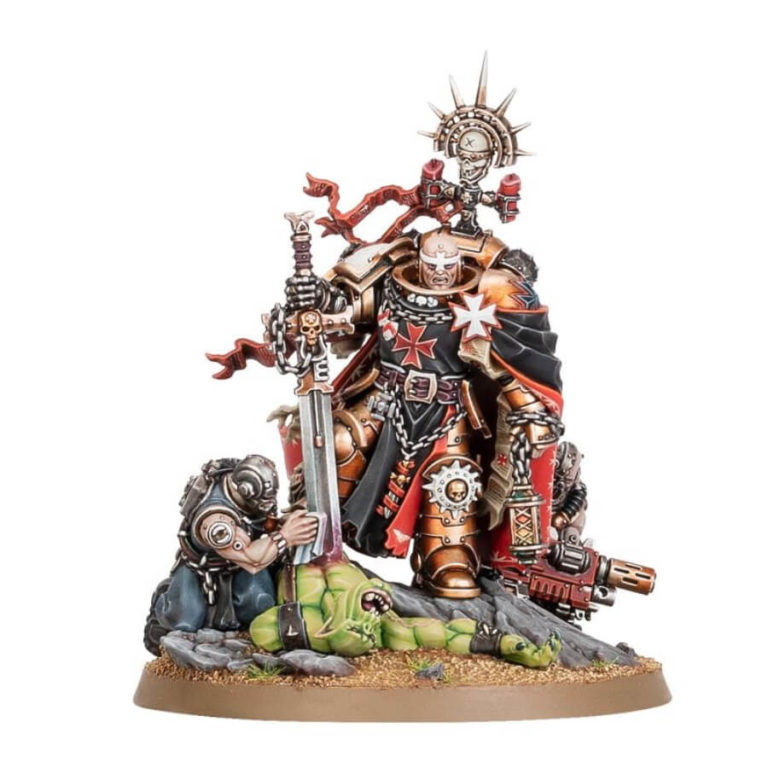
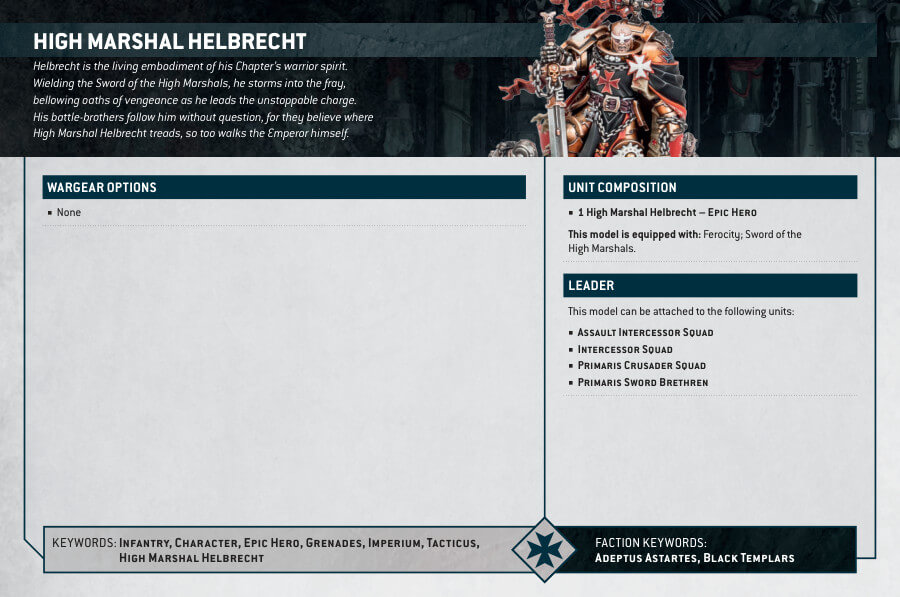
High Marshal Helbrecht stands as the embodiment of his Chapter’s unwavering warrior ethos. Armed with the mighty Sword of the High Marshals, he charges headlong into battle, his thunderous oaths of vengeance inspiring his battle-brothers to follow without hesitation. To them, Helbrecht represents a living conduit to the Emperor himself.
Accompanying High Marshal Helbrecht are two devoted attendants. One carries his fearsome combi-melta, aptly named Ferocity, while the other meticulously maintains the revered Sword of the High Marshals. Helbrecht’s presence on the battlefield is a catalyst for Black Templar valiance, transforming the surrounding terrain into a chaotic maelstrom of combat.
The High Marshal Helbrecht kit offers customization with three distinct head options, including two unhelmeted choices, allowing collectors to personalize their model. Additionally, an optional impaled Ork at his feet adds a gruesome yet striking detail to this formidable leader of the Black Templars.
High Marshal Helbrecht Datasheets
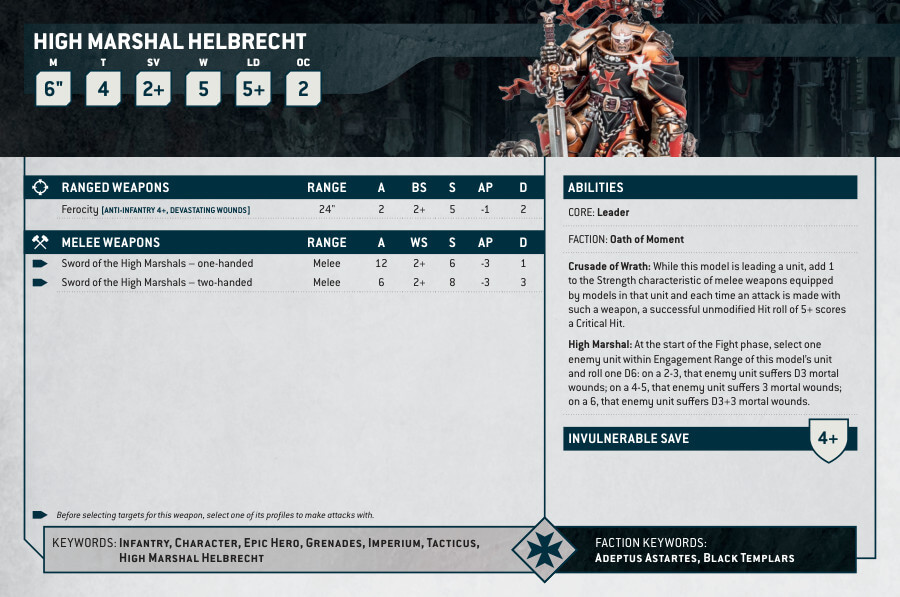
What’s in the High Marshal Helbrecht box
- x39 plastic components that make one High Marshal Helbrecht miniature.
- x1 Citadel 60mm round base.
How to paint High Marshal Helbrecht
- Step 1: Priming
Begin by priming your model with Chaos Black Spray. Ensure thorough coverage and let it dry completely. - Step 2: Basecoating
Apply base colors to different areas. Use Retributor Armour or any brass/gold paint you like for the armour, Abaddon Black for the clothing, Corax White for white emblems or skulls, Leadbelcher for metallic components, like the sword, Mephiston Red for the inside of the clothing, Rakarth Flesh for exposed skin(a.k.a his head, but if you assembled him with a helmet skip this), and Zandri Dust for parchments. Thin the paints with water and apply two thin coats for solid coverage. - Step 3: Shading
Enhance depth with shades. Apply Nuln Oil to black and metal sections, Agrax Earthshade to gold and skin areas, Carroburg Crimson to red parts, and Drakenhof Nightshade to white areas. Be precise, and remove excess shade while it’s still wet. - Step 4: Layering – Black and Red
Layer the black edges of the outside clothing with Eshin Grey to create highlights. Same thing with Evil Sunz Scarlet, use it to highlight the red clothing parts. - Step 5: Layering – White and Gold
Highlight the white details with White Scar. Apply Ironbreaker to the edges of the sword and other metallic parts you may have painted, and Liberator Gold to the edges of the armor. - Step 6: Layering – Skin/Helmet
Highlight Helbrecht’s face and hands with Flayed One Flesh, if they’re exposed. If you assembled him with the helmet, paint the white cross markings with White Scar, specific to Black Templars. - Step 7: Drybrushing (optional)
Apply Necron Compound to create a worn look on metal parts.
You can also use Praxeti White to add a dusty effect to white areas. - Step 8: Detailing – Body
Paint the eyes of Helbrecht and his thralls with White Scar. Add a tiny dot of Abaddon Black to create the pupils.
You can also paint the teeth with Zandri Dust and wash them with Agrax Earthshade. For purity seals on Helbrecht’s armor and sword, use Runelord Brass as the base, and wash with Agrax Earthshade. Paint the wax seals with Mephiston Red or White Scar and wash them with Carroburg Crimson or Nuln Oil. - Step 11: Detailing – Blood Effects
Apply Blood for the Blood God to Helbrecht’s sword and base to create a realistic glossy blood effect. - Step 12: Detailing – Ork
For the Ork on Helbrecht’s base, paint it with Waaagh! Flesh, wash it with Biel-Tan Green, and layer it with Warboss Green to create highlights. Paint his eyes with Abaddon Black or Yriel Yellow. - Step 13: Varnish
Protect your meticulously painted model by finishing with a layer of Ardcoat. This will create a shiny and reflective effect on helmet lenses, clothing, gold parts, and metallic components.
This miniature can be quite a challenge, even for experienced hobbyists. Lots of small details.
Check out this video for additional help, from a seasoned painter, that makes it look way easier 🙂

