Lieutenants play a crucial role in the Adeptus Astartes, serving as the trusted right hands of their Captains. They bring tactical expertise and guidance to the battlefield, directing their fellow battle-brothers in the heat of combat. Their responsibilities often extend to commanding a demi-company or strike force, handling the intricate logistics of squad-level coordination, and setting the example as exceptional leaders. This invaluable support allows Captains to concentrate on the broader strategic aspects of the entire theater of war.
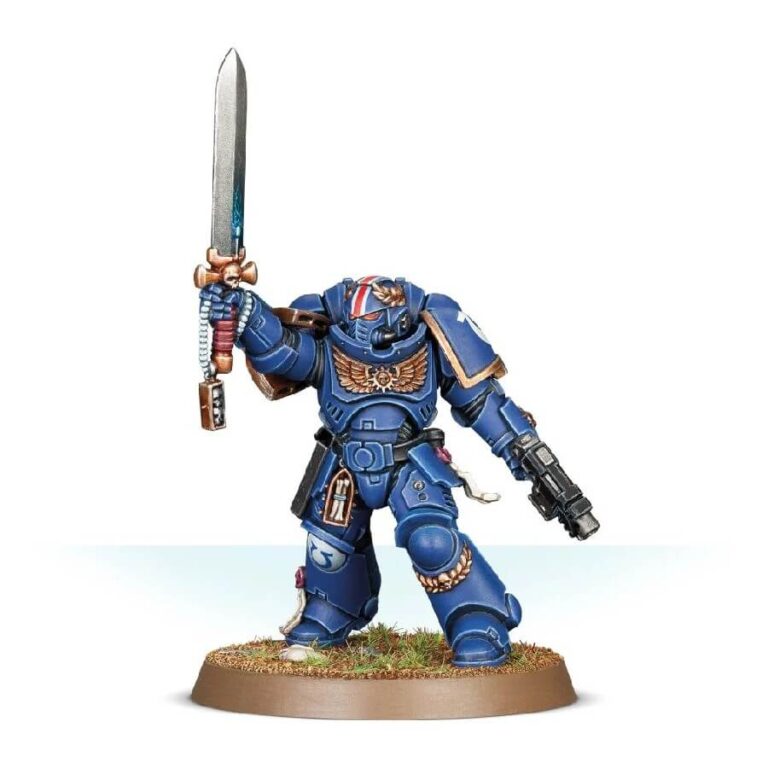
A Primaris Lieutenant represents a vital HQ choice for any Adeptus Astartes Faction, including renowned chapters like the Blood Angels, Dark Angels, and even the Space Wolves, where they assume the role of the Primaris Battle Leader. Armed with a potent combination of a power sword and a bolt pistol, these warriors are melee-focused and adept at close combat. Their formidable Mark X power armor is adorned with revered relics and laurel wreaths, symbolizing their dedication to the Chapter’s legacy and honor.
Primaris Lieutenant with Power Sword Datasheets
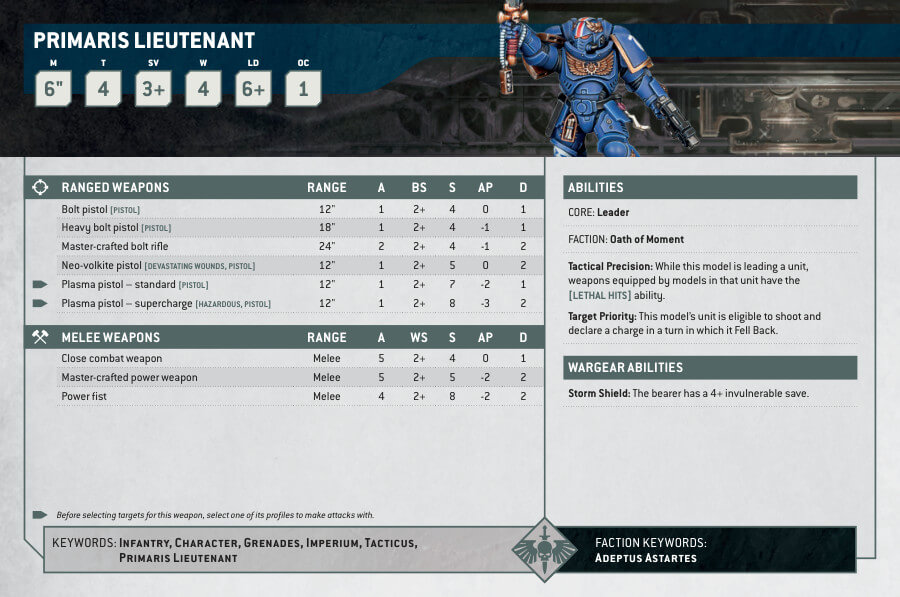
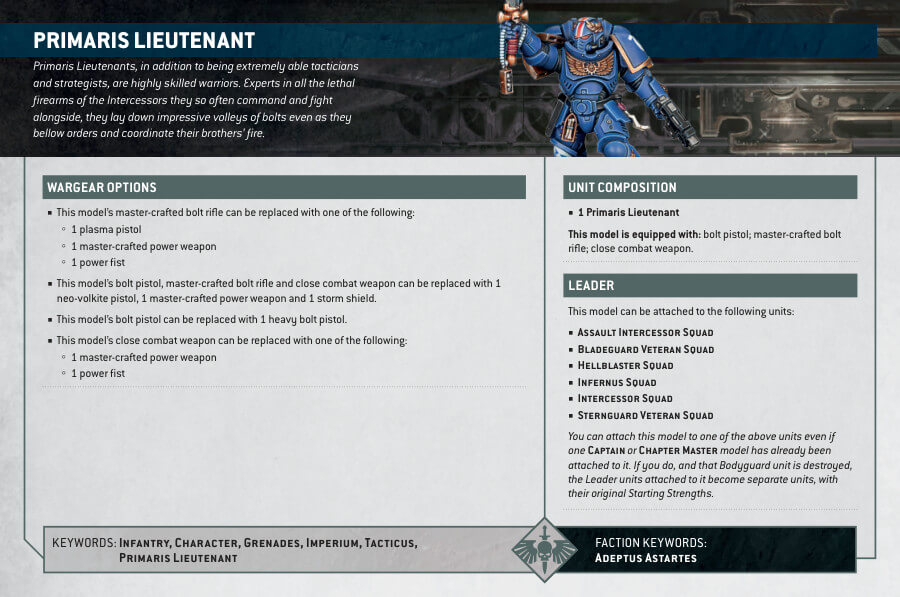
What’s in the Primaris Lieutenant with Power Sword box
- x9 plastic components that make one Primaris Lieutenant with Power Sword.
- x1 Citadel 40mm Round Base.
How to paint the Primaris Lieutenant with Power Sword set
- Step 1: Base Colors
Begin by applying the base colors to your Primaris Lieutenant with a Power Sword. For his armor, use Macragge Blue for a striking blue hue. Paint his undersuit with Abaddon Black, ensuring a smooth and even coat. - Step 2: Silver Accents
Now, let’s add some metallic details. Paint any silver elements, such as the hilt of the power sword and any decorative pieces on his armor, with a metallic silver paint like Ironbreaker. - Step 3: Power Sword
For the power sword, start by painting the blade with a metallic color like Leadbelcher. This will be the foundation for the energy glow. Make sure the black is applied evenly. - Step 4: Energy Glow
To create the energy glow effect, pick a color like Temple Guard Blue. Carefully paint a thin line along the center of the sword blade. Imagine it as the core of the energy. Then, blend this color outward, feathering the edges so that it gradually fades. You can add a touch of White Scar at the very center for a brighter glow if desired. - Step 5: Gold Details
Paint any gold details, like trim on the armor or insignia, with a rich gold paint such as Retributor Armor. Be precise to make these details stand out. - Step 6: Armor Shading
Now, let’s enhance the depth of the armor. Apply Nuln Oil as a shade to the armor. Focus on the recessed areas and corners, allowing the shade to settle and create shadows, giving the armor a more realistic appearance. - Step 7: Armor Layering
To highlight the armor, use Calgar Blue as a layer. Apply this color to the raised surfaces of the armor, leaving the shaded areas in Macragge Blue. This layering technique adds dimension to the armor plates. - Step 8: Final Highlight
For a final highlight, use Fenrisian Grey. Apply this sparingly to the most pronounced edges and corners of the armor plates. This will create a subtle but effective highlight that makes the armor pop. - Step 9: Details and Pouches
Pay attention to the smaller details, such as any pouches or equipment on the Lieutenant. Choose appropriate colors for these, like Mournfang Brown for pouches or a Stormhost Silver for equipment. - Step 10: Basing
To complete your model, consider adding a base. You can use textured paints like Agrellan Badland or Astrogranite and materials like sand to create a suitable base texture. Paint the base with colors that match your army’s theme or the terrain you envision your Lieutenant fighting on. - Step 11: Varnish
Lastly, protect your hard work by applying a varnish. This will ensure that your paint job stays vibrant and protected during battles.

