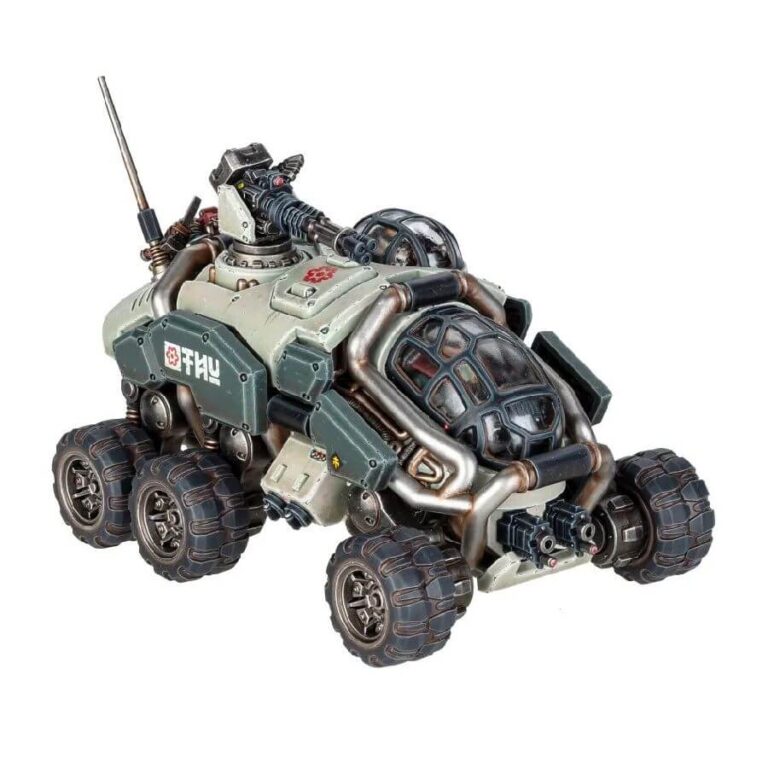
Within this box, you’ll craft a single Sagitaur, a dynamic and swift vehicle that seamlessly integrates firepower and transport capabilities. With its robust six-wheeled design, this ATV features a twin bolt cannon mounted on the hull, a rear transport hatch, and offers an array of turret weaponry choices, all operated by an automated gunner. Opt for a HYLas beam cannon, L7 missile launcher, Sagitaur missile launcher, or MATR autocannon, adapting to diverse combat scenarios. The Sagitaur’s pilot is discernible beneath a clear plastic shield, complemented by three distinct head options, enabling you to customize your driver and maintain unique distinctions among your vehicles.
What’s in the Sagitaur box
- x88 plastic components that make one Sagitaur, a formidable Fast Attack vehicle for your Leagues of Votann forces.
- x3 clear plastic components
- x1 Leagues of Votann Transfer Sheet with 555 numerals, runes, and markings for prominent Leagues.
How to paint the Sagitaur set
- Step 1: Prime the Model
Start by priming the Sagitaur model with White Scar spray or Mechanicus Standard Grey spray primer. This prepares the surface for painting and helps the colors adhere better. - Step 2: Base Colors for Vehicle
Apply Incubi Darkness to the main body of the Sagitaur, ensuring an even coat. This establishes the initial color layer for the vehicle. Shade it with Coelia Greenshade. - Step 3: Adding Mechanical Details
Use a fine brush to paint smaller mechanical details and panels with Celestra Grey. This creates depth and contrast, making the model’s features stand out. - Step 4: Metallic Accents
Apply Leadbelcher to parts like the weaponry, mechanical components, and joints to achieve a metallic appearance. You can also use Retributor Armour for a more golden hue. - Step 5: Turret Weaponry
Select your desired turret weapon and paint it accordingly. For instance, if you choose the missile launcher, use Mephiston Red as the base color for the missile casing or Averland Sunset for the weapon’s accent details. - Step 6: Gunner and Cockpit Details
Paint the gunner’s robotic structure with Mechanicus Standard Grey or Corax White. For the cockpit, apply White Scar to small parts of the glass and add sensor nodes using Mephiston Red. - Step 7: Weathering Effects (Optional)
For a weathered appearance, drybrush Ryza Rust on edges and corners of the vehicle. This mimics rust and adds realism to the model’s texture. - Step 8: Pilot’s Uniform and Face
Paint the pilot’s uniform with colors like Kantor Blue or Mournfang Brown. For the face, use Cadian Fleshtone or Kislev Flesh to define facial features. - Step 9: Highlight Metallic Parts
Apply a lighter metallic shade such as Ironbreaker to edges and raised surfaces of the metallic components to create a reflective effect. - Step 10: Squad Markings and Insignias
Add squad markings or insignias with colors like Khorne Red or Yriel Yellow. This adds personalization and character to the model. - Step 11: Varnish for Protection
After completing the painting process, apply a protective varnish like Ardcoat to safeguard your masterpiece from potential wear and tear while enhancing its finish.

