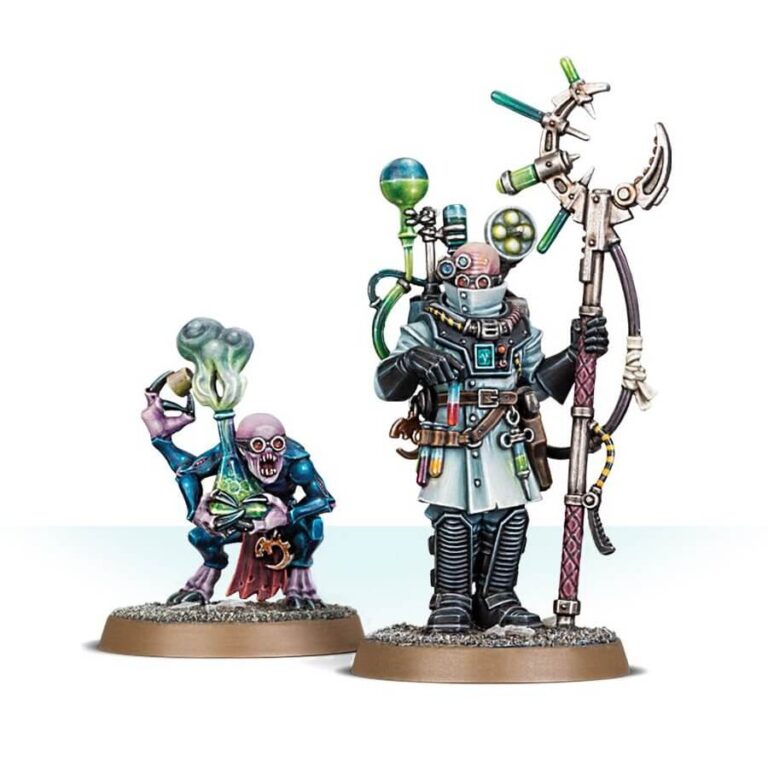
Mastery in gene-manipulation and bio-alchemy defines the role of the Biophagus, a vital figure in industrializing indoctrination and infection processes. With cunningly devised contaminants, they infuse victims with xenos genetics, reshaping body and mind to yield to the cult’s malevolent sway. A Patriarch may bestow an Alchemicus Familiar upon the Biophagus, an assistant adept at infiltrating secured locales to disperse disruptive chemical agents.
Apart from significantly enhancing nearby Genestealer Cults Aberrant units, the Biophagus exhibits formidable melee prowess, wielding a lethal injector goad. Accompanied by the Alchemicus Familiar, they work to elevate the combat prowess of their mutated kin, reinforcing the potency of your Genestealer Cult army’s hulking Aberrants.
What’s in the Biophagus box
- x10 plastic components that make one Biophagus armed with a holstered autopistol and an injector goad, and is accompanied by an Alchemicus Familiar.
- x2 Citadel 25mm round bases.
How to paint the Biophagus set
- Step 1: Base Coat the Skin
Begin by painting the Biophagus’s skin with a base coat of Daemonette Hide. Apply this color evenly to establish a solid foundation for the skin tones. - Step 2: Shade the Skin
Use Druchii Violet shade to add depth and shadow to the skin. Apply the shade to the recesses and areas where shadows would naturally occur. - Step 3: Layer the Skin
Apply a layer of Warpfiend Grey to the raised areas of the skin. This layering technique creates highlights and adds dimension to the skin. - Step 4: Highlight the Skin
Use a lighter color like Slaanesh Grey to further highlight the most pronounced areas of the skin, such as the nose, cheekbones, and knuckles. This step enhances the contrast and brings out the details. - Step 5: Paint the Clothing and Details
Paint the Biophagus’s clothing and any other details, such as belts and pouches, with your chosen colors. For example, use Mephiston Red for the robes and Leadbelcher for any metallic parts. - Step 6: Highlight the Clothing
Apply a lighter shade, like Wild Rider Red for the robes, to create highlights on the edges and folds of the clothing. This adds texture and depth to the fabric. - Step 7: Paint the Armor
Paint the armor sections with Kantor Blue as the base color. Ensure even coverage and consider using thin layers for a smooth finish. - Step 8: Layer the Armor
Apply a layer of Hoeth Blue to the armor, focusing on raised areas and edges. This layering technique adds highlights and definition to the armor plates. - Step 9: Detail the Armor
Use a finer brush to add small details to the armor using retributor armor or metallic paint of your choice. Paint elements like buttons, clasps, and other intricate designs. - Step 10: Final Touches
Paint any remaining details, such as the injector goad, using suitable colors. You can also add any additional elements like vials or pouches to further enhance the model’s appearance. For example you can paint the belts and pouches with Mournfang Brown. - Step 11: Basing
Finish the model by working on its base. Paint the base with a suitable color, such as Stirland Mud or Astrogranite. You can then add texture using materials like sand or small rocks for a realistic look. - Step 12: Varnish
Protect your hard work by applying a varnish. A varnish spray like Munitorum Varnish will help preserve the paint and keep your Biophagus looking vibrant during battles and displays.

