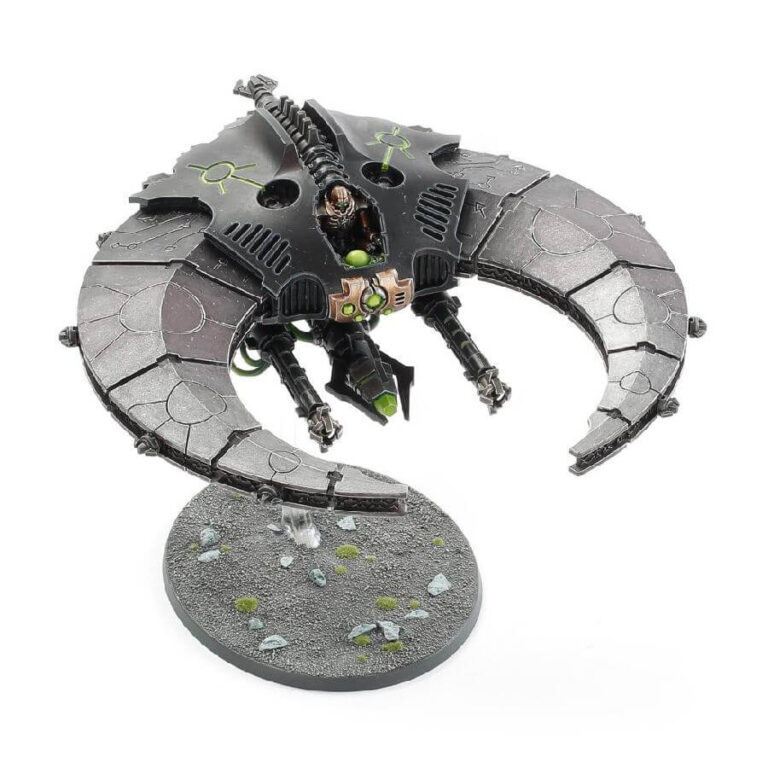
The Night Scythe’s distinctive crescent shape exudes an aura of awe. Adorned with intricate Necron iconography, its numerous elegant panels are accentuated by orbs, grills, and a spine-like engine. At its core lies a concealed Necron pilot, while a twin-linked tesla destructor stands ready to wreak havoc. Capable of unleashing devastation upon lightly armored adversaries, the Night Scythe then deploys its contingent of passengers onto the battlefield to secure vital objectives. With its unique design and versatile capabilities, the Night Scythe stands as a remarkable testament to the might of the Necron forces.
What’s in the Night Scythe box
- x51 plastic components that make one Night Scythe. Alternatively you can build a Doom Scythe.
- x1 flying stem.
- x1 Citadel 120 x 92mm flying base.
- x1 Necron transfer sheet
How to paint the Night Scythe set
- Step 1: Base Color for Body
Begin your Night Scythe painting process by applying Abaddon Black paint to the body. This initial coat establishes a dark foundation for the rest of your paintwork, setting the tone for the model’s overall aesthetic. - Step 2: Add Intricate Details
Utilize Screaming Bell to paint intricate details to various parts of the Night Scythe. Pay special attention to edges, panels, and mechanical elements. This meticulous detailing adds depth and complexity to the model, making it visually captivating. - Step 3: Green Glyphs and Energy Sources
Enhance the otherworldly aspect of the Night Scythe by using Tesseract Glow paint to highlight green glyphs and energy sources. Apply this vibrant color to areas like symbols and energy nodes, creating an ethereal glow and dynamic visual interest. - Step 4: Depth with Shade
To introduce depth and realism, apply Nuln Oil shade to the model. This shade settles into crevices, enhancing shadows and giving the Night Scythe a three-dimensional quality, making its intricate features stand out. - Step 5: Layering
Employ the layering technique with Administratum Grey to bring dimension to the Abaddon Black areas. By gently layering this color, you’ll accentuate the texture and emphasize the model’s edges, adding depth and visual complexity. - Step 6: Enhance Metallic Elements
Give metallic components such as gun barrels and engine parts a lustrous shine using Leadbelcher paint. This metallic hue imbues these elements with a sense of realism and mechanical brilliance. - Step 7: Basing
Immerse the Night Scythe in its environment by crafting a realistic base. Begin with a base coat of Stirland Mud and then perform a dry brush technique using Ushabti Bone. This creates the illusion of weathered terrain beneath the model, enhancing its overall presentation. - Step 8: Varnish
Consider applying a protective varnish to safeguard your painstakingly painted Night Scythe. Citadel offers two options: Ardcoat for a glossy finish that intensifies color vibrancy, or Stormshield for a matte finish that adds a protective layer without altering shine. Tailor your choice to your preferred aesthetic and the level of protection your masterpiece deserves.

