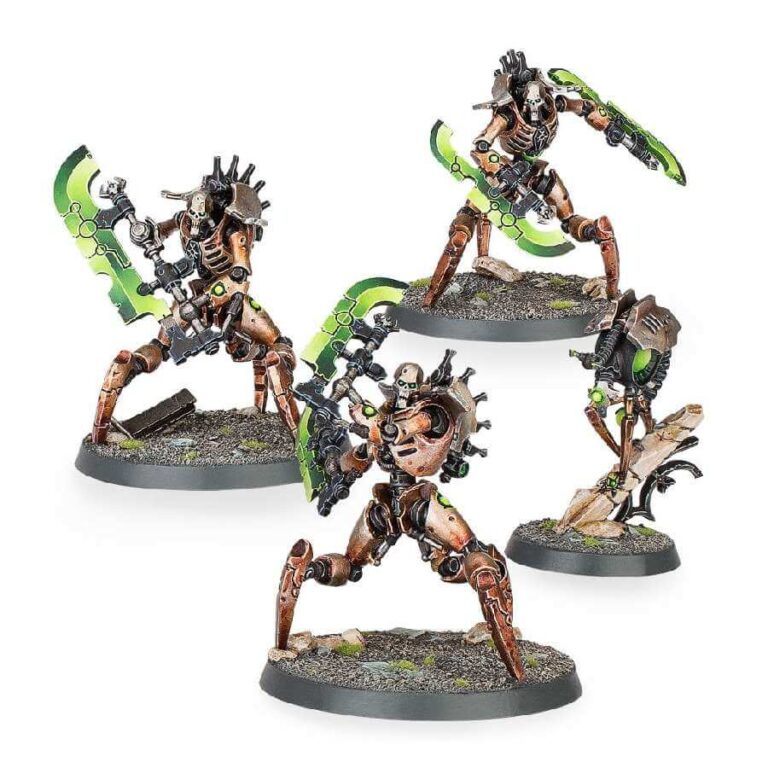
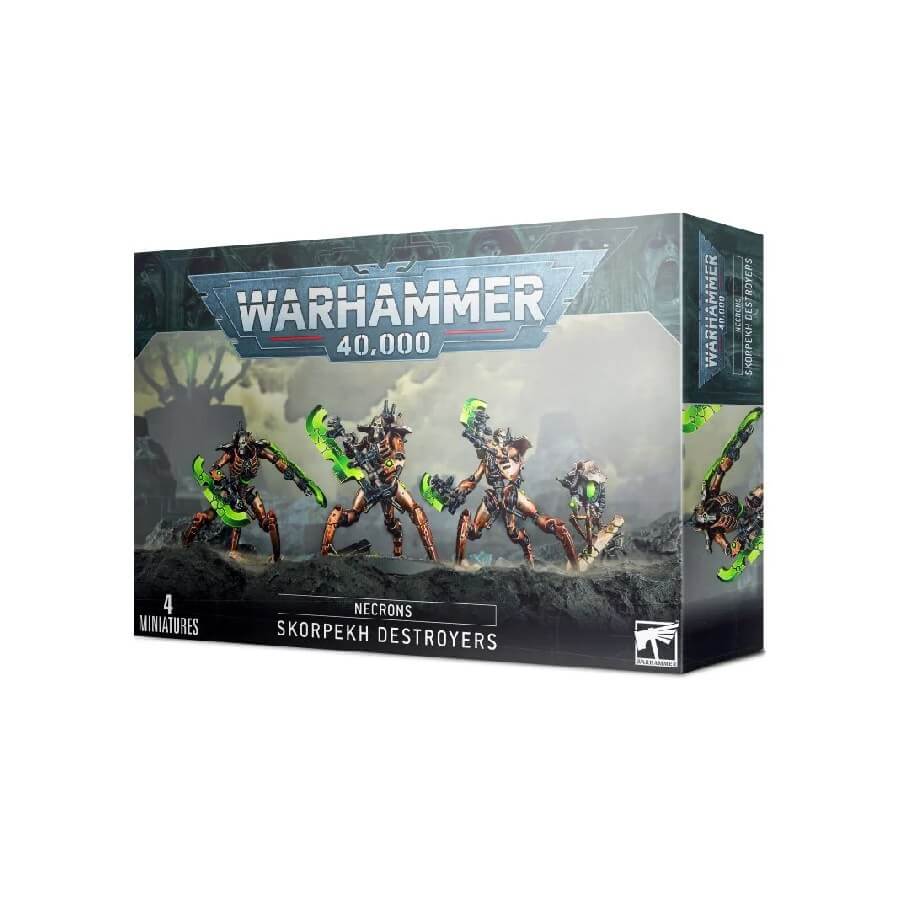
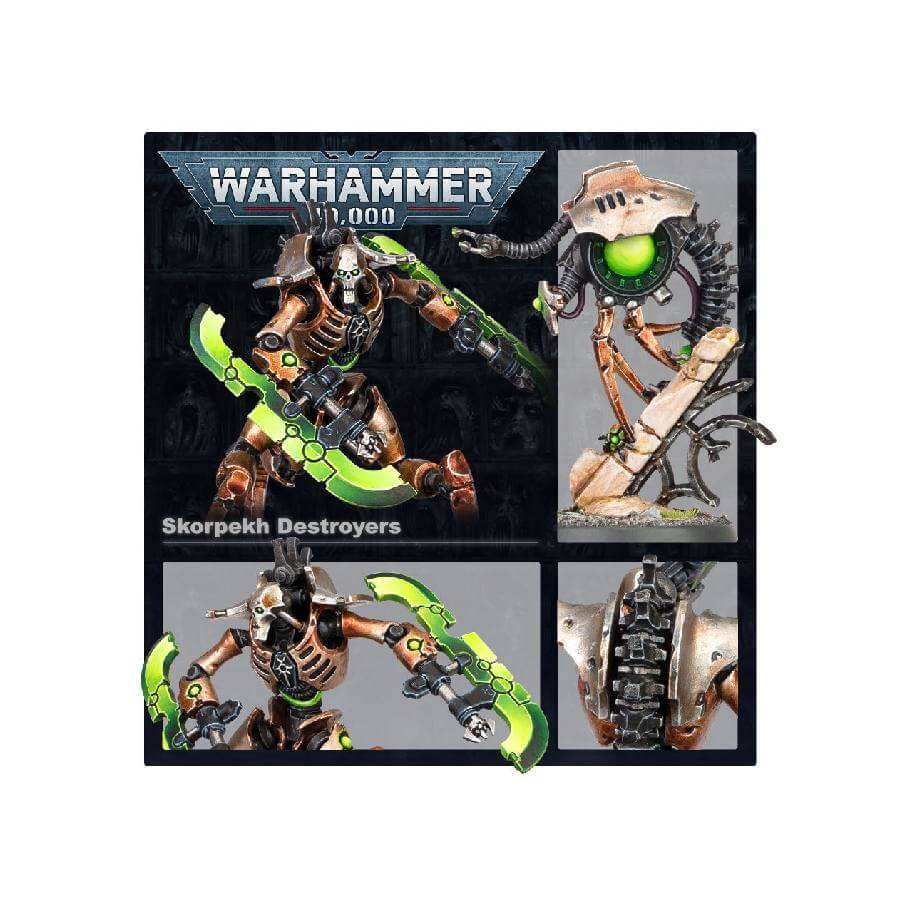
Marching forward in an unsettling frenzy of strides, their weaponized limbs slashing through the air in a gruesome whirlwind, the Skorpekh Destroyers satiate their insatiable thirst for bloodshed with each unleashed step onto the battlefield. This indomitable drive to kill overrides all else, fueling the ferocity of these deranged Necrons.
Operating as a sinister catalyst, Canoptek Plasmacytes employ their monomolecular proboscis to infuse the twisted minds of the Destroyer Cults with an infectious, sentient energy. This malevolent substance, as potent as it is perilous, propels their already nihilistic frenzy to harrowing new heights, forging a path of mindless obliteration.
Furthermore, their capacity for carnage can be elevated even further by the addition of a Plasmacyte, enhancing their already formidable killing prowess to unprecedented levels.
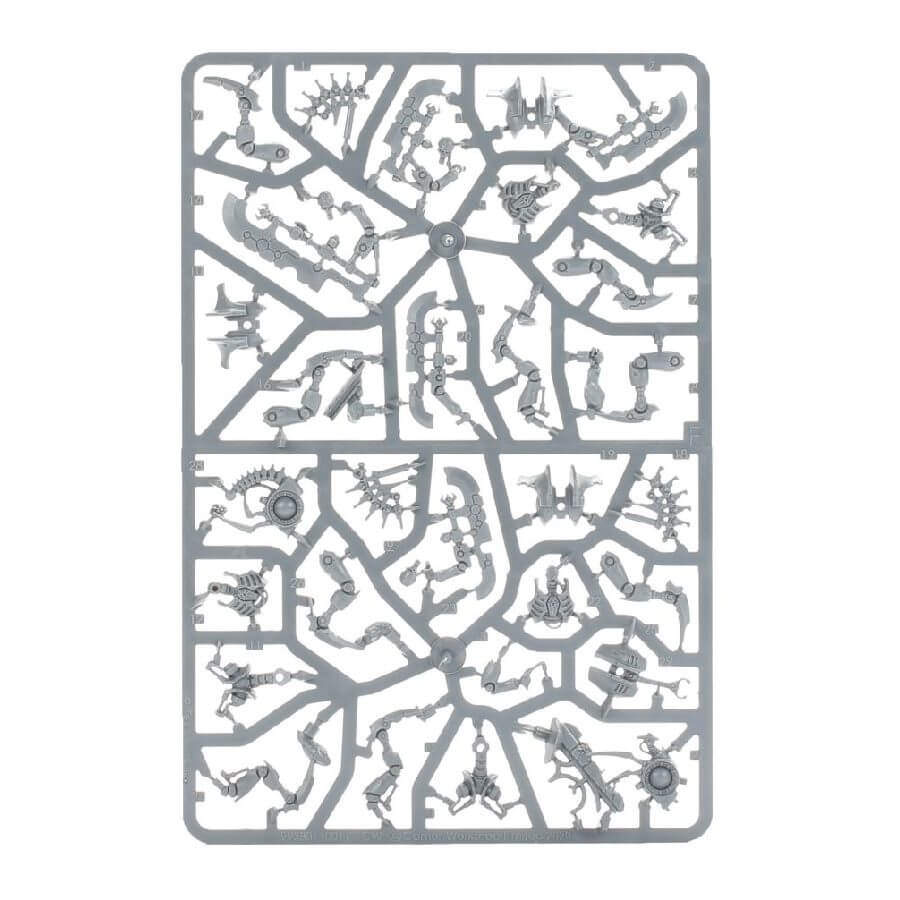
What’s in the Skorpekh Destroyers box
- x29 plastic components that make 3 Skorpekh Destroyers – two armed with hyperphase threshers and one with a hyperphase reap-blade – as well as a Plasmacyte.
- x3 Citadel 50mm Hex Hole Round Bases.
- x1 Citadel 28.5mm Hex Hole Round Base.
How to paint the Skorpekh Destroyers set
- Step 1: Prime Your Models
Begin by priming your Skorpekh Destroyers set with Chaos Black primer. This provides a solid base for your paints to adhere to. - Step 2: Armor Base Coat
Paint the armor of the Skorpekh Destroyers with Balthasar Gold. This initial layer establishes a rich metallic foundation. - Step 3: Shading the Armor
Enhance the depth of the armor by shading it with Agrax Earthshade. Apply the shade selectively to the recesses and crevices of the armor to create contrast and definition. - Step 4: Details
Focus on the finer details of the models. Use Abaddon Black to paint elements like glyphs, markings, and other intricate features. - Step 5: Blade Base Coat
For the blades, apply a base coat of Caliban Green. This serves as the foundation for achieving a glowing and ethereal effect in the next step. - Step 6: Creating the Glow
Build up the glow effect on the blades by layering Warpstone Glow onto the Caliban Green. Gradually add Moot Green and finish with a touch of Flash Gitz Yellow at the tips. This progressive blending creates a radiant and otherworldly appearance. - Step 7: Final Touches
Revisit any other metallic details, ensuring they are refined and polished. Take a moment to address any areas that require highlighting or touch-ups. - Step 8: Varnish
Finish your painting process by applying a protective varnish. Use Ardcoat for a glossy finish, that fits the glowing-like green blades and the metallic sheen of the gold armour.
